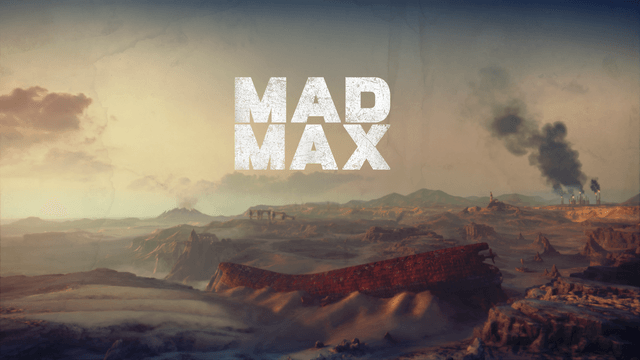
So, I did start with the best Photo Mode I’ve seen, DriveClub, but that is no disservice to the great Photo Mode of Mad Max.
It looked like, with each Photo Mode I did, they were getting progressively worse. However, Mad Max‘s stands above the other 4 in this series as it has impressive settings and visuals.
Oh, the camera? Well to quote Rage Against The Machine: “Freeeedooommmmmm… yeaaaaahhhhhhh!” With each Photo Mode, the first thing I do is move the camera in the hope of free easy movement, Mad Max delivers.
You’ll know from the Shadow of Mordor article, that I realised with each game I was focusing on one aspect. With Mad Max, it’s visually appealing across the board. Action shots, environment shots and establishing shots all work great in Mad Max. I ended up entering Photo Mode every few seconds.
How it Works
Like Shadow of Mordor, I’m playing on PC and using a controller. Clicking in the two analogue sticks is how you enter Mad Max‘s Photo Mode. If using mouse and keyboard (you crazy person) you press X + C together to enter Photo Mode, and exit with Q.
Now you can relish in the freedom that Mad Max‘s camera gives you. It kind of reminds me of the freedom you get with GTA V‘s Editor camera.
- Filters: 17 filters, with intensity, that you can apply to the image. For the first time, I found myself using a few of them, and even some at 100% intensity.
- Camera Settings: Lots here so here’s a list
- Exposure: Exposure changes the brightness of the shot. The Lower the exposure the darker the shot.
- Field of View: Your usual zoom. No range numbers, with most options in the photo mode it’s just a bar.
- Blur Intensity: When using Depth of Field to decide what is and isn’t in focus. This setting allows you to control the blur of what isn’t in focus.
- Depth of Field Focus Distance: This setting will move the depth of field area from the camera.
- Depth of Field: This setting will widen the area that the Depth of Field covers. Combining with Distance gives you some nice control over what is and isn’t in focus.
- Autofocus on Max: On/Off setting. If on the Depth of Field will focus on max, focus distance then has no effect on the image.
- Vignette: Applies soft black edges around the shot. The least obtrusive one I’ve seen even on the highest size and intensity it’s not that bad.
- Frame: There are a lot of frames in Mad Max’s Photo Mode. What I like about these even though I don’t use them, is they fit the aesthetic of Mad Max. Blood splatter, barbed wire and metal cogs for example.
- Overlay: These are effects you can add to the shot. Like Black smear liquid or metallic scratches. Again these share the aesthetic to Mad Max.
- Logo: 7 different logos with the title “Mad Max”. There are logos like a metal logo of mad max with red and white splatter behind them.
There does look like there are a lot of settings if you include all the camera setting ones. With the other Photo Modes, I do include Field of View and Depth of Field as their own setting. So really, this is an impressive bunch of settings for Mad Max‘s Photo Mode. You can go pretty crazy with action shots with a frame, overlays and logos. Like this for example:
What do you mean you can’t see what’s going on?
Overall I’m impressed with the Photo Mode of Mad Max. As I said this is the first Photo Mode where I have used quite a few different filters and some overlays. My favourite overlay was Black Smear Liquid. It felt like it added and represented the post-apocalyptic wasteland which is Mad Max.
Video Mode… wait, what?
That’s right, Mad Max‘s Photo Mode with a click of one button turns into a video mode. On a keyboard, you hit R from within the Photo Mode. On a controller, the triangle or Y button enters Video Mode. X, A or E for Keyboard then “begins the session.” You do need a second controller to use Video Mode which is awfully convoluted.
Needing two controllers makes Video Mode difficult to use by yourself. You can’t do mouse and keyboard + a controller, it has to be two gamepad controllers. One controls the camera, the other the game as normal. You kind of have to do this with a friend as it’s difficult to play the game and record it with a second controller. For recording just the environment, it’s easy to do yourself. Actually playing the game driving around while recording it with the camera? Yeah, you need two people.
With YouTube’s processing on videos, the clips will never look as good as screenshots.



Published: Sep 28, 2015 05:37 am