The Iron Banner is a popular Crucible event in Destiny. The Rise of Iron expansion revamped this beloved event and now it is better than ever. If you are trying to gear up, there is no better place to be.
I’m going to go over the recent changes to Iron Banner and gives tips for efficiently playing through this event.
This guide will go over the new Iron Banner in Destiny including:
- Iron Banner Basics – What the Iron Banner is and how to do it.
- Iron Banner Rewards – What you can get from the Iron Banner.
- Iron Banner Tips – How to raise your light level using the Iron Banner.
Iron Banner Basics
The Iron banner is a Crucible event that lasts a week. It takes the place of the weekly crucible playlist
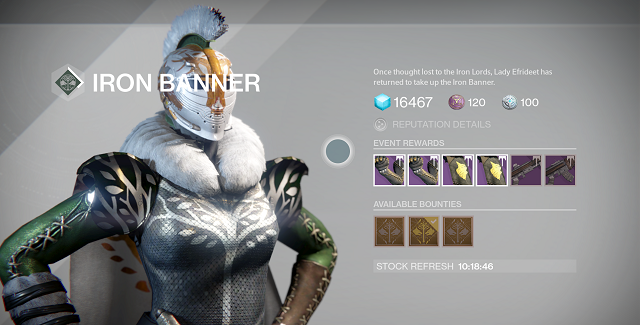
- It has its own rep faction that resets every event.
- There is exclusive armor that you can only get during the event.
- There is a vendor that is only there for the event.
Things are a bit different this year.
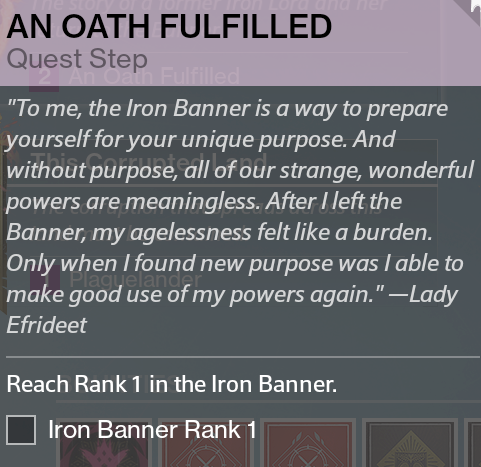
- There is now an Iron Banner quest that starts at the Iron Temple social space in Felwinter Peak.
- There are also only 4 bounties for the event, instead of daily and weekly bounties.
You get rep whenever you turn in a bounty, or win a match. you will not get rep if you lose a match.
Iron Banner Rewards
Each bounty gives you a piece of Iron Banner gear. There are 2 that give weapons and 2 that give armor. You can also do these on your other characters for a total of 12 pieces of gear.
As you rank up, you will complete the quest, and be able to buy gear from the vendor. The vendor gear is different for each event, but it will always have both armor and weapons.
- The quest gives you a reward for reach rank 1, rank 3, and rank 5.
- Be sure to turn the quest in each time you complete a step because you will get gear.
- You can buy gear from the vendors at ranks 3, 4, and 5.
You also have a chance at getting Iron Banner gear at the end of every match, whether you win or lose. The drop rate is high and it not affected by rank.
Iron Banner Tips
Iron Banner is the best way to raise light level if the event is active. First, make sure you get the quest started and all 4 bounties.
- Play Iron Banner matches until you reach rank 1, then turn in the quest.
- After the rank 1 quest is done, you can start turning in bounties, but pay attention to the rewards.
- Some give weapons and others give armor.
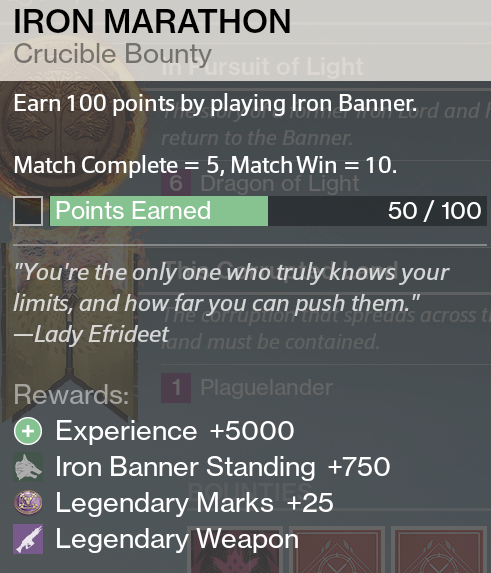
Look at your lowest pieces and find out which you need more, armor or weapons. Turn in a bounty if it gives one of your lowest pieces.
- Example: If you need boots the most, turn in a bounty that gives armor, and save the weapon bounties for later.
This way, you will have the best chance at raising your light level and not wasting a potential higher light level drop.
- Try to save at least 1 bounty for each reward type, armor and weapon, until later ranks.
- This allows you to potentially increase your light level from the drops after matches, then cash in for higher rewards.
Playing 3 characters is the best way for huge rewards.
- Complete all the bounties on one character and get to at least rank 4.
- On your other characters, you will get increased rep up until you reach the same rank as your highest character.
- So if you reach Rank 5, your other character will get to Rank 5 a lot faster.
Don’t forget to sue a Three of Coins each match if you have them, since that gives you a chance of an Exotic engram.
That’s all for my guide to the new Iron Banner in Destiny: Rise of Iron. Let me know if you have any questions!





Published: Oct 6, 2016 07:27 am