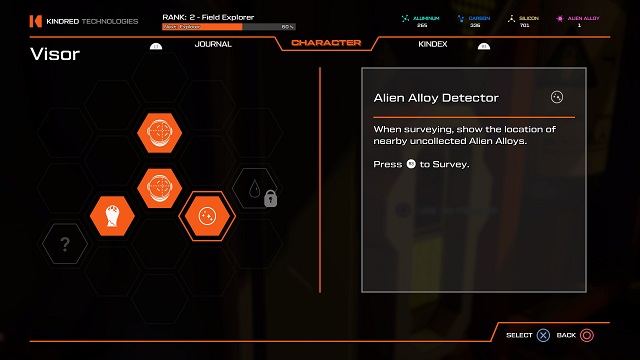
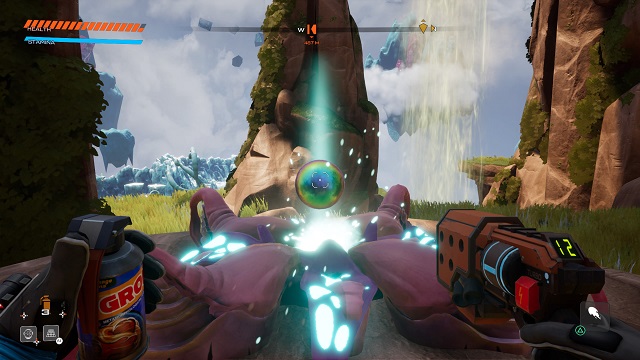
Alien Alloy is an important part of Journey to the Savage Planet. You use it to upgrade your weapons and gear. Not every enhancement uses it, but almost all of them do, especially the more important ones. Some even require two.
As with my Orange Goo locations walkthrough, I won’t outline every Alien Alloy location. There are 32 to find and most are easy to find. Instead, I will tell you how to get the Alien Alloy Detector upgrade for your visor. Once you unlock it, you can scan the landscape for Alien Alloy locations yourself.
How to Get the Alien Alloy Detector Visor Upgrade

To get the enhancement, you first have to achieve Science Rank 3 — Explorer. You will gain access to the challenges leading to this rank once you complete Science Rank 2. Just scan all of the flora and fauna you come across, and it will unlock quickly.
The science experiments for Science Rank 3 — Explorer are:
- Live Samples 2: Gather live samples from Kapyena, Jellywaft, and Infected Pufferbird.
- Corrosive Rain: Hit 2 creatures with the acid burst from a single dying Prime Jellywaft
- Easy Target: Kill 4 creatures while they are stuck in a Binding Bile within 3 seconds.
- Bomb Drop: Kill 3 amber-armored Pufferbirds with a single Bombegranate.
Live Samples 2
To gather live samples, equip the Live Sampler. Go up to an animal or specimen and press “R1” on PS4, “RB on Xbox One, or “Q” on PC. If you did it correctly, a little green hand will flash on the X screen. If you did not, a red “X” will appear.
Kapyena Locations
Kapyena can be found in two place: Fungi of Si’ned VII in The Itching Fields and the Infernal Cauldron in The Elevated Realm. You can simply teleport to the Infernal Cauldron and quickly find the Kapyena since the area is so small.
But if you haven’t opened that area yet, teleport to Fungi of Si’ned VII. As soon as you teleport into the area, turn left and go under the rock archway. Follow the path straight. Go left when the path turns left. Go through the bigger arch that looks like it has teeth on the sides and enter the Kapyena area.
Jellywaft Locations
Jellywaft are easy to find. They are in Jellywaft Basin at the beginning of the game, and they can be found in The Verdant Wilds of Zyl. You will most likely have to jump and press the corresponding input to gather a Jellywaft sample.
Infected Pufferbird Location
So far, I’ve only come across Infected Pufferbird in one area: The Festering Chasm in The Itching Fields. When you first enter The Itching Fields at the Planetary Flotsam, your primary objective will take you to The Festering Chasm (it’s the area where you first encounter the Blight Bomb plant).
Follow the marker around to the right side of the Planetary Flotsam and up. When you reach the cliff overlooking The Festering Chasm, turn right. You will see mushrooms forming platforms to another cliff. Jump across. Go through the cave to the first drop. Look down to find the Infected Pufferbird milling around a stone obelisk.
Corrosive Rain
Prime Jellywaft can be found in The Itching Fields, specifically The Planetary Flotsam and Fungi of Si’ned VII. Prime Jellwaft are pink, and they are more powerful than your average Jellywaft, requiring more shots to bring down.
When they die, they explode in an acid burst. The best place to finish this experiment is The Planetary Flotsam. From the teleporter there, go straight toward the Alien Tablet. Turn left and continue the tether point in front of you. When you land, it will say “secret nearby.” Turn right to see large platform with several Jellywaft and Pufferbird.
Attack the Prime Jellywaft here to kill 2 creatures with the acid burst.
Easy Target
The best place to get this is The Festering Chasm in The Itching Fields. Go to the teleporter. Put the swampy area with the Blight Bomb plants, mushrooms, Babushkas, Skippers (birds), and three Amber Pufferbird behind you.
Go straight and take the first left. There will be a cliff face and your left and a group of purple Repulsive Trees on your right. In front of you, you will see several Pufferbird Alpha. There are also regular Purfferbird.
Throw Grob on the ground. When the Purfferbird begin to eat, throw a Binding Bile on them. The throw a Bombegranate on them to complete the experiment.
Bomb Drop
Again, the easiest place to get this is in The Festering Chasm in The Itching Fields. Fast travel to The Festering Chasm. In front of the teleporter is an open area with Blight Bomb plants, mushrooms, Babushkas, Skippers (birds), and three Amber Pufferbird. Kill the Skippers and drop a can of Grob near the three Amber Pufferbird.
When the Pufferbird start eating the Grob, throw a Blight Bomb on them. Quickly switch to a Bombergranate and throw it at them. Easy peasy.
—
Once you achieve Science Rank 3 — Explorer, return to the Javelin Habitat and access the 3D printer. Craft the Alien Alloy Detector. Now you can locate every Alien Alloy location by pressing “R3” on PS4 and Xbox One and “Z” on PC.
It’s worth noting that you’ll need further upgrades to actually get some of the Alien Alloys, such as the Launch Booster, the triple-jump and the quadruple-jump, and the Advanced Proton Tether. It also helps to have the Smarter Visor, but it’s not necessary.
For more tips and tricks on this new exploration game from Typhoon Studios, be sure to check out our other Journey to the Savage Planet guides. Here are a few you might find useful:
- How to Quickly Find Every Orange Goo
- How to Kill the Green Cube for Alien Alloy
- The Best Upgrades to Get Early
Be sure to check out our official review of the game, too, where we said, “Journey to the Savage Planet is a satirical and colorful metroidvania that survives its corny jokes thanks to fun traversal and worthwhile exploration.”


Published: Jan 25, 2020 11:20 am