Each regular stage in Kirby and the Forgotten Land asks you to find between three and five Hidden Waddle Dees, and Everbay Coast is no different. These cute caged friends are hidden behind obscured secrets, challenges, and optional puzzle rooms. You’ll need to find them to unlock boss doors and expand your building in Waddle Dee Town.
Finding Hidden Waddle Dees in the levels is the easiest way to increase your total count and unlock everything that Waddle Dee Town has to offer. The more you collect, the more stores and mini-games unlock in the hub.
Where to Find All Hidden Waddle Dees in Everbay Coast
There are 16 Hidden Waddle Dees to find across four levels. For the sake of clarity, we have separated these out from the ones you find for completing the Hidden Missions in Everbay Coast. We cover how to find and complete those missions in this Everbay Coast Hidden Missions guide.
Use the links below to jump to each level:
All Hidden Waddle Dees in Everbay Coasts’ Abandoned Beach
There are three Hidden Waddle Dees you’ll need to track down in Everbay Coast’s Abandoned Beach.
Abandoned Beach Waddle Dee 1
The first Hidden Waddle Dee in Everbay Coast can be found after the Wild Bonkers mini-boss; be sure to pick up the Hammer ability he drops. In the second part of Abandoned Beach, you’ll see a ladder that doesn’t quite reach the ground. Climb it to reach a platform with a stump you can use your hammer on. This will open up a previously hidden area.
Abandoned Beach Waddle Dee 2
The second Hidden Waddle Dee is in the whirlpool section of Abandoned Beach. you’ll need the Hammer ability equipped again to make your way up another ladder and smash another stump. This time, you’ll have to navigate a speed challenge area. You’ll have to hit the peg and platform to the other side of the secret room in time.
Abandoned Beach Waddle Dee 3
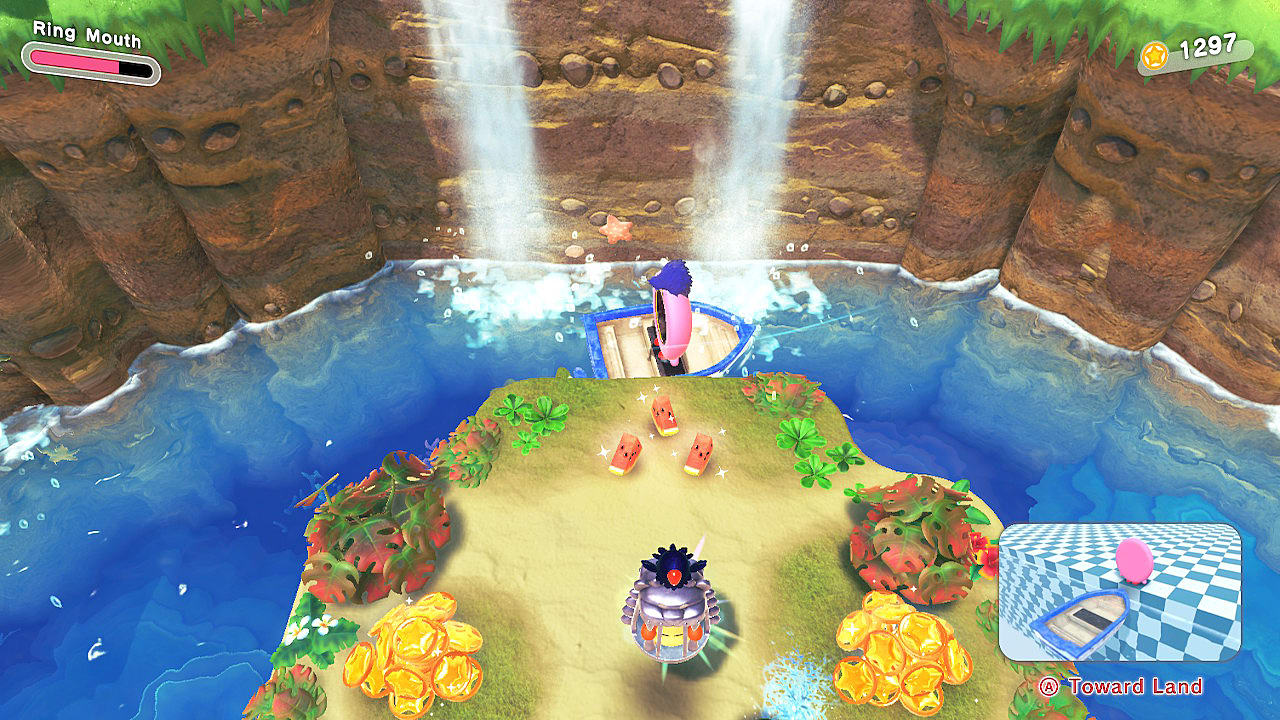
The final Hidden Waddle Dee in Abandoned Beach is in the final parts of the level, where you use Ring Mouth Kirby to drive a boat. Look for a cracked part of the wall you can charge into with the boat. This will unveil a new area.
All Hidden Waddle Dees in Everbay Coasts’ Concrete Isles
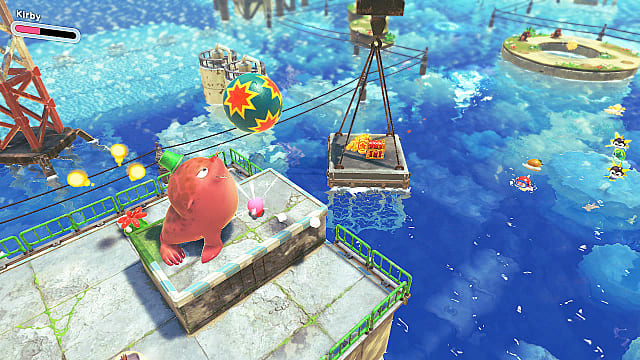
There are four Hidden Waddle Dees in the Concrete Isles level of Everbay Coast.
Concrete Isles Waddle Dee 1 (Green Star Bits)
The first Hidden Waddle Dee will be freed once you find five Green Star Bits.
- Green Star Bit 1: In the center of one of the first platforms you reach.
- Green Star Bit 2: At the top of a floating platform.
- Green Star Bit 3: On an elevated section with bomb enemies.
- Green Star Bit 4: In the middle of the two moving platforms.
- Green Star Bit 5: On the other side of the moving platforms, guarded by a giant seal on an elevated platform. Take care of the other enemies first, and then the seal, before grabbing this one.
After you get all five Green Star Bits, a crane will come out of the water near you holding a pile of coins and a treasure chest. Float over and rescue this one from the chest.
Concrete Isles Waddle Dee 2 (Orange Star Bits)
The segment for the second Waddle Dee in Concrete Isles is a bit like the last, only you’ll be finding Orange Star Bits and need the Drill ability this time. You can inhale the enemy guarding the first Orange Star Bit if you need the ability.
- Orange Star Bit 1: In front of the Digguh on the first sandy platform.
- Orange Star Bit 2: From the first, move forward to the second sandy platform, and dig in the middle.
- Orange Star Bit 3: From the second, take the platform to the right.
- Orange Star Bit 4: From the third, jump up to the elevated platform on the left.
- Orange Star Bit 5 (Requires the Mouthful Ability): Go to the lift up ahead, and move it all the way to the right. You’ll find an alcove with an enemy guarding a patch of dirt hiding the final bit.
This one will be in a chest that comes out of the water once you have obtained all five Orange Star Bits.
Concrete Isles Waddle Dee 3 (Isle of Treasure)
From the platform with the Warp Star going to the second half of the level, follow the power line until you see a downed section. Swim through it to reach the Isle of Treasure, where the third Hidden Waddle Dee awaits.
Concrete Isles Waddle Dee 4 (More Green Star Bits)
You’ll again need the Drill ability to collect the Green Star Bits for the fourth Waddle Dee in Concrete Isles. In this sequence, you’ll be jumping on moving platforms with two sections.
- Green Star Bit 1: In the patch of dirt on the upper section of the first platform.
- Green Star Bit 2: On a stack of boxes behind a Balloon-Meister.
- Green Star Bit 3: On the next moving platform; find it by digging through the dirt patch at the end of the upper section once again.
Before the cannons in this area, drill in the dirt down on a ledge to your right. This will reveal a Warp Star that will transport you to the top of a hill near a pipe. Go Mouthful on the pipe, and you’ll begin an auto-scrolling platforming section where the next two Green Star Bits are hidden.
- Green Star Bit 4: Directly ahead, hiding under some boxes you need to smash through.
- Green Star Bit 5: Spit out the pipe at the end of the section to find it just below where Kirby stands.
All Hidden Waddle Dees in Everbay Coasts’ Scale the Cement Summit
There are four Hidden Waddle Dees in Everbay Coast’s Scale the Cement Summit world.
Scale the Cement Summit Waddle Dee 1
The first is in the early part of Cement Summit, behind the pool guarded by enemies with a Bomb Block in the middle. Take care of the riff-raff to find another slightly obscured ladder heading down. There is a vending machine on this platform you can Mouthful and knock over to reveal the Waddle Dee.
Scale the Cement Summit Waddle Dee 2
The second will become visible when you step on a star switch. From there, you’ll have 15 seconds to navigate an arena of enemies and jump up to the Hidden Waddle Dee cage suspended on a bridge atop the arena.
Scale the Cement Summit Waddle Dee 3
From the second Waddle Dee, head to your left and down a walkway to uncover the door to a room holding the third one of the level. Make sure you have the Tornado Copy Ability equipped: you’ll need it to cross a valley of spikes and hit all three switches to open the cage door on the way.
Scale the Cement Summit Waddle Dee 4
The final Waddle Dee is found in the gliding section at the end of Scale the Cement Summit. Eventually, you’ll see cannons coming up on your left, but there is a cracked wall to your right. Spin dash to break the wall and follow the hidden path to the end.
All Hidden Waddle Dees in Everbay Coasts’ Fast-Flowing Waterworks
There are five Hidden Waddle Dees in Everbay Coast’s Fast-Flowing Waterworks stage.
Fast-Flowing Waterworks Waddle Dee 1
The first river ride section ends in a pipe guarded by Gordos. Navigate around the spiky enemies to free the Waddle Dee caged in the middle of the pipe.
Fast-Flowing Waterworks Waddle Dee 2
The second Hidden Waddle Dee challenge comes after you get the Chain Bomb blueprint. Look for a bomb block to hit to blow up some metal boxes, revealing a hidden area. Inside you’ll find a ring you can inhale for Ring Mouthful mode and a boat. Once you hop on the boat, you’ll be shown the maze puzzle with three choices. The correct path is: right, left, center. Dash through to reach this one.
Fast-Flowing Waterworks Waddle Dees 3 + 4
The next two Waddle Dees are found by doing a two-part puzzle in the staircase swallowing area. First, hit the blue switch guarded by a seal. This will make a walkway appear, allowing you to move a staircase across the gap to the red switch. This raises on a set of bars in an alcove to your right; but move past that Waddle Dee first.
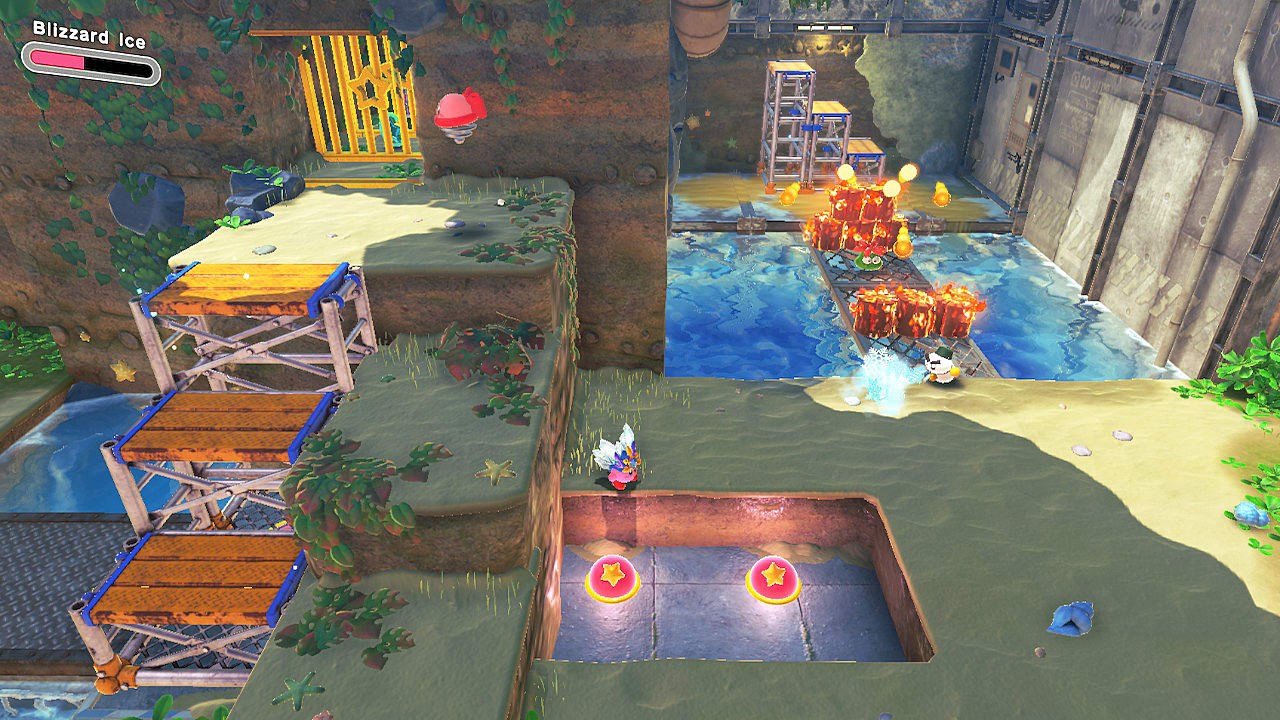
On the other side, you’ll see a Chilly guarding some fiery logs blocking another staircase. Absorb the enemy for the ice ability to move to the staircase. Mouthful it and head back in the direction you came from, where you can drop the staircase in a ditch on top of two red switches. This will unlock the rear gate, letting you collect both Waddle Dees.
Fast-Flowing Waterworks Waddle Dee 5
In the final area of the stage, you’ll find the last Hidden Waddle Dee. Look to the right near the second whirlpool you encounter, and you’ll see a series of ledges that lead to a blue star switch. Float your way over and step on the switch to access this one.
Those are all of the Waddle Dees in Kirby and the Forgotten Land’s Everbay Coast. If you missed any in Natural Plains, be sure to consult our Hidden Waddle Dee guide for World 1, as well as our Natural Plains Hidden Missions guide. For any other tips on Kirby and the Forgotten Land, hit up our dedicated guides page.




Published: Apr 1, 2022 12:21 pm