The Chalk Prince and The Dragon, the latest update 1.2 for Genshin Impact, introduces a brand-new Dragonspine region on the map. It includes a new abyssal domain called Peak of Vindagnyr, which holds some excellent rewards. Here we will guide you through the Dragonspine puzzle.
You will need to complete the “In The Mountains” quest given by Iris at the Dragonspine Adventurer Camp. Follow the steps below to finish this complex mission and unlock the Peak of Vindagnyr.
How to Get to Peak of Vindagnyr in Genshin Impact
Talk to Iris
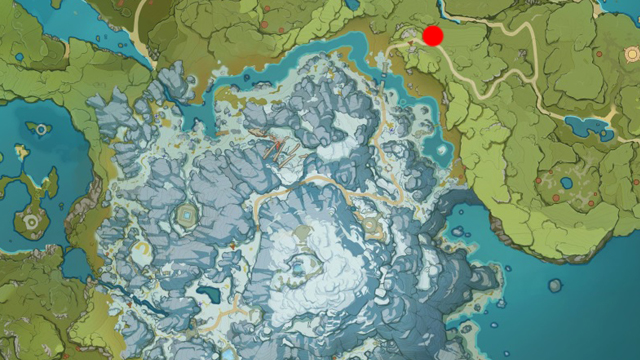
Iris can be found at the adventurer camp, which is located on the way from Dadaupa Gorge towards Dragonspine in the south of Mondstadt.
This conversation will start the “In The Mountains” quest, which consists of a series of smaller missions.
Unlock the Frostbearing Tree
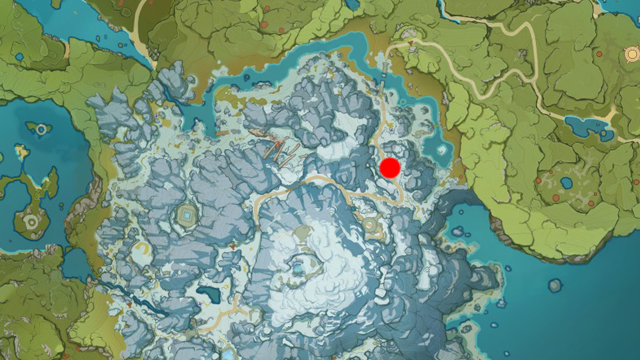
Teleport to the Snow-Covered Path South waypoint near Frostarm Lawachurl. You will see crimson agate, a red quartz, which can be used to destroy blue crystal, which is the first shard.
Hit the crimson agate and hit the blue crystal as quickly as possible while you still hold the crimson energy. You need to do this four times: pick up four crimson agates scattered around the blue crystal and hit it four times.
If you did well, a blue orb will appear. Interact with it and watch a short cutscene how the Frostbearing Tree awakens.
Travel to Entombed City Outskirts
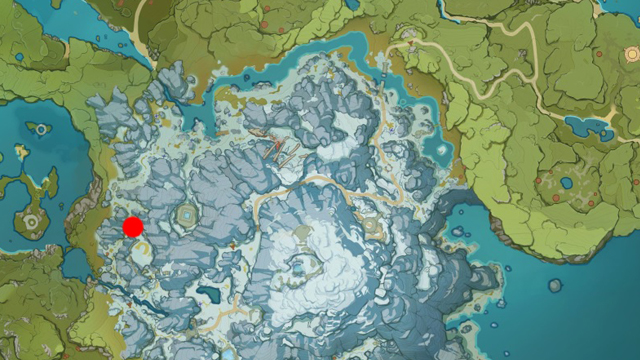
The second waypoint you need to teleport to is Entombed City Outskirts south of Dawn Winery’s Statue of the Seven. Follow these steps to thaw the second shard:
- Interact with the circle of totems
- Watch the Seelie fly over the totems and remember the pattern
- Use a Cryo character and hit all five totems in the same sequence
- Unlock the precious chest
- Beat the two ruin guards and one ruin grader
- Jump into the hole in the ground
- Break four crimson agates and hit the blue crystal four times
Travel to Starglow Cavern

The third waypoint is located east of Starglow Cavern. Follow these steps to thaw the third shard:
- Interact with the circle of totems
- Watch the movement patterns of two Seelies
- Repeat their pattern by interacting with totems in the same sequence
- Jump into the hole in the frozen pool
- Interact with another circle of totems
- Watch the movement patterns of three Seelies
- Repeat their pattern in the same sequence
- Beat three waves of Hilichurls
- Beat three Cryo Abyss Mages
- Break four crimson agates and hit the blue crystal four times
Thaw All the Shards Out Again
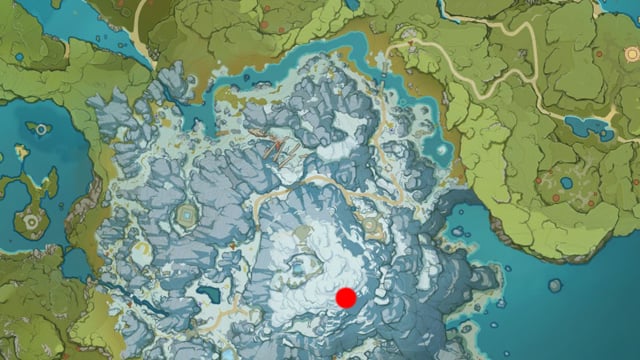
You will need to thaw all three shards one more time. In order to do this you need to travel to the southeast of Entombed City Outskirts and follow the Seelie through the Hilichurl camp into the Skyfrost Nail.
Follow these steps to thaw the first shard out again:
- Locate the dormant ruin guard
- Hit the crimson agate nearby
- Go up the slope behind the guard
- Use your ranged character to shoot the shard in the sky
Follow these steps to thaw the second shard out again:
- Keep going northwards up the slope
- Reach the heat beacon
- Beat the Frostarm Lawachurl
- Hit the crimson agate near the chest
- Go back to heat beacon
- Shoot the second shard in the sky
Follow these steps to thaw the third shard out again:
- Go back to the chest near crimson agate
- Follow the Seelie to the totem
- Activate the totem with an Anemo character
- Use the wind current to travel to the Hilichurl camp
- Hit the crimson agate in the camp
- Descent onto the platform and shoot the third shard
With all three shards destroyed the three blue orbs will appear. You need to interact with all three of them.
Unlock Peak of Vindagnyr
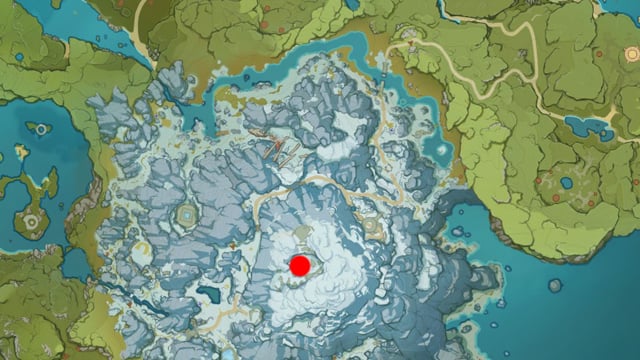
After a cutscene you will be able to open the luxurious chest, containing the Red Aura, which is the key to the Peak of Vindagnyr domain.
Reach the domain indicated on the map and open three precious chests and one exquisite chest full of great loot.
There are four levels of rewards inside the domain, which include:
- 1,850 Mora; Defender’s Will; Gambler
- 2,025 Mora; Defender’s Will; Gambler
- 2,200 Mora; Defender’s Will; Gambler; Ice Breaker; Ocean Conqueror
- 2,525 Mora; Defender’s Will; Gambler; Ice Breaker; Ocean Conqueror
That’s all you need to know on how to get to Peak of Vindagnyr in Genshin Impact. If you found this guide helpful, consider checking out our other Genshin Impact tips articles!





Published: Dec 24, 2020 11:25 am