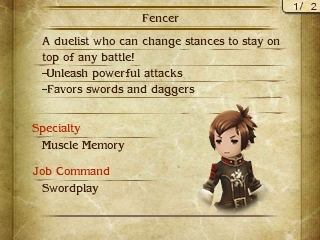
The Fencer Job in Bravely Second can change stances to boost their attack, defense or speed. They also have special abilities that can only be used in certain stances. It requires some setup, but can be a very strong Job when used correctly.
If you like to switch things up in battle to have multiple boosts and good physical damage, Fencer is for you.
This guide will go over everything about Fencer in Bravely Second including:
- Unlocking Fencer – How to unlock the Job.
- Equipment Guide – The optimal equips for this Job.
- Ability List – Each ability and when you get them.
- Cross Job Tips – Which Jobs work well with this one.
- Combat Tips – How to use this in battles.
Unlocking Fencer
You unlock Fencer after finishing the Prologue.
Equipment Guide
Fencer has S rank in Swords and Daggers and A rank in shields.
Armor
- They have C proficiency in armor and helms, but the light armor is still best since you get good magic defense.
- Equip a shield in your off-hand if you want more defense.
- Accessories that increase STR, AGL, DEX, or speed are useful.
Weapons
- Swords are the better option if you are going for pure damage, but a dagger will let you access the healing Special, Perfect Circle.
- Triple Wield can also be good for the added attack 3 swords can give.
- I used a Fencer/Hawkeye combo and used Rifle lore to get S rank in Firearms, then equipped a rifle.
Ability List
The specialty for Fencer is Muscle Memory.
- Muscle Memory – The effects of any stance taken will persist for 10 turns even after assuming another stance.
Level 1
- Blazing Wolf – Assume the offensive wolf stance to increase your P.Atk and M.Atk by 25%.
Level 2
- Stalwart Aurochs – Assume the defensive aurochs stance to increase P.Def and M.Def by 25%.
Level 3
- Wolf Fang – Only usable in wolf stance. Single-target attack that does 1.3x damage and switches you to aurochs stance.
Level 4
- Goring Aurochs – Only usable in aurochs stance. Single-target attack that does 1.5x damage and switches you to wolf stance.
Level 5
- Soaring Falcon – Assume the speedy falcon stance to increase speed by 50%.
Level 6
- Stampede (Support Skill. Cost: 1) – When in aurochs stance, have a 75% chance of counterattacking against single-target physical attacks. Not triggered by reflected attacks.
Level 7
- Muscle Memory (Support Skill. Cost: 1) – Lets you use the Fencer specialty on other Jobs.
Level 8
- Eye of the Wolf (Support Skill. Cost: 1) – Start out in wolf stance at the beginning of each battle. Does not take effect in chained battles.
Level 9
- Sword Lore (Support Skill. Cost: 1) – Raise Sword proficiency to S.
Level 10
- Falcon Claw – Only usable in falcon stance. Deliver 4 attacks on random enemies that do 0.8x times damage each.
Level 11
- Bloody Wolf – Assume a wold stance that increases P.Atk and M.Atk to their maximum possible values for 10 turns.
Cross Job Tips
- Hawkeye is my favorite and great for most physical attacker Jobs. This lets you add elements to your weapon so you can exploit enemy weaknesses.
- Swordmaster is great for building off the aurochs stance. You can use it as your sub or just get the Counter Amp and/or Katana Lore.
- Ninja is good if you want to Dual Wield without the penalty.
- Charioteer for Triple or quad wield.
Combat Tips
Fencer takes some setup, but can be worth it. Choosing the support ability Eye of the Wolf cuts down on that time by starting you in wolf stance.
Falcon Claw will give you the most damage if you only have 1 enemy in battle, but there are no attacks that put you in falcon stance so you will have to take a turn to set that up. It also takes 1 BP, but if you hit damage cap, that is nearly 40,000 damage in one attack.
It is a good idea to switch between your stances at the beginning since the boosts last for 10 turns, then you can save up BP for your attacks.
That’s it for my Bravely Second Fencer guide. Let me know if you have any questions!


Published: Apr 21, 2016 11:33 am