If you want to detail a coastline or land along a waterway in Cities: Skylines 2, you’ll have to get creative. Unfortunately, vanilla doesn’t have any choices for seawalls. But that doesn’t mean we can’t build them. Here’s how to make quays in Cities: Skylines 2.
How to Build Quays in Cities: Skylines 2
As you may already know, quays are 100% an aesthetic choice in Cities: Skylines and its sequel. Though they’re meant to help in loading and unloading cargo from ships in real life, they’re just for looks here, adding more realism to your city designs. But while CS1 had various quays baked into the base game, that’s not so here.
We’ll need several things:
- Shift Terrain tool.
- Level Terrain tool.
- Roads.
To make quays, we’ll need to get a little creative with the game’s terraforming tools and roads. Note that this method can work with most any road in my testing. However, larger roads, such as medium four-lanes, take more finesse and patience to build this way.
CS2 Quay Construction: Step-by-Step
Use the Level tool to create a flat surface moving away from the water. Do this for the length you want the quay to be. I typically go with about five zoning-blocks to give myself space to work with. Once you have a flat piece of land, follow these steps.

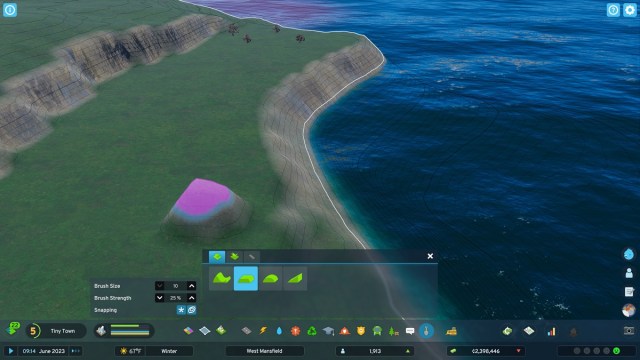
Go about three to four zoning blocks away from the water. Then, set the Shift Terrain tool brush size to 10 and strength to 25%. Next, press LMB two or three times on the same spot to create a small piece of elevation. Now, choose the Level Terrain tool and press RMB on the peak of the elevated terrain to copy it.
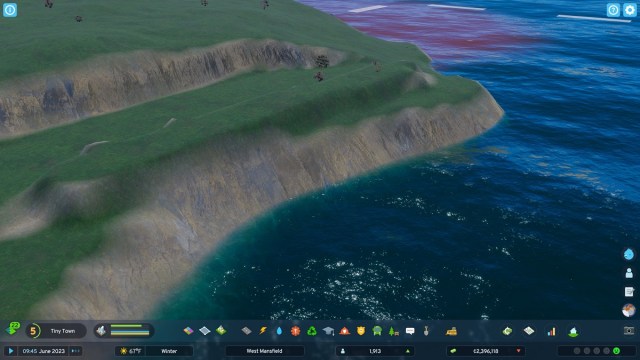
Turn your brush strength up to 60-75% and use the Level tool to make a ridge following the path you want the quay to take. I recommend ensuring the ridge is as close to flat as possible, or there will be waves in your road (see my screenshot of one attempt below). Pay attention to the elevation symbol as you build the road, and construct it in small increments, making changes to the terrain’s elevation as necessary.
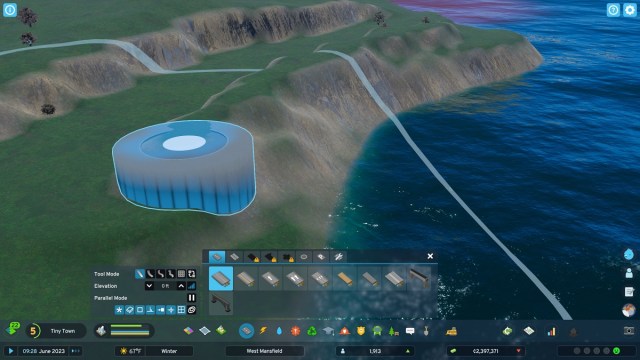
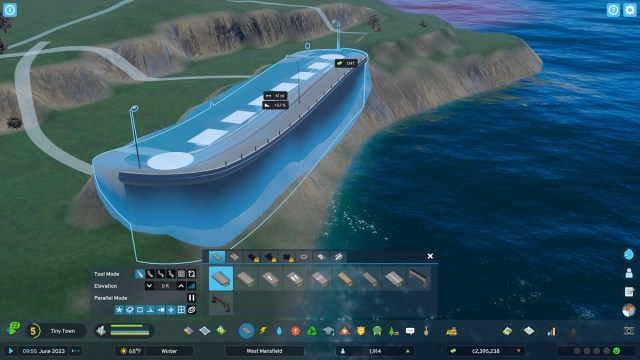
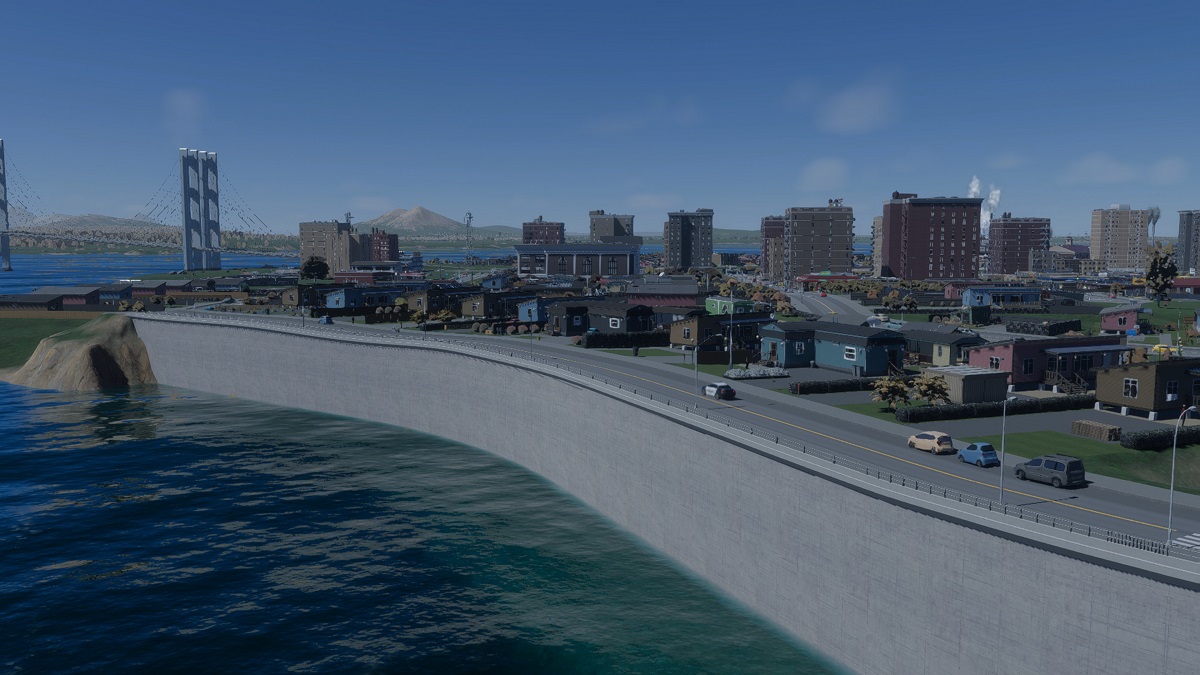
Next, choose a road. Place the center of the road (the white node) on the edge of the ridge closest to the water. The road piece should have a cylindrical bottom to it, looking as if it has a foundation. Run the road along the ridge. Disable snapping if you need to. You don’t need to raise the road with the Elevation Step tool in the road placement menu. It should automatically look somewhat like this but much less like a boat.
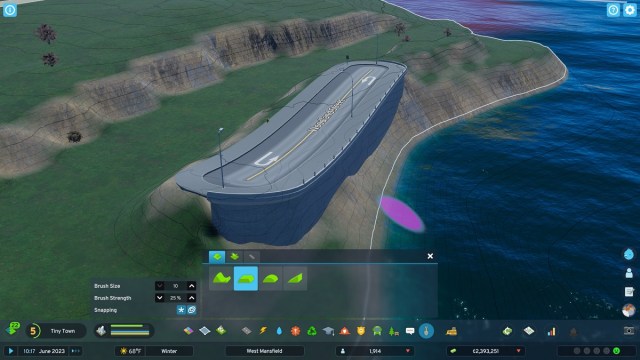
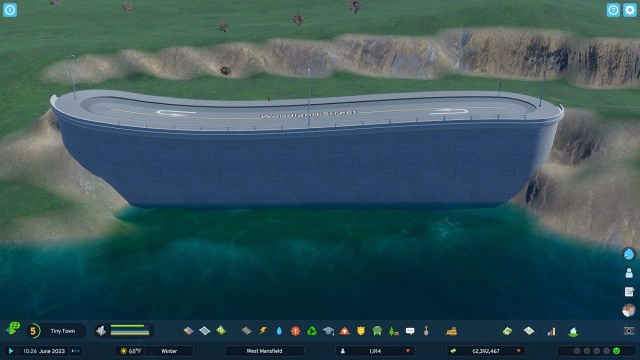
Use the Level tool to copy the elevation of the shallowest piece of water. Remove the land against the road to create a quay. Note: You don’t want the ridge directly on the waterline because there may be areas that flood, and the game won’t let you build the quay.
Can People Walk on Quays?
Since this is a road, there are sidewalks on it. And people can walk on sidewalks. All of the pedestrian mechanics here work as they would on a regular road. Indeed, depending on how you make quays, you can also build anything from residential to service buildings, giving your Cims water-side views.
How to Connect Paths to Quays
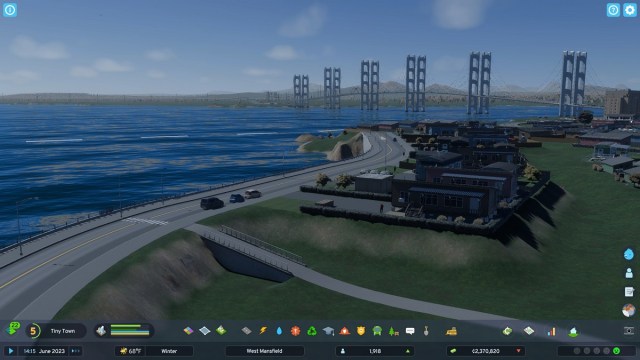
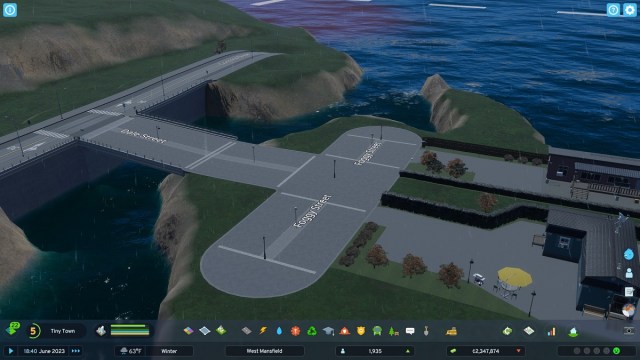
Again, since quays in Cities: Skylines 2 are roads, you can attach paths to these structures by building them up to the edge of the road like any other path. While you can attach paths to both the land side and water side of a quay, the connection point on the latter side has bars that prevent Cims from using the pathway. I tried for nearly an hour to get Cims to cross it, and they never did.
You can, however, build regular roads and pedestrian roads off the water side of a quay. I was able to build an island with homes, connecting it to the mainland this way, and Cims moved in as quickly as they would in any other residential zone.
For now, that’s the workaround to make quays in Cities Skylines 2. It’s not ideal, and it can take quite a bit of work and patience to pull off. But the finished product can be worth it to give your city more variety. Get more tips on things like how to fix not enough customers and high rent or lesser-known mechanics like changing one way road direction over in our CS2 guides repository.



Published: Oct 24, 2023 12:00 pm