Heroes of the Storm is the newest Blizzard title to hit PCs and takes pride in being much more objective-based than its fellow MOBA counterparts.
The game consists of 7 different maps, all containing a different set of missions that competitors will have to team up with other players to take on.
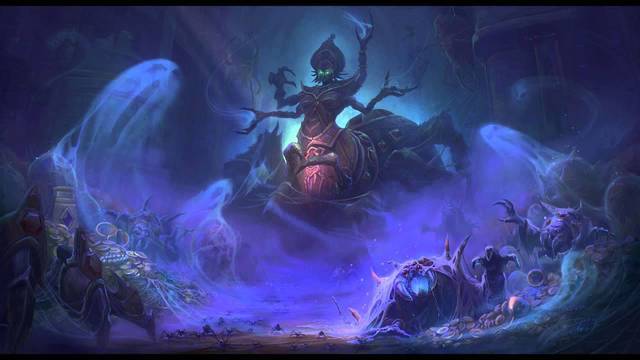
Strategizing with the random map you’ve been assigned to play on is the key to victory in Heroes of the Storm. Here we will explore the Tomb of the Spider Queen map, including general tips and tricks, then diving further into specific champions, builds, and strategies to wipe the floor with your opponents.
Step 1: A General Understanding of the Map
Map Layout
The map in Tomb of the Spider Queen follows the same general HoTS suit, where there are 3 total lanes and the bottom lane is slightly longer and larger than the others.
This map is the smallest map so far, and therefore has a lot more action and rotations then other maps, rivaled only by Blackwater’s Bay.
Around the entire map are various spider camps that drop gems, which will be turned into the spider queen to gain advantage over your opponents.
There are minion camps, along with the spiders, which are bottom heavy. The Siege Camp is at the very bottom. There are two Bruiser camps at the beginning of the middle lane for both sides.
There are two Altars located on either side of the middle lane, and the Boss is located at the very top.
Map Objective
Just like in Blackwater’s Bay, your team will be fighting for gems, which you will drop when you die. The number of gems you, or any others, possess will be displayed above your head, so you know who to take out on the opposing team, and also who to protect on your team.
Th main difference between this map and Blackwater’s Bay is that the gems your opponents drop will not be available for you to pick up. Another vital difference is that the gems will not stay there forever, and will disappear after a certain time if not grabbed. Therefore, you can guard them from the enemy team until they go away to ensure they can’t be used against you.
After you capture enough gems, you can turn them into the Spider Queen, who will unleash her Webweavers on the enemy team, destroying structures.
The more you recruit the Spider Queen, the more gems she will begin to ask for. You can turn in gems at either Altar mentioned above.

Current Team Structure Meta
Currently there are two main tactics to explore for this map– Pushing relentless against the other team, or roaming around to kill the other team.
Depending on which strategy you and your team decide on before the game starts is who you should base your team around and where your team will be located on the map.
If you chose to push against your opponent then you’ll be playing a 1-1-3 composition.
If you chose to roam around and kill your opponents then you’ll be looking to play a 1-3-1 composition. This strategy is focused on movement and it is essential that your team rotates together to pick off any enemy out of position. This can also be used to destroy any lone hero from the other team attempting to turn in at the altar, and defend piles of gems that the enemy is trying to recover.
Step 2: Playing the Map Correctly
Using the Pushing Strategy
Players who are opting into the pushing strategy will be using the positioning in your favor and taking the neutral minion camps as often as possible and shoving down your opponent’s bottom lane as fast as you can. This will grant your team a massive XP lead and will also grant your team dominance over the bottom altar.
The entire concept of this strategy is to constantly have possession over the Mercenary camps at the bottom of the map, meaning that rotating to make sure the enemy team doesn’t capture them is essential. If they do, you lose your edge and potentially the game.
The other two members of your team will be in the top and middle lane soaking XP and holding their own. They should be careful not to engage in any unsafe fights, because dying would mean an XP spike for your enemies, as there won’t be a member of your team in that lane for experience.
Later on in the game it’s possible to rotate to the top lane to push for those structures and the Boss. If your team chooses to do this, the Boss must be captured quickly, as your strategy is based heavily around the Merc camps, and giving them up for too long will make you lose your momentum very quickly.
Since the lane minions will be constantly dropping gems, you’ll eventually need to turn in gems. Since you have 3 heroes in the bottom lane, you should have pretty substantial control over the bottom altar and therefore should travel as a pack whenever bot or mid lane heroes need to turn in. This will be elaborated on below in Step 3.
Using the Roaming Strategy
If your team has opted for the roaming strategy, then you’ll need to be positioned in a 1-3-1 and be ready for constant movement around the map.
This is a direct counter to the aforementioned push strategy because you’re main goal is to prevent the opposite team from controlling the minion camps.
Your aim is to use the 2-3 heroes from the mid lane to travel to bot or top lane (mostly bot if you’re against the composition mentioned previously) so your 1 hero in the bottom lane should be travelling to join you as well.
Your aim is to constantly prevent the other team from completing any objectives at all and taking whatever camps the other team is attempting to take over. You’re also going to be stopping them for turning in any gems, and camping large quantities of gems that were dropped by the other team to make sure they aren’t retrieved until they safely disappear.
Your team will be turning in gems, but only at the opportune moments and only when your team is all together. Using this method is dangerous, and therefore your gems should be guarded.
Step 3: Turning in Gems Safely
When to Hold on to Your Gems
A general rule to keep in mind during your battle in the Tomb of the Spider Queen is that you shouldn’t visit the Altars too often, and it’s better to hold on to your gems and strike at the right time instead of just running there as soon as you get a few gems.
This is true for a few different reasons, including the fact that your opponents can’t pick up your dropped gems if you die, which makes the risk factor much lower than in Backwater’s Bay.
Because there are two different spots to turn in gems, it’s much easier to turn them in than in it’s pirate adversary. The damage that the Webweavers deal also scales into late game, unlike the cannonballs, so it’s better to rotate which of your teammate will make the big gem drop so that someone else on your team is stacked with gems and ready to turn them in later on in the game.
When to Turn in Your Gems
There is a strategy to turning in gems, and it’s to wait until the Spider Queen is right about to have enough gems and snipe the last few. Basically, you’re waiting for your time to strike and then swooping in to seal the deal.
In this regard, your team can ambush the Altar as soon as it’s about to hit capacity and kill the enemy team, leaving it vulnerable. Then you can steal the Altar away and turn your enemy’s hard work against them.
Step 4: Choosing Your Hero Effectively
This map is all about which strategy you’ve chosen to take on, so your hero choices will differ. Generally you’ll be looking for heroes that have high mobility and therefore will be able to travel from one lane to the other, and to the altar, quickly.
Crowd Control, or CC, is also a powerful hero trait to posses on this map because of the added ability to stop the other team from capturing minion camps or from turning in gems.
Team Composition and Powerful Heroes
No matter which strategy you’ve chosen to pursue, your top laner will be a solo lane either way, and should be a strong damage dealer who’s hard to kill and has insane wave clear. Therefore your top option is Zagara, but many honorable mentions include Azmodan, Kerrigan, Zeratul, Johanna, Tassadar, etc.
If you’re going to be pushing bottom heavily, your mid lane should mimic the top heroes above, since it will also be a solo lane. If you’re going for the roaming composition, your 3 roamers will be in the middle which should include a healer, a tank with CC, and a heavy DPS with CC as well as an added bonus.
Your healer could be anyone, but the most popular in the meta right now are Malfurion, Brightwing, and Tyrande. Powerful tanks include E.T.C., Muradin, Uther, Diablo, Arthas, etc. Jaina is one of the most powerful DPS heroes on this map because of her slows and stuns, but other damage dealers can be Sylvanas, Valla, Illidan, Sgt. Hammer, or Nova.
The bottom will either be a solo lane, if you’re roaming, or 3, if you’re pushing. If it’s a solo lane, you should revisit the solo lane list above, because this is also a carbon copy. If it’s the 3 person lane, the paragraph above should be applied here instead.
Let the Battle Begin!

Now that you’re a Tomb of the Spider Queen expert, it’s time to decimate your opponents on the field of battle. If there’s anything this Tomb of the Spider Queen Guide is missing, feel free to let us know and we’ll be happy to expand.
Players looking for further HoTS content can find more guides, tips, news and more in the Heroes of the Storm section of GameSkinny here.


Published: Jun 17, 2014 08:21 pm