Dormant SIVA are collectible items in Destiny: Rise of Iron. Besides being collectibles, they are also related to getting the Gjallarhorn as a part of the new quest. It may also be linked to other exotics, but it not yet known.
I’m going to help by listing the locations of all the known Dormant SIVA, and how to get to them. Check out my guide on how to get Gjallarhorn, which also requires you to find Dormant SIVA.
This guide will go over finding Dormant SIVA in Destiny Rise of Iron including:
- Dormant SIVA List – All the Dormant SIVA that exist in the game.
- Dormant SIVA Locations – Where to find the Dormant SIVA.
Dormant SIVA List
I’m going to list all the Dormant SIVA you can get first, then I’ll separate them by the missions or patrol locations you can get them in.
- Dormant SIVA: Clovis Bray 1.0
- Dormant SIVA: Clovis Bray 1.1
- Dormant SIVA: Clovis Bray 1.2
- Dormant SIVA: Clovis Bray 1.3
- Dormant SIVA: Clovis Bray 1.4
- Dormant SIVA: Clovis Bray 1.5
- Dormant SIVA: Clovis Bray 1.6
- Dormant SIVA: Clovis Bray 1.7
- Dormant SIVA: Clovis Bray 1.8
- Dormant SIVA: Clovis Bray 1.9
- Dormant SIVA: Iron Lords 2.0
- Dormant SIVA: Iron Lords 2.1
- Dormant SIVA: Iron Lords 2.2
- Dormant SIVA: Iron Lords 2.3
- Dormant SIVA: Iron Lords 2.4
- Dormant SIVA: Iron Lords 2.5
- Dormant SIVA: Iron Lords 2.6
- Dormant SIVA: Iron Lords 2.7
- Dormant SIVA: Iron Lords 2.8
- Dormant SIVA: Iron Lords 2.9
- Dormant SIVA: Fallen 3.0
- Dormant SIVA: Fallen 3.1
- Dormant SIVA: Fallen 3.2
- Dormant SIVA: Fallen 3.3
- Dormant SIVA: Fallen 3.4
- Dormant SIVA: Fallen 3.5
- Dormant SIVA: Fallen 3.6
- Dormant SIVA: Fallen 3.7
- Dormant SIVA: Fallen 3.8
- Dormant SIVA: Fallen 3.9
Dormant SIVA Locations
Keep in mind that many of these can also be done during Patrol in Plaguelands. I’m just listing them by mission order to make it easier to find them.
King of the Mountain (1st mission) – 2 Dormant SIVA
- Iron Lords 2.9 – When you reach the part where you must jump out of the gondola, continue down the hill.
- Jump to the ledge that’s at the bottom and to the right for the fragment.
- Fallen 3.0 – This one is on a tower during the part where Fallen skiffs come to attack you.
- You will have to jump on the skiff to the right, and ride it until it gets near the tower.
- After that, jump on the tower to find the fragment.
- Here is a video posted on reddit of someone who found it first.
The Walls Come Down (2nd mission) – 7 Dormant SIVA

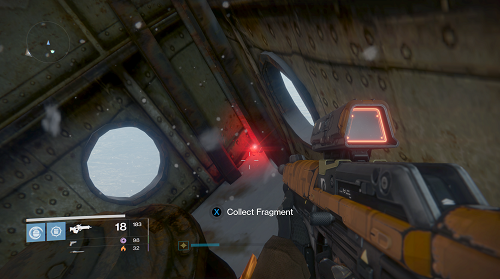
- Clovis Bray 1.9 – At the start of the mission, head to the ketch on the left, and up the stairs.
- You will find it in a gap in the wall.
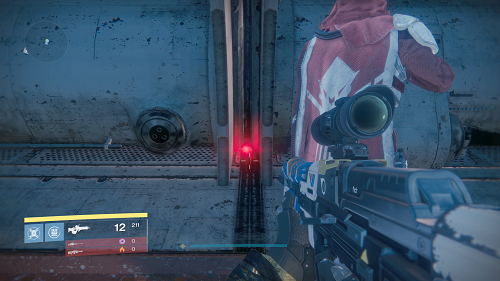
- Clovis Bray 1.3 – When you reach the door you have to go through to go to the wall, drop down the ledge instead.
- Keep going and you’ll see it behind a metal bar.
- Iron Lords 2.0 – When you reach The Divide you will see a dead walker in the middle.
- On the side is the fragment.
- Iron Lords 2.2 – When you reach The Divide, go towards Dock 13 and pass the the room into the open area.
- It will be on a wall to your left between gaps.
- Clovis Bray 1.7 – Go to the frozen pond area right before the entrance to the Sepiks strike in the Rocketyard.
- Go to the nearby room and you’ll find the fragment behind a computer on a table.
- Iron Lords 2.5 – Go to the Rocketyard, then to where the Sepiks strike would be.
- Follow this until you reach a Hive ship on your left. You will find the fragment on the pillar inside.
- Iron Lords 2.3 – Continue through the path to the Sepiks fight until you reach the area right before the walker.
- The fragment is behind a pillar to the right, in the long doorway.
Felwinter Peak/Temple (Social Area) – 1 Dormant SIVA
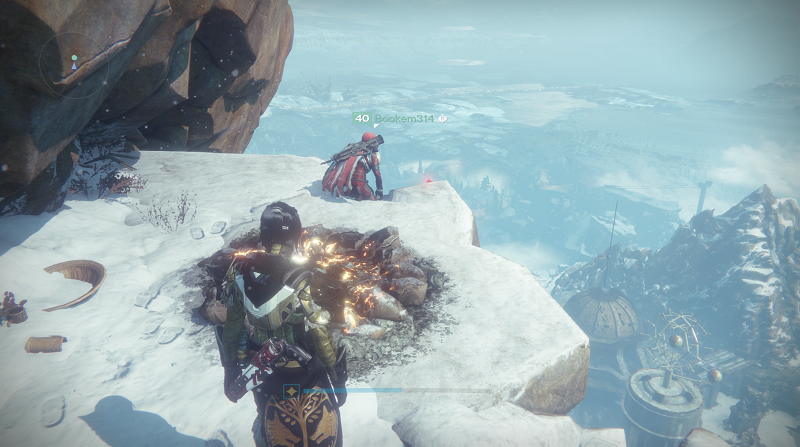
- Fallen 3.1 – When you spawn in, go to the left to see rocks you can jump up.
- Jump to the ledge that’s at the bottom and to the right for the fragment.
The Plaguelands (3rd Mission, not Patrol) – 5 Dormant SIVA
- Clovis Bray 1.4 – When you reach Lord’s Watch, go until you get outside and see the SIVA wires on the right.
- Keep going until you reach the second SIVA wires and you’ll find the fragment underneath it.
- Clovis Bray 1.5 – When you reach Bunker Triglav, there is a tower in the middle you an go up. It is behind a computer monitor at the top.
- Iron Lords 2.4 – You can get this in the Devil’s Lair strike with Sepiks, or in The Plaguelands mission. You need a splicer key if done in the mission.
- Go to the Rocketyard, then towards where the Sepiks strike would be.
- When you reach the walker, go to the room to the left of it. You will see a place to use the key if you are on the mission and the fragment is through there.
- Clovis Bray 1.8 – Go until you reach the last area where you have to take out the guns in the Splicer Battery.
- You will find it on the right gun structure.
The Iron Tomb (5th mission) – 6 Dormant SIVA

- Clovis Bray 1.1 – When you reach Giant’s Husk, go right a bit and keep going until you see water.
- After that, go to the right corner until you see a boat. Go to the front of the boat for the fragment.
- Clovis Bray 1.2 – When you reach the room that has cores that you must reverse, head towards the right core.
- On the ground to the right, and below the core platform, is the fragment. It is next to black pyramids.
- Clovis Bray 1.0 – When you reach Archon’s Forge, turn to your left to see a ledge.
- Jump to that ledge and you’ll see the fragment in the back-right corner.
- Iron Lords 2.8 – Go until you reach Site 6 and have to break into the complex.
- When you reach the part where you must use a computer, look up and to the left to the huge monitor.
- Jump to grab the fragment up there.
- Iron Lords 2.6 – Go until you reach Site 6 and make the long drop down the hole.
- As soon as you get there, turn around and head towards the platforms in the back.
- Keep going until you see a cave, and you’ll find the fragment in there.
- Iron Lords 2.7 – When you reach the final room i the mission, there are 3 huge pillars.
- Go the the side of the pillar on the far left to find the fragment.
Download Complete (4th mission) – 1 Dormant SIVA
- Fallen 3.2 – Go until you jump down the elevator shaft.
- The fragment is on pillar with monitors in the back of the room.
Plaguelands (Patrol) – 1 Dormant SIVA
- Clovis Bray 1.6 – Go until you reach the Bunker Triglav area.
- Head to the building on the left, and go to the 3rd floor.
- Look towards the roof in the center to see the fragment on a ledge.
The Wretched Eye (Strike) – 1 Dormant SIVA
- Fallen 3.3 – Go until you reach the area before the final boss.
- Climb to the top until you reach a bridge that leads to a closed door.
- The fragment is under the ceiling on that bridge.
The Devil’s Lair/Sepiks Perfected (Strike) – 1 Dormant SIVA
- Fallen 3.5 – Go until you reach the final boss, Sepiks Perfected.
- It is under a grating on the front left.
Wrath of the Machine (Raid) – 4 Dormant SIVA
- Fallen 3.8 – After the first jumping puzzle, on your way to fight the Archpriest, keep going instead of going to the boss.
- Follow the path until you get to the corner in the back-left and you’ll see the fragment.
- Fallen 3.9 – Go until you reach the second jump section after Vosik, the Archpriest.
- Just before the narrow hall way on the left is the fragment, on top of a structure to the right.
- Fallen 3.7 – Go until you finish the siege engine/death zamboni fight.
- After dropping down for the chest, go to the side of the cliff on the right.
- Fallen 3.6 – Go until you reach the first room after the siege engine/death zamboni fight.
- Once you reach the bridge, drop off to a ledge on the left. Follow these until you see the fragment.
That’s all for the SIVA Dormant Cluster locations in Destiny Rise of Iron. If you know the locations of any I’m missing, let me know and I’ll add it to the guide!


Published: Sep 22, 2016 11:11 am