After you recruit new Tribesmen in Soulmask, you can use them to help collect more materials, build structures, or fight beside you in battles. Every Tribesman has a proficiency, making them excel at different aspects of survival. Here’s how you can assign them to jobs to help out the tribe.
How to Assign Work to Tribesmen in Soulmask
Before you begin assigning Tribesmen to different jobs around your camp, you’ll want to make sure you’re assigning the right one for the job. All Tribesmen have various levels of skills and proficiencies, meaning one could be really great at chopping down trees while another is better at crafting items.
How to Check Tribesmen Proficiencies
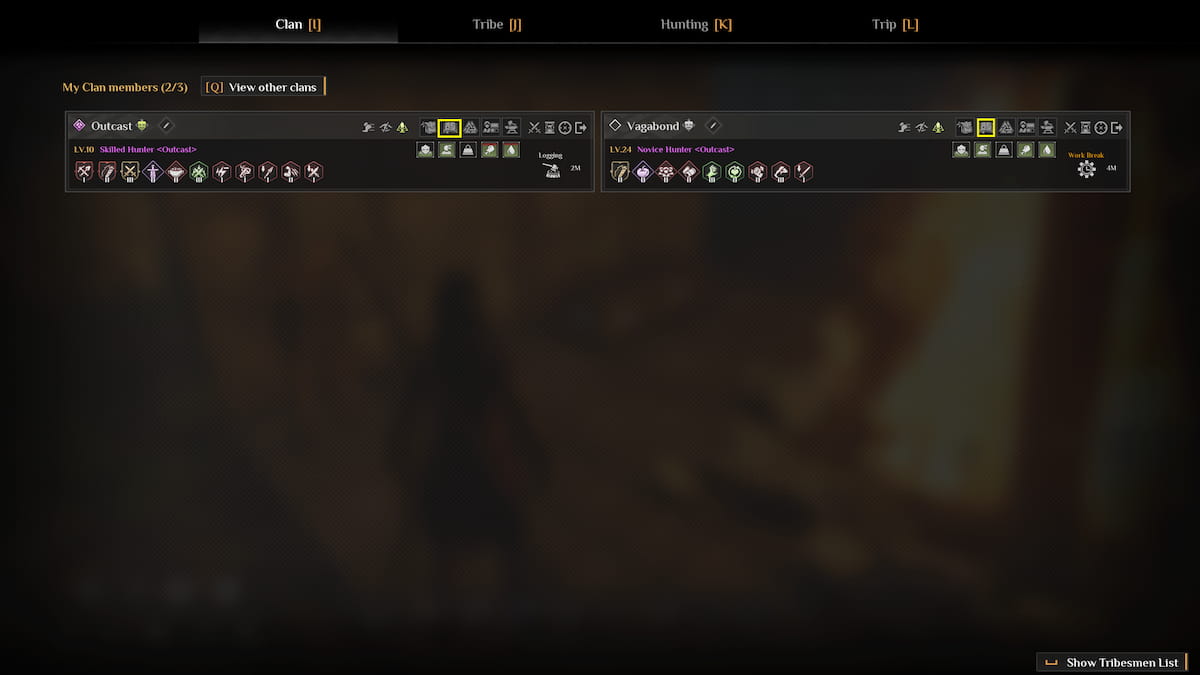
To check what your Tribesmen are good at, open your Clan page by pressing I. In the Clan page, you’ll see all your current Tribesmen. Click on the small book icon to the right of the Tribesmen name, which says, “Go to Proficiency.”
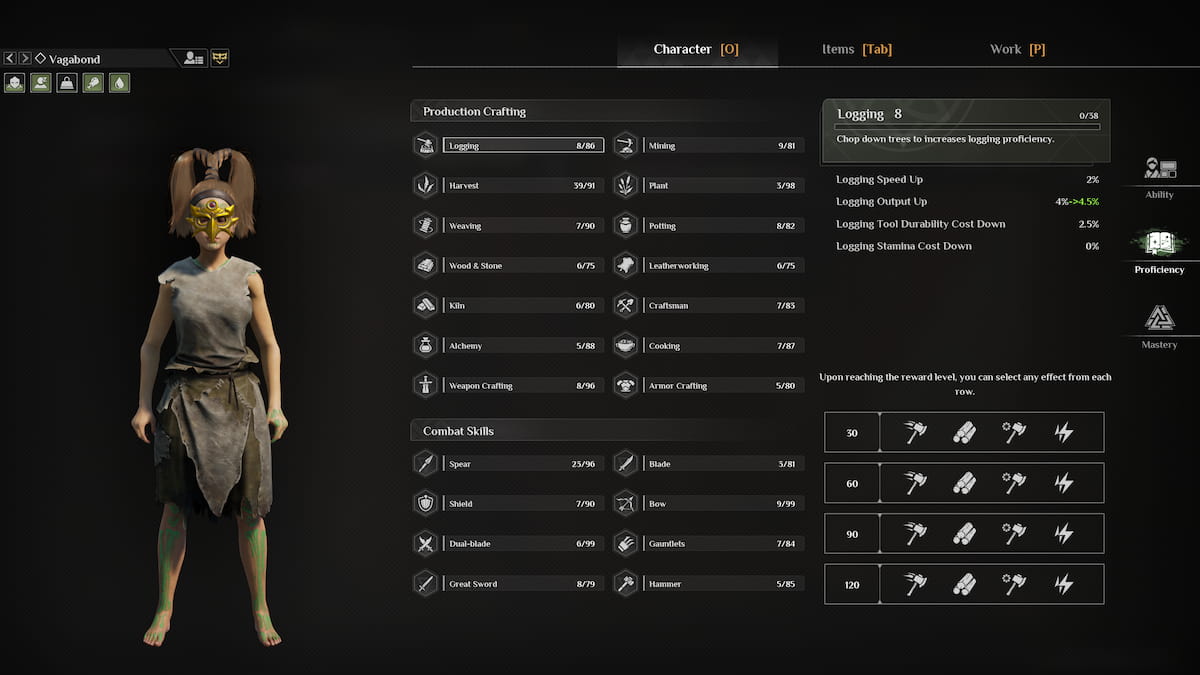
In this page, you’ll see all the skills your Tribesmen has in production, crafting, and combat skills. These are random for each character, although higher-level characters are bound to have greater proficiencies. You’ll want to pick a task based on their highest-level skills. Here’s all the skills they can have:
- Production Crafting:
- Logging
- Harvest
- Weaving
- Wood & Stone
- Kiln
- Alchemy
- Weapon Crafting
- Mining
- Plant
- Potting
- Leatherworking
- Craftsman
- Cooking
- Armor Crafting
- Combat Skills:
- Spear
- Shield
- Dual-blade
- Great Sword
- Blade
- Bow
- Gauntlets
- Hammer
Reward Levels
As your Tribesmen perform these tasks more and more, they will grow even more proficient at them. You can choose extra bonus effects for each skill as they reach staple reward levels.
To do this, click on each skill and press on one of the effects for each level shown on the bottom right of the screen. These can be little things like increased speed while performing the task, increased output, or stamina cost.
How to Assign a Work Job

Now that you’re aware of your Tribesmen’s strengths and weaknesses, you can assign the right jobs for each of them. To do this, approach them and hold E to pop up the menu. In the menu, press Tribesman Work, which will take you to the Tribesman Work Assignment.
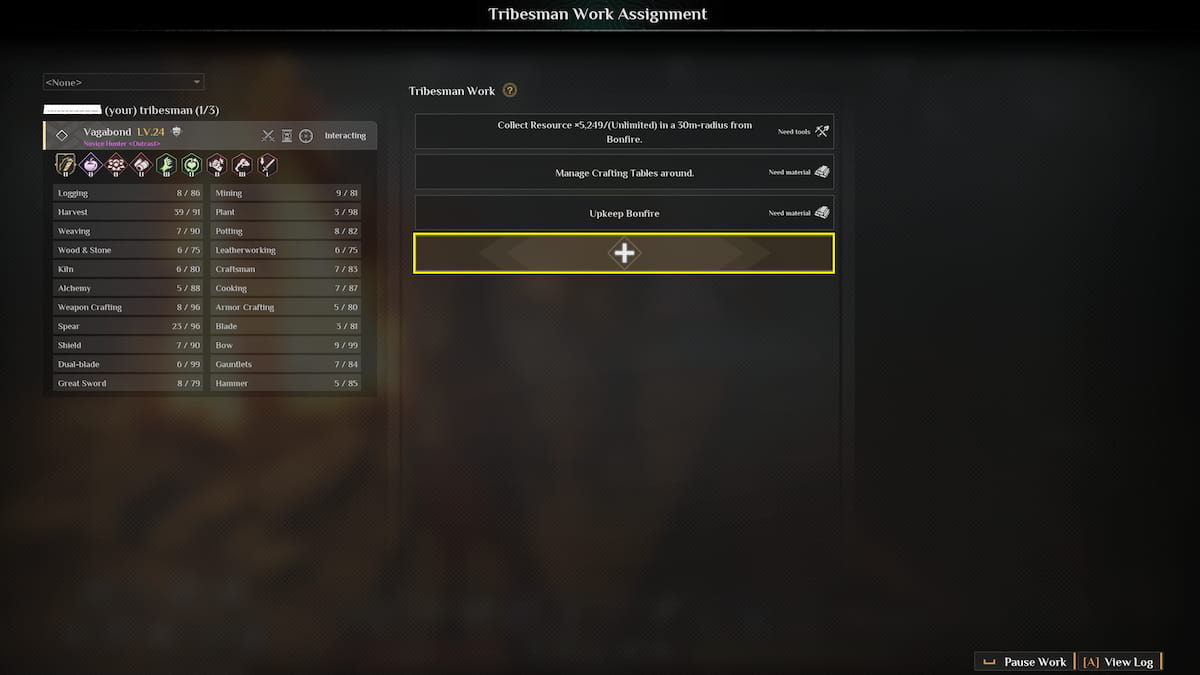
In this Tribesman Work Assignment menu, you’ll see a list of your Tribesman’s current work assignments. You’ll also see a small reminder of their proficiencies on the left. To assign a new work job, press the “+” button. Then, you’ll need to pick a Work Type, Work Location, and Work Goal. You can also occasionally filter in the amount of items you want them to limit their task to and what storage locations you want them to use.
There are plenty of jobs for your Tribesmen to do:
- Operate Workbench – Craft new items on a workbench.
- Wild Collection – Harvest new materials, including logging, mining, or plant materials.
- Workshop Collection – Harvest materials from a workshop spot at your camp, such as a Logging Yard, Excavation Pit, or Collection Yard.
- Store & Withdraw Items – Transports items back and forth for building.
- Farm Management – Sows, manages, and harvests plants in farmlands and Granary.
- Crafting Table Autoplay – Will manage a crafting table when there are tasks queued on it.
- Breed & Slaughter Management – Manages and cares for animals in the Breeding Farm and animal pens, feeding and slaughtering animas automatically.
- Camp Upkeep – Keeps the camp structures repaired and refuels the fire as needed.
- Mine Exploitation – Ventures out to mine pits nearby and brings back materials.
Some jobs will require specific tools that your Tribesmen need before they can begin. Make sure you craft the right tools, gear, and stations and set them up beforehand. You’ll also want to place down chests and storage containers to store any supplies that your Tribesmen bring back.
How to Make Tribesmen Fight With You
If your Tribesmen excel at more combat skills, rather than the camp skills, than you may want to bring them with you into combat instead (especially if you didn’t choose a combat-based starting mask in character creation).
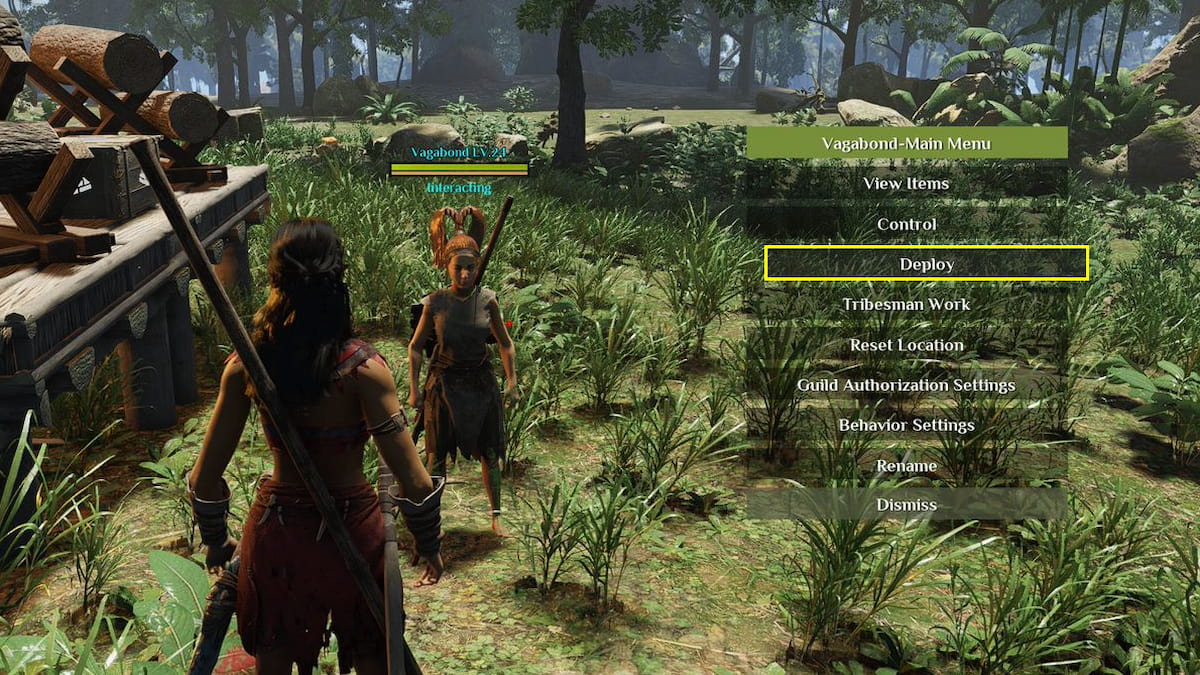
To make your Tribesmen follow, approach them and hold E to see their menu. Then, select the Deploy option.
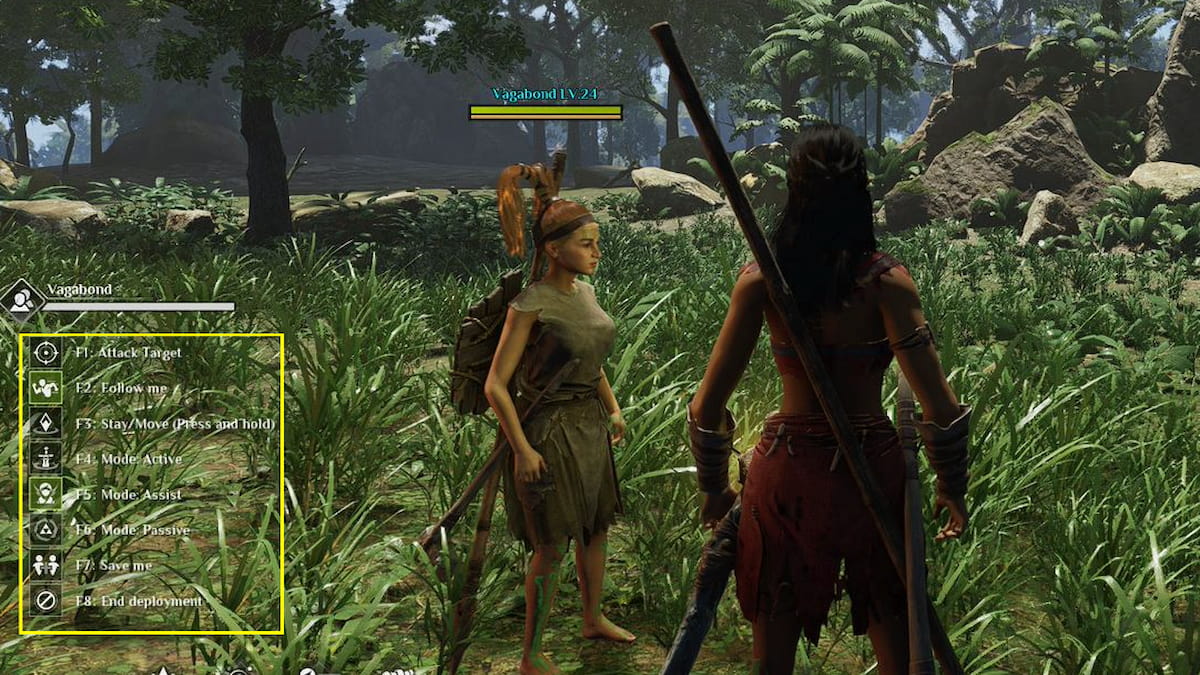
Once a Tribesman is deployed, you’ll get a list of actions you can make them do, like follow you, save you from enemies, or attack the same target as you. You can also choose to make them stay in specific spots in passive mode or active or assist modes.
Deployment is the perfect opportunity to bring your Tribesmen with you for those more dangerous outings and end explorations, especially if they aren’t very helpful at camp. However, be careful because they can die. You can end their deployment at any time, sending them back to camp.
Start assigning your Tribesmen to different jobs to get more done around camp. You’ll collect materials way faster with the extra help. Plus, bring some along with you to explore other regions of the map. You’ll need some backup against those more dangerous creatures and enemies.
Want more helpful tips like this? Check out GameSkinny’s Soulmask guides hub.


Published: May 31, 2024 03:43 pm