
Like any survival-based game, Soulmask requires players to keep up with some basic needs. The two most important of the needs being: hunger and thirst. While it’s not too hard to farm food, getting water proves to be a slightly more complicated task. Here is everything you need to know.
Soulmask Hydration Guide — How to Get Water
Unfortunately, you can’t just drink water from anywhere in Soulmask. You’ll need a vessel to collect water and use it to drink or transfer from. Once you have those vessels, you’re free to collect water from any old stream or river. However, if you want to set up a better water source directly at your camp, then there are other options for that as well.
How to Drink Water
If you notice the little water drop icon at the bottom of your screen starts to turn red, it means your character is getting thirsty. You’ll need to drink water to raise it back up. To drink water, you’ll need a Water Bottle.
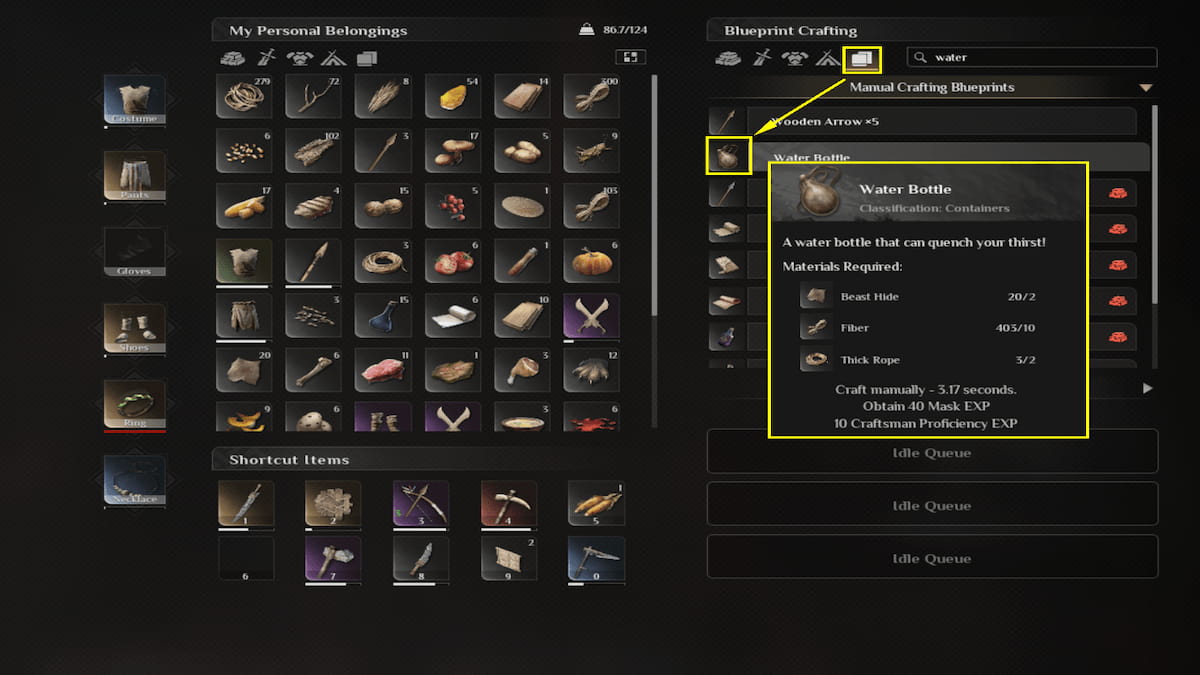
You can make the Water Bottle directly through your Inventory crafting menu with the following materials:
- Beast Hide x2
- Fiber x10
- Thick Rope x2
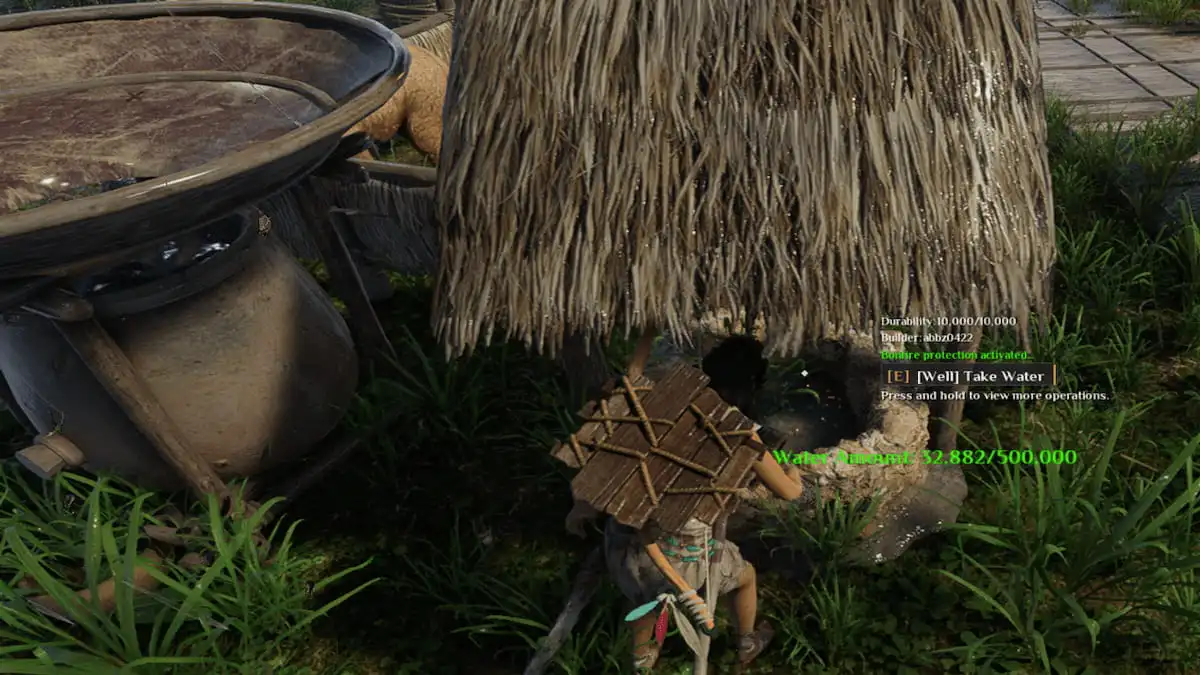
Once you have the Water Bottle, place it in your Shortcut Items so you can more easily get to it. You’ll notice the bar underneath the Water Bottle is red, indicating that it’s completely empty. To fill it, approach some water until the prompt, “Draw Water,” pops up. Then, press E to fill it. You can also fill it with water sources at your camp by approaching them and pressing “Take Water.”

The bar on the bar underneath the Water Bottle will be white when it’s completely filled. Then, you can press on it to drink some water, restoring some of your hydration.
How to Make Tribesmen Drink Water
Your Tribesmen also need water to stay happy and healthy. You can actually provide them water the same exact way, with a Water Bottle. Craft them an extra one to keep in their inventory, or if you want them to drink now, place the Water Bottle in their inventory, click on it, and press “Use”.
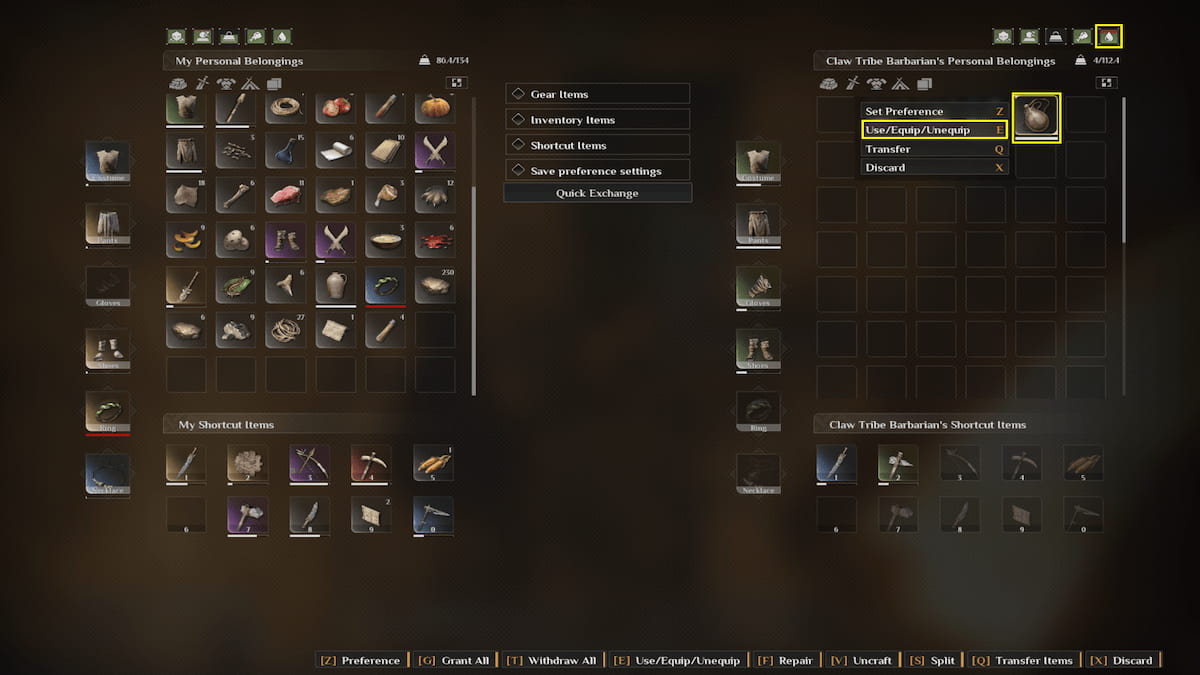
Pressing “Use” on the Water Bottle while in the Tribesman’s inventory will make them drink some of the water immediately. However, all Tribesmen will restore their own thirst when it reaches below 60%, as long as they have a Water Bottle supplied to them.
How to Transfer Water
A Water Bottle is only suitable for collecting water to drink. If you want to transfer water to an animal’s water trough or water your farmlands, you’ll need some other vessels. While playing, I came across two different water vessels. Both can be used to water farmlands or fill water troughs (important for when you capture animals): a Water Bucket and a Water Tank.
Here’s how to make them:
| Water Container | Materials | Crafting Table |
|---|---|---|
| Water Tank | Clay x20 Leather Rope x2 Ceramic Mold x2 | Potting Table |
| Water Bucket | Plank x10 Copper Ingot x4 Wooden Handle x2 | Carpenter’s Table |
Once you have one of the two containers made, equip it from your inventory or shortcut slots. Just like the Water Bottle, it will show a red line when it’s empty. You can fill it up by approaching any water source and collecting the water, just like with the Water Bottle.
Then, carry it to where you want to transfer the water, like a water trough or farmland. With the bucket or tank equipped in your hand, press M1 to dump the water where you want it. It will completely empty the container to water a field or fill a trough (depending on how much water is already in the trough).
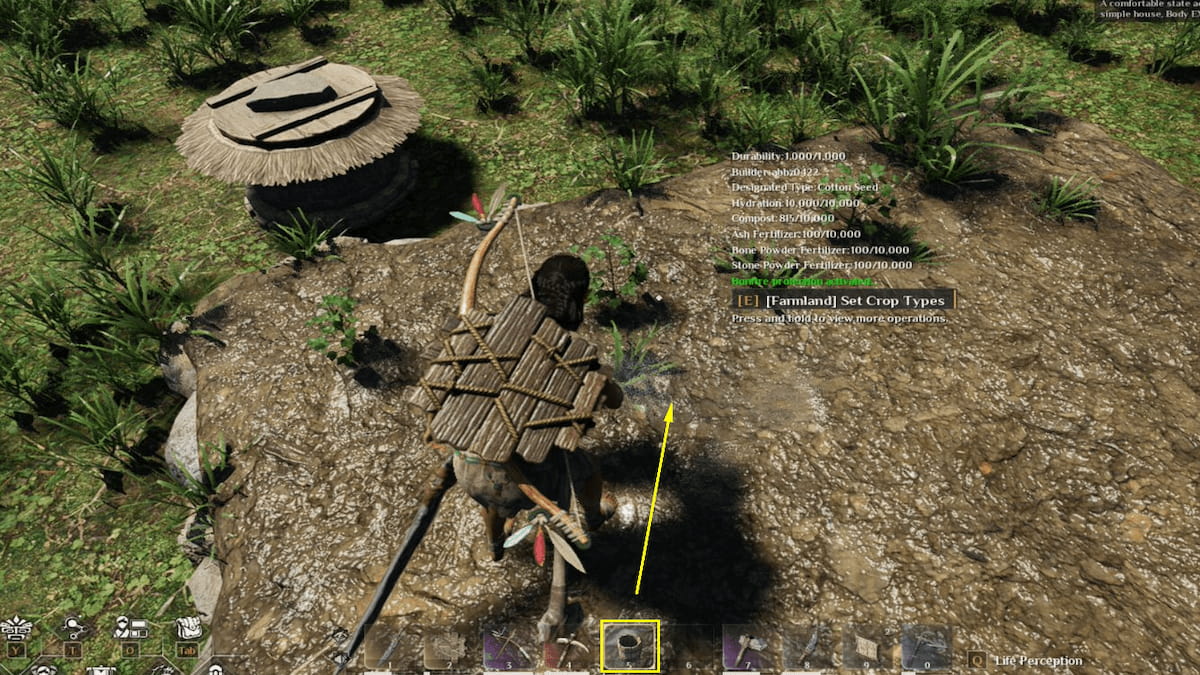
How to Make a Water Source
If you want a constant water source you can use right in the comfort of your camp, there are two options that work great: a Well or a Rainwater Collector. Both collect water as it rains and allow you to transfer it as you like or fill your Water Bottle. The Rain Collector doesn’t have quite as much water as the Well but still serves its purpose.
Here’s what you need to make them:
| Water Source | Materials | Crafting Station |
|---|---|---|
| Well | Thatch x19 Clay x19 Thin Rope x10 Optional: Log or Hardwood x10 | Inventory |
| Rainwater Collector | Clay x20 Ceramic Mold x2 Wooden Handle x8 Thick Rope x5 | Potting Table |
Once you have one of these water sources placed at your camp and containers to transfer or drink from, you’ll never have to worry about thirst again. If your water source is getting low on water, just wait for some rain, or take a trip to the nearest river and transfer some water with your bucket or tank.
Want more helpful tips like this? Check out GameSkinny’s Soulmask guides hub!


Published: Jun 5, 2024 04:06 pm