
If you’re not happy with the official servers in Soulmask, then it’s time to set up your own dedicated server for the game, where you can create the best possible environment for yourself and your friends. In this guide, I’ll explain how to set up a private server in Soulmask, including a list of all startup parameters.
Soulmask: How to Set Up a Private Server
Step 1: Install Steam Console Client
The Soulmask dedicated servers run on Steam Console Client, also known as SteamCMD. That’s why you need to install the official server client once you’re able to purchase hosting on either ClawCloud or G-Portal:
- Download SteamCMD for Windows.
- Create a “SteamCMD” folder on the root of the C:\ drive of your server.
- Extract the contents of the zip file and put them in that folder.
- Run a command prompt on your server.
- Use the following command to locate your path to steamcmd.exe: cd C:\steamcmd
- Use this command to download the dedicated server: C:\steamcmd +login anonymous +app_update 3017310 validate +quit
Once the download and installation are over, you should receive the “Success!” message in your command prompt.
Step 2: Start and Customize Server Settings
Before customizing the server, you need to launch it by executing the “StartServer.bat” file, which can be found at the following path:
- C:\steamcmd\steamapps\common\Soulmask Dedicated Server For Windows\StartServer.bat
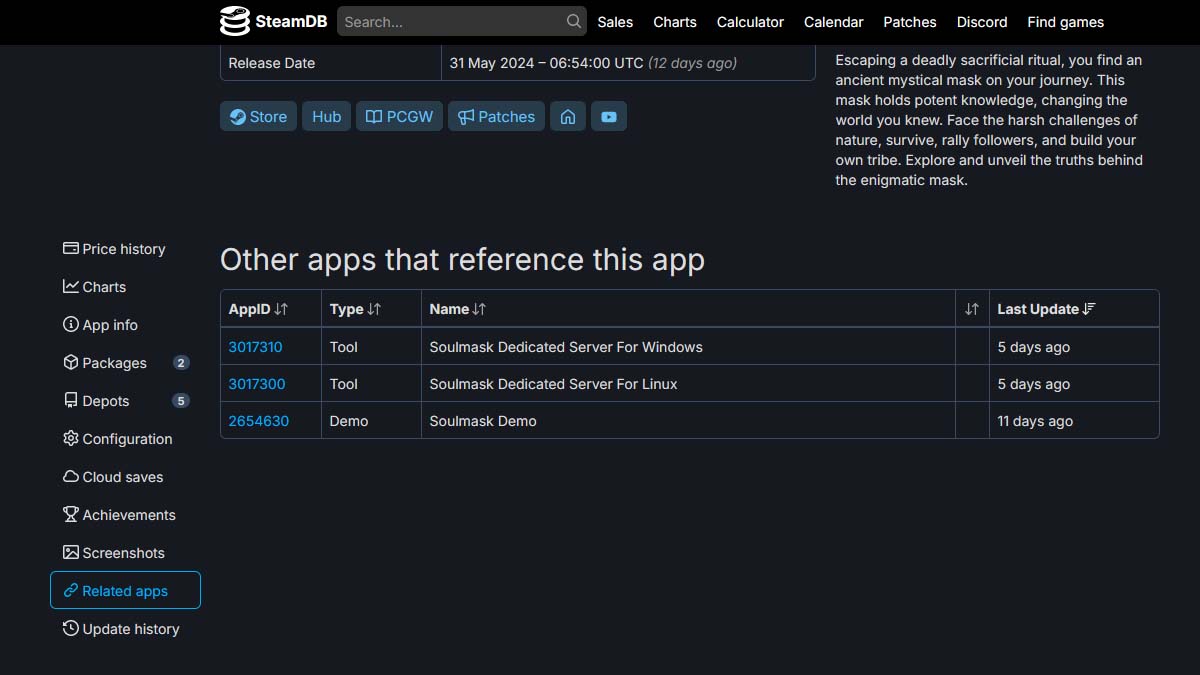
Now, when the server’s running, you can start customizing it. Note that you can find all the necessary configuration data on the SteamDB page of Soulmask, as shown above. But I suggest you simply follow these steps to configure your server:
- Make a backup copy of the “StartServer.bat” file so you can safely edit the original.
- Enter the command in the prompt: call StartServer.bat
- Customize the following features:
- Setting the server name: -SteamServerName=”your server name”
- Setting the max players on the server: -MaxPlayers=50
- Server password: -PSW=”yourpassword”
- Enable GM access password: -adminpsw=”yourGMpassword”
- Setting to PVP mode: -pvp
- Setting to PVE mode: -pve
Once you run the server again, it’ll start with the new settings. You can also use the following additional parameters for deeper server customization:
| Command | Effects |
|---|---|
| -log | Turns on game console output. |
| -backup | Specifies the interval for writing the game database to disk (in seconds). |
| -saving | Specifies the interval for writing game objects to the database (in seconds). |
| -MULTIHOME | Specifies the local listening address. Use 0.0.0.0 or the local network card address. |
| -Port | Specifies the game port, UDP, needs to be open to the public. |
| -QueryPort | Specifies the Steam query port UDP, which needs to be open to the public. |
| -EchoPort | Maintenance port, used for local telnet server maintenance. |
| -initbackup | Backs up game saves when the game starts. |
| -backupinterval | Specifies how often (in minutes) to automatically back up the world save. |
Step 3: Saving Data and Shutting Down Server
Before shutting down your server, it’s important to manually save all the data, which can be found at the following location:
- /WindowsServer/WS/Saved/
When that’s done, here’s how to shut down the server when needed:
- Type in the following command in the prompt: telnet 127.0.0.1 18888
- Once you’ve connected to the Telnet server, you can shut it down.
- Type in the shut-down command: quit 180
That’s all I wanted to tell you about setting up a private server in Soulmask. Stay tuned for more Soulmask tips and tricks articles right here.


Published: Jun 12, 2024 11:27 am