Stardew Valley is fun with mods, but if you’re like me, you’ll want to enjoy them with the best new features in the 1.6 update. Keeping your mods up-to-date offers the best of both worlds. Here’s how to update your Stardew Valley mods for update 1.6.
How to Update Stardew Valley Mods
As Stardew Valley grows and receives further updates, mods can become outdated. Unfortunately, this means some of them might not continue working with the latest version of the game. It’s up to the modders to provide fresh versions of their mods that are compatible with the latest game update. However, players must also ensure to update mods as they become available.
How to Check for Outdated Mods
If you aren’t sure if your mods are outdated, there’s a way for you to check. Most mods use SMAPI, a unique mod platform that allows you to boot up the game with your mods. When you open the game with SMAPI via your Program Files, a black control panel will pop up on your screen. Look within this box to see all the mods loading into the game.
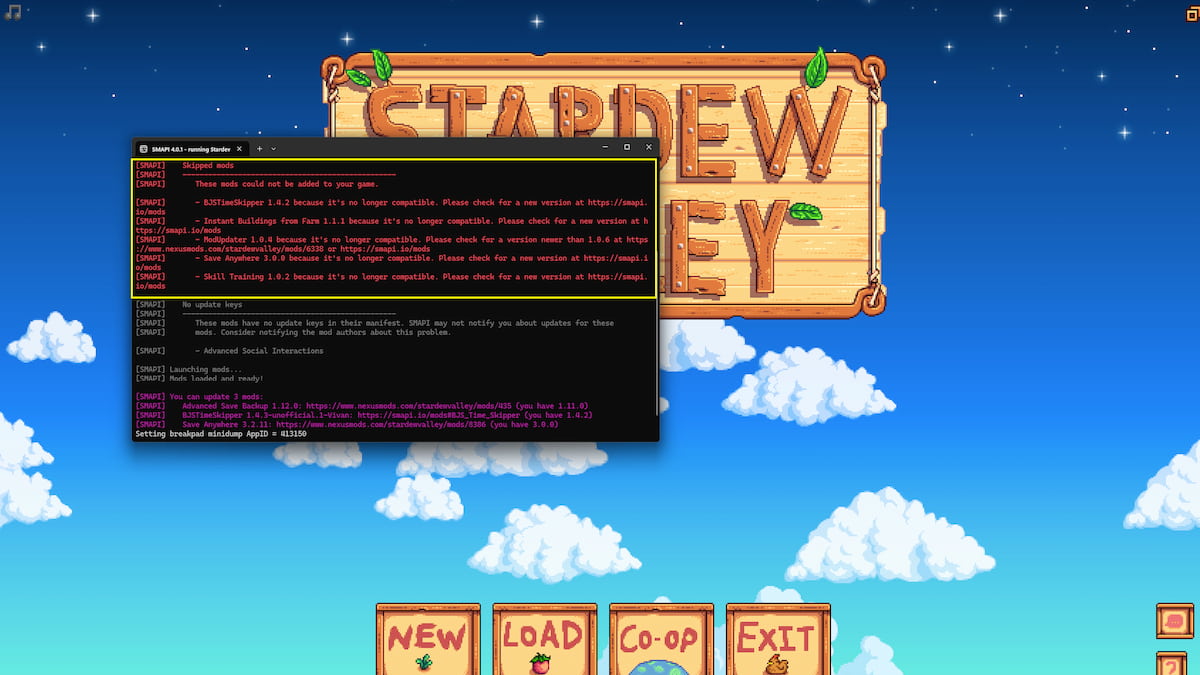
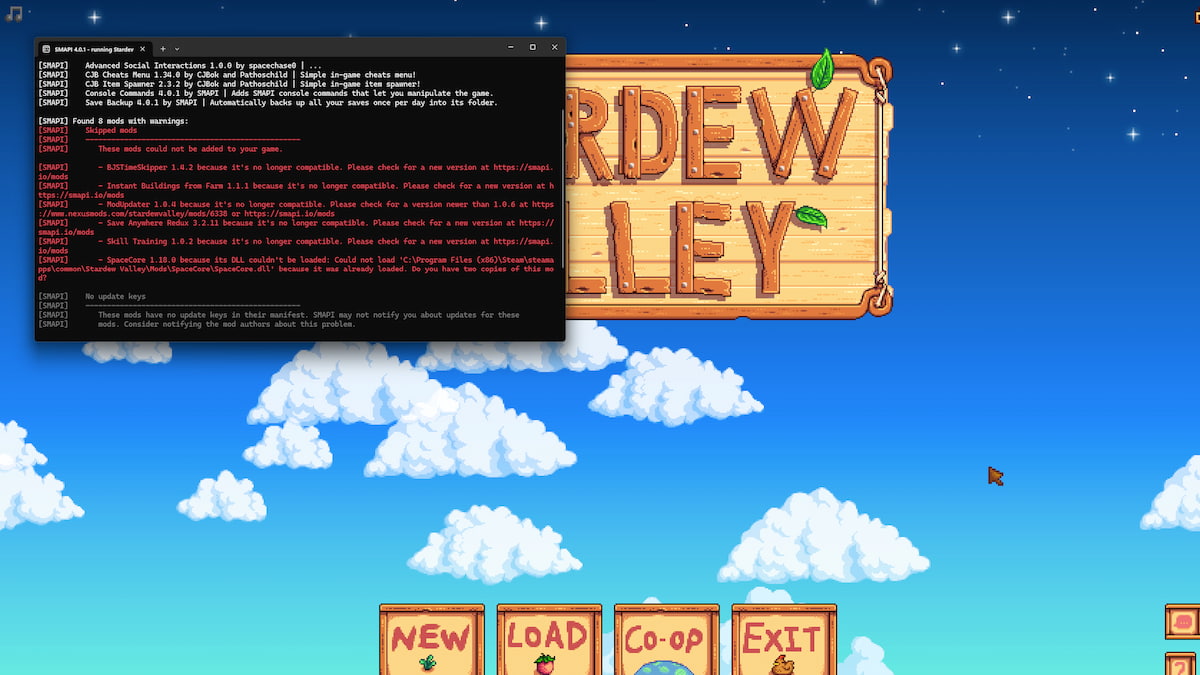
Mods in white text are ones that successfully load and will work correctly. If mods don’t successfully load, they will appear in red text under the “Skipped mods” title. This red text also tells you if the mods are no longer compatible.
You can also use the Mod Updater mod, which occasionally tells you within the SMAPI control panel if a newer version of the mod is available by displaying purple text underneath the red text.
How to Download Mod Updates
By knowing which mods are outdated, you can check for newer versions and update them accordingly. To find updates for your mods, you can head to the site you previously downloaded from, such as NexusMods or CurseForge. Then, search the exact title of the mod you want to update.
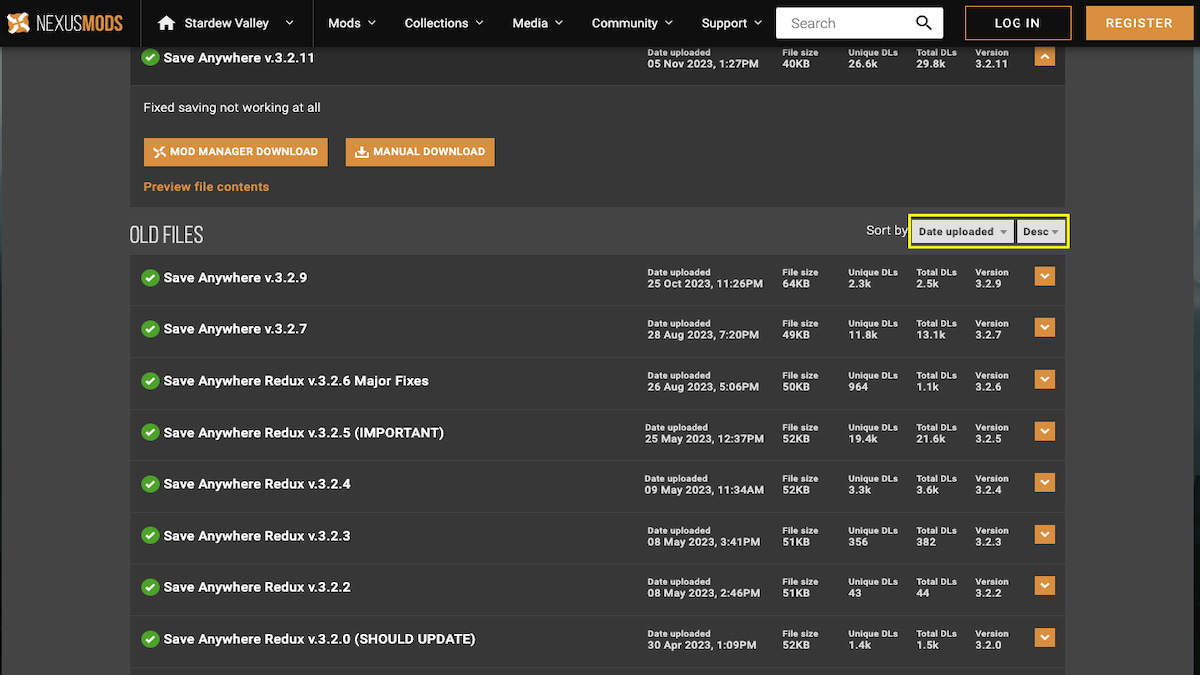
On that mod page, switch over to the Files tab. Here, you’ll want to sort all the files by Date and Descending order. This will bring the most recent file added to the site to the very top. You’ll want to download the newest file available (if it happens to be the one you already have, then the modder hasn’t yet recreated an updated version).
How to Replace Mod Files with Updated Files
Now that you’ve downloaded the fresh files, you can work on updating the ones you already have installed. First, open your Stardew Valley Mods folder. Open your Files or Finder and then navigate these files: This PC—Program Files (x86)—Steam—steamapps—common—Stardew Valley—Mods.
All your Mods should be right in this folder. The easy way to update the files for a mod is to delete the whole mod file. For example, I want to update my Save Anywhere mod. I can delete the Save Anywhere folder from my Mods folder and then drag over the fresh folder I downloaded to replace it. This works perfectly, but if you don’t want to delete anything, you can replace the files instead of the folder.
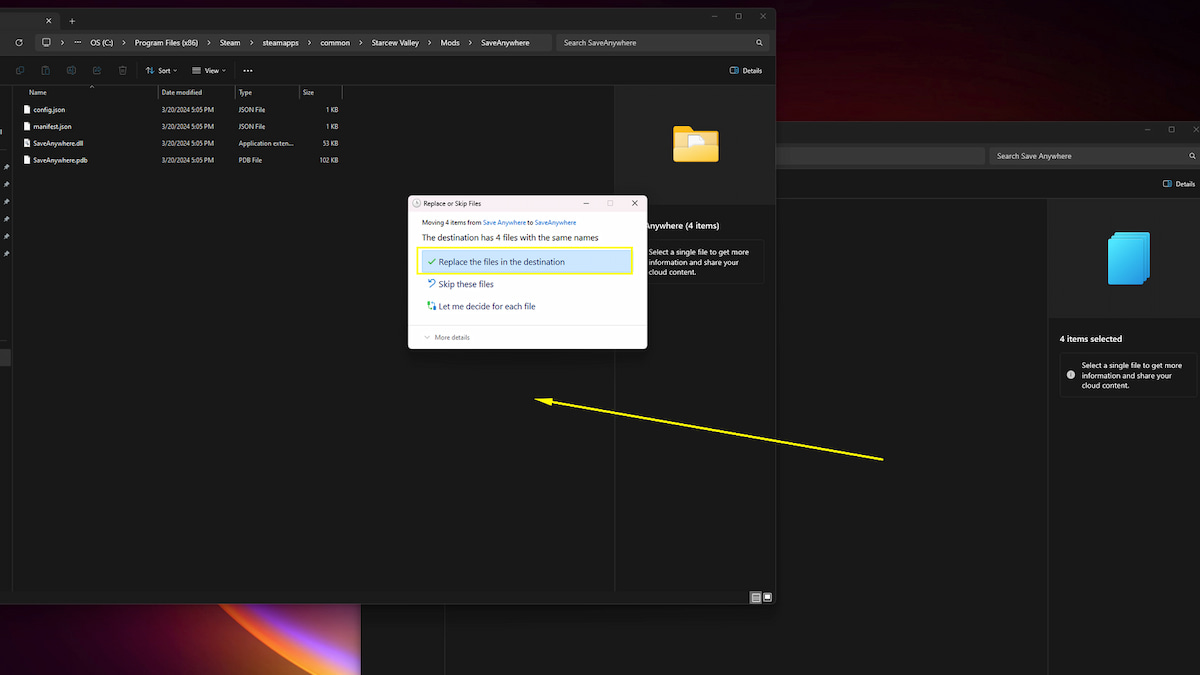
Rather than delete the folder, open the mod folder. Inside, you’ll see the files required to make the mod work. Open the new folder you just downloaded, keeping them open side by side. Then, drag over all the files from the new to the old folder. It should prompt you to “Replace the files in this destination” or some similar statement. Doing this will overwrite all the old files with the updated versions. Ta-da! Your mod should now be up to date.
After the new files are in place, restart your game and see if they are listed within the properly loaded mods! Your mods will work with update 1.6 if updated in March 2024 or later (in some cases, older mods can also work with 1.6, but you’ll need to test it out). If your mod doesn’t have a new version yet, you may have to wait a bit for the modder to provide one, or you could even try contacting them and asking if they plan to release one soon.
Keep checking your SMAPI for any mods that have fallen out of date so you can continue to enjoy all your mods with the new update! Want some more update 1.6 tips? Stay tuned to GameSkinny’s Stardew Valley guides hub and check out Update 1.6’s New Crops (& How to Get Them)!



Published: Mar 21, 2024 12:59 pm