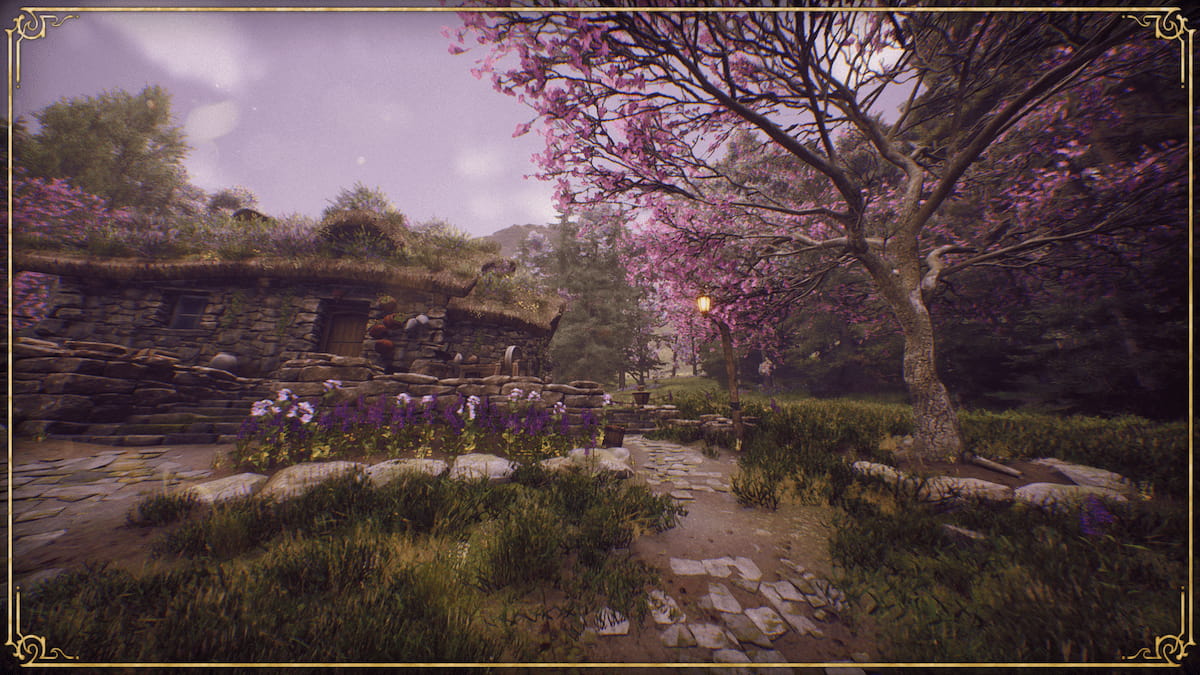
Hogwarts Legacy has always been one of my favorite games visually, with some of the best graphics and iconic landscapes. Thankfully, now we can capture all our favorite moments with Photo Mode. Not sure where to get started? Here are some tips and tricks for the best photos.
Hogwarts Legacy Photo Mode Guide — How to Take the Best Pictures
If you come across a particularly gorgeous landscape or witness a heartfelt moment you want to capture forever, then photo mode is definitely the way to do it. Not only can you adjust the lighting and give it a filter, but you can change the time of day and the season, make your character pose, and even hide other characters you don’t want to show.
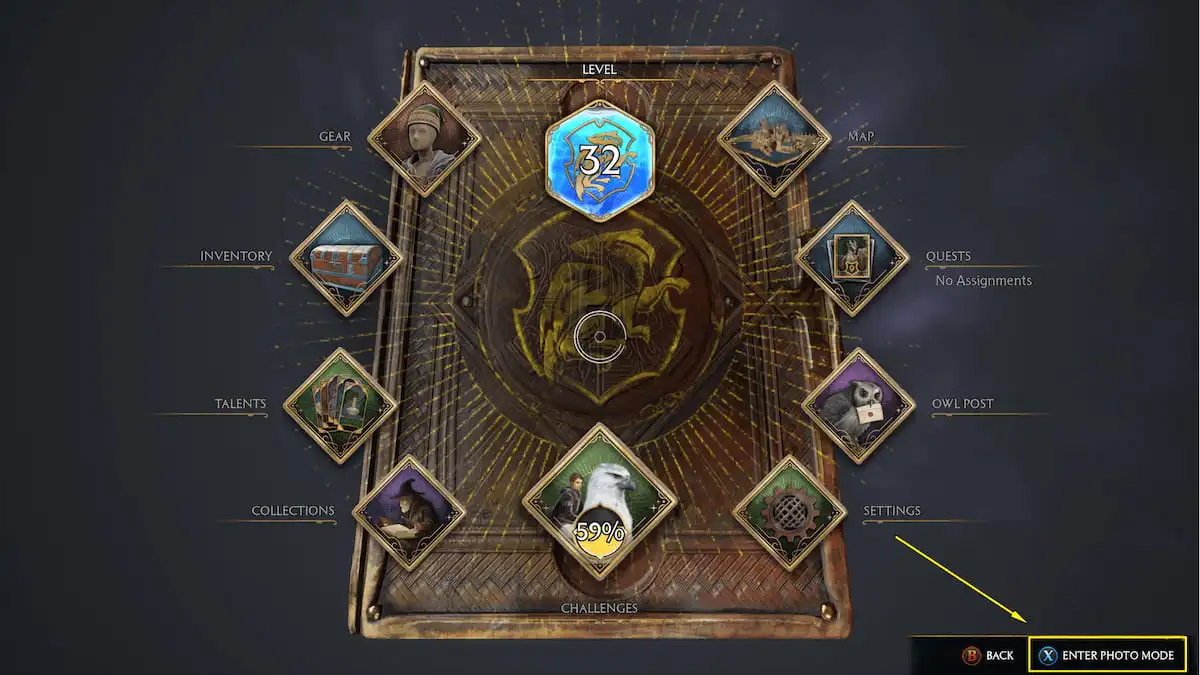
You’ll need to progress through the main tutorial and unlock your Field Guide to unlock the option to use Photo Mode. Once you do, you can open Photo Mode any time you like. Just open your Field Guide, and you’ll see the option to “Enter Photo Mode” on the bottom right (the controls will differ depending on what platform you use).
Once you enter Photo Mode, you can start getting creative. Of course, beforehand, you’ll want to change your character’s gear appearance and put them in their best ensemble. Then, here are some tips on how to take the best picture.
How to Adjust Camera Angle
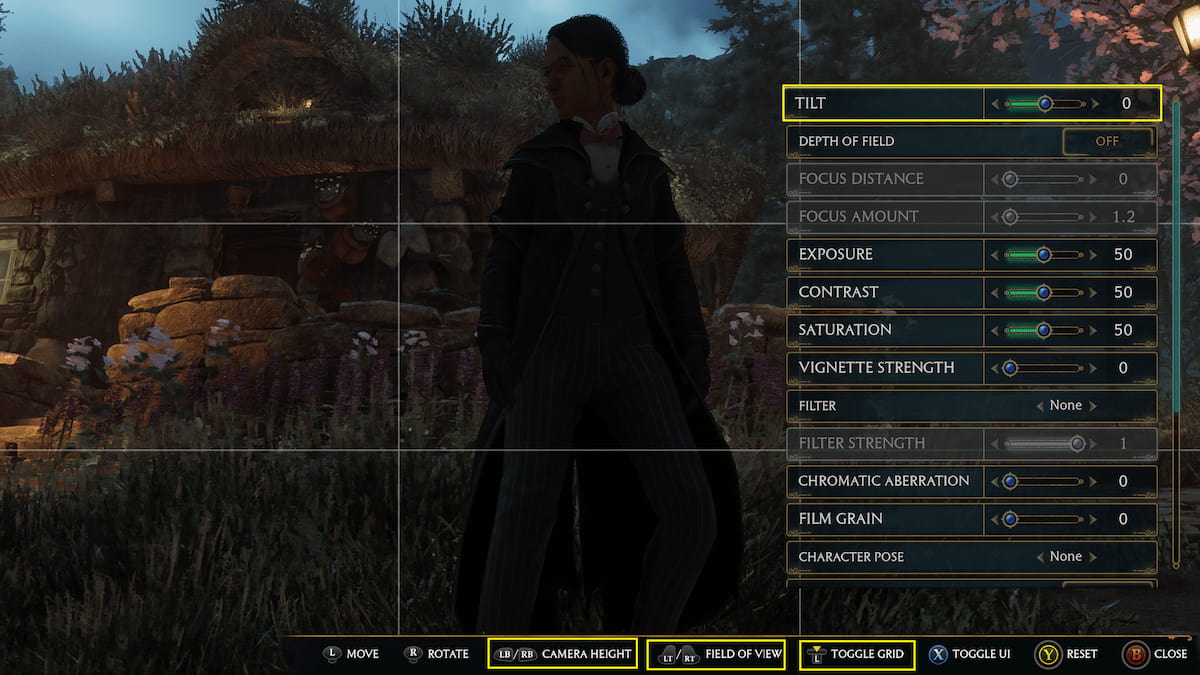
Move the camera to the position you want using LB/RB, L1/R1 and L-Stick/R-Stick, or WASD and your mouse. If you’re unsure what angle to get, try toggling the grid. This puts lines up on the screen so you can center the character or object you’re taking a picture of.
The general rule of thumb is to line it up so the top of the object (your character’s head) is in the top center box. You may have to zoom in and out using LT/RT, L2/R2, or the mouse scroll wheel to fill the boxes appropriately. If you’re going for a particularly dramatic angle for your image, you can even throw in some tilt to the image, by adjusting the meter at the top of the list.
How to Blur the Background
If you want the sole focus of the picture to be on your character or object, you can adjust the settings to blur out the background. To do this, you’ll want to turn Depth of Field on.
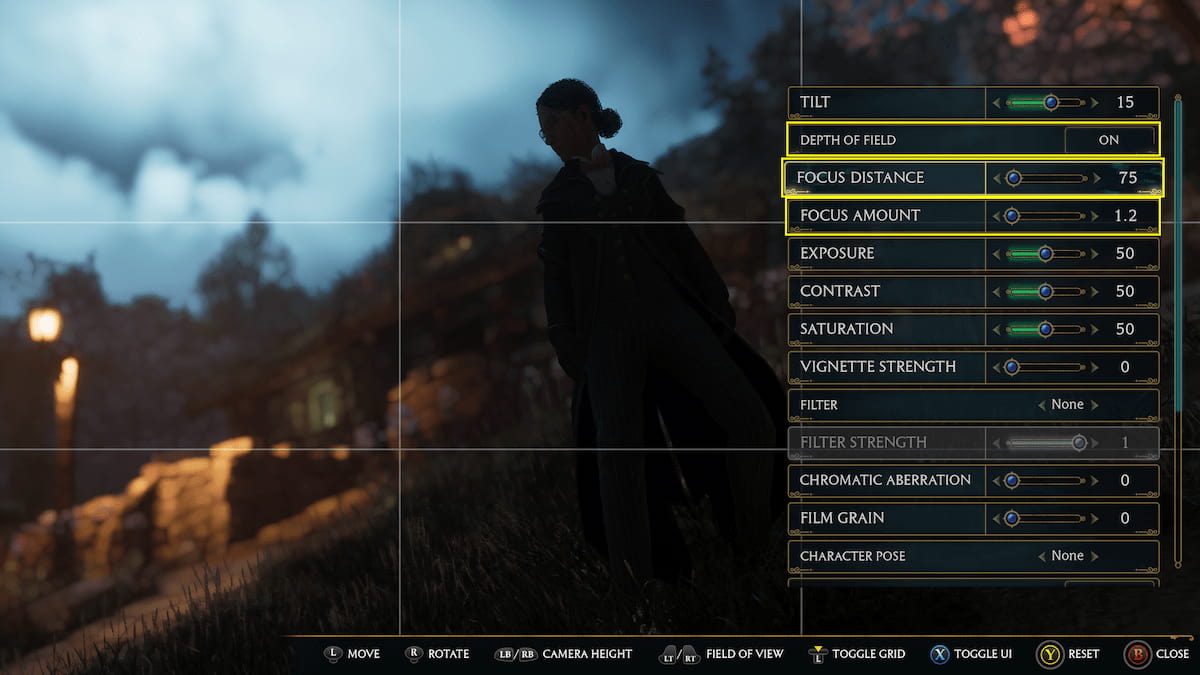
Immediately when turning on Depth of Field, your character may turn completely blurry. To fix this, you’ll want to adjust the Focus Distance and Focus Amount to the proper amounts. Start the Focus Distance at 0 and then slowly move it up until you get the focus object clear and everything else blurry. You can adjust the Focus Amount to determine how blurry it is.
If the background is blurred how you want it, but there’s still an extra character you don’t want there, you can use the Hide NPCs option toward the bottom of the options list. This will hide all characters except for your main character. You can even hide your own character if you want just a shot of the scenery by selecting the Hide Character option.
How to Adjust the Lighting
There are a lot of dark spaces around Hogwarts and its surrounding environments. If the lighting is ruining your perfect picture, then you can adjust it by messing with the photo settings a bit. The Exposure and Contrast options will affect the lighting by making the whites lighter and the blacks darker, allowing you to raise or lower to get rid of or create some shadows. However, the very best setting that always seems to brighten things up for me is the Time of Day.
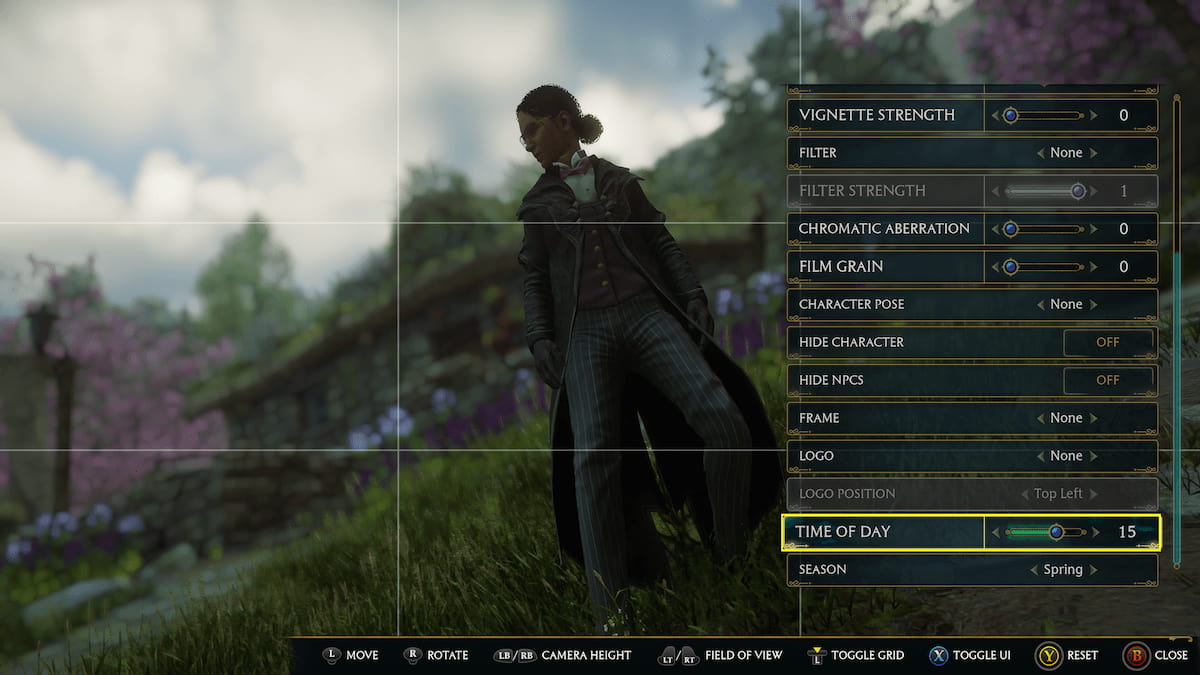
You can adjust what time it is (just for photo mode) so you can make it lighter or darker. I found the best times to be between 10 and 15, especially if you’re taking photos outdoors. This way, the sun is high enough in the sky to give you the light you need and make the setting look more dazzling.
How to Change the Photo Background
Although you can’t actually change the background of your image, except by physically moving your character there or rotating the camera to face a different direction, there are some ways to add to it. You can add a Frame and adjust the Season.
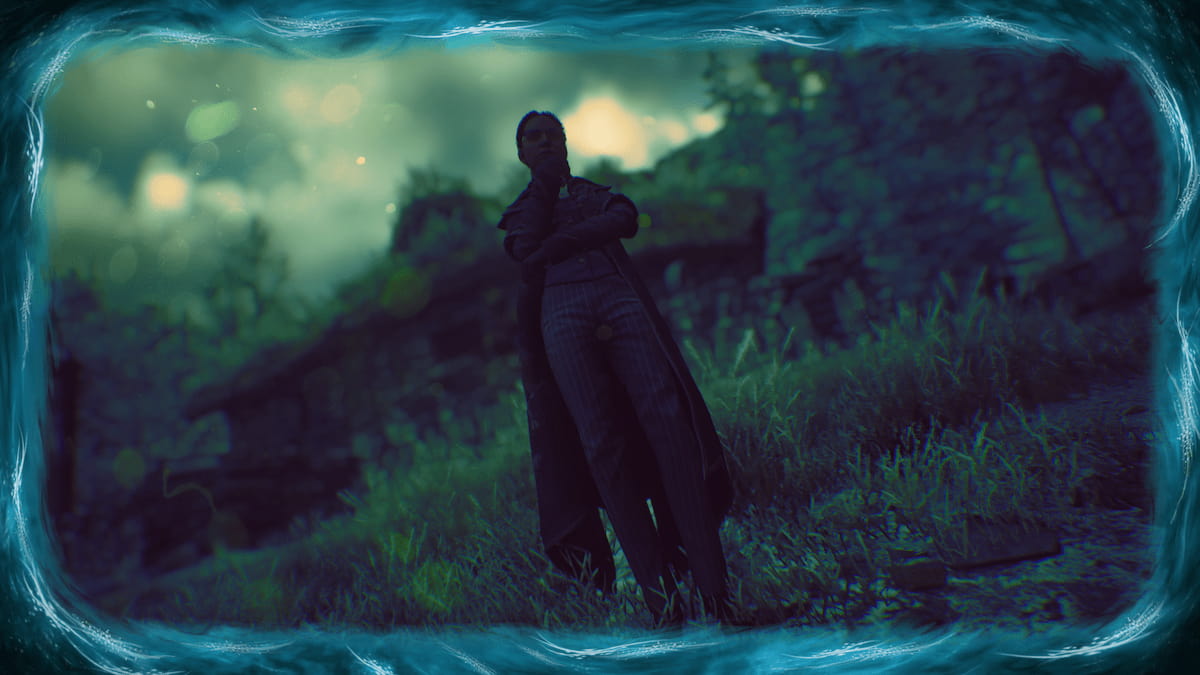
There are plenty of frames you can add to your picture, minimizing the background space by adding edges to your picture. You can make them simple cropped letterbox edges or make it something fun like looking into the Pensieve.
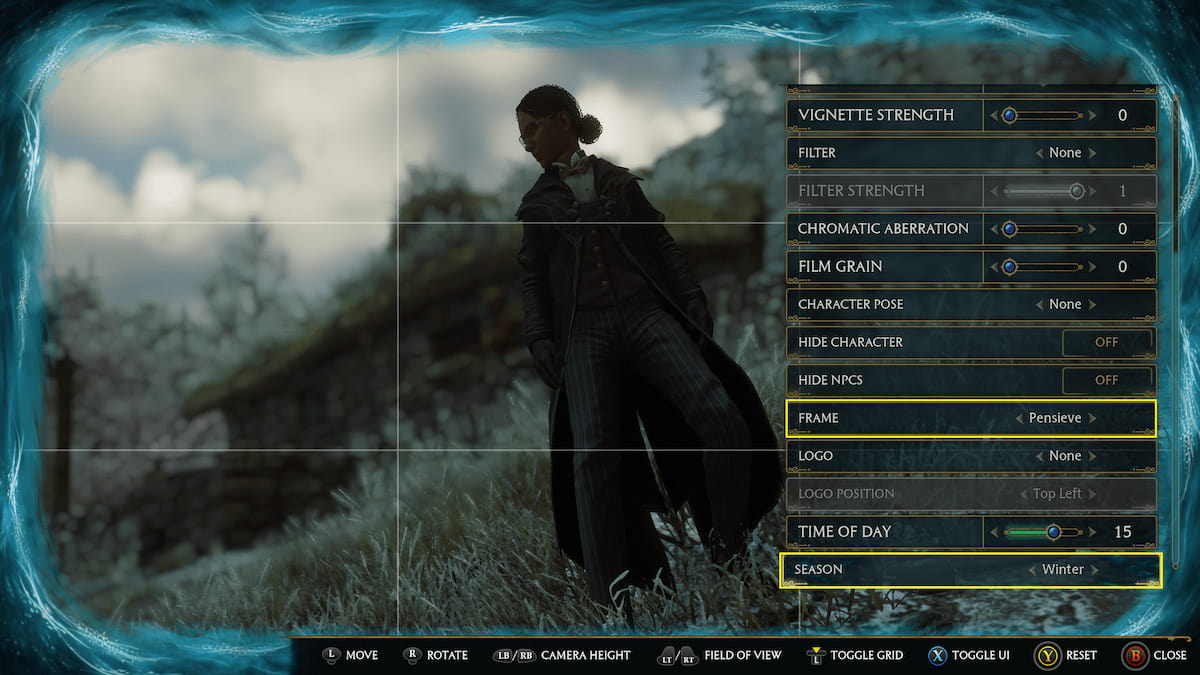
Another way to add to your background is by adjusting the Season. The Season option is just below the Time of Day, and you can filter through it to all four seasons: Spring, Summer, Autumn, and Winter. Doing so will affect your surroundings. Winter, for example, will place snow around the area.
How to Add Flair to Photos
Before you move on to the last step, you can add your own personal flair to your pictures. This is done by adding in a funky filter, pasting on a logo, and making your character hit the right pose.
There are lots of different filters to choose from that will completely change the vibe of the image. They change the texture and color balances of the image and set a particular mood. If you’re going for dark, evil character energy, you may want to try Slytherin or Deathly Hallows. You can adjust how saturated the filter is with the Filter Strength meter below the Filter option.
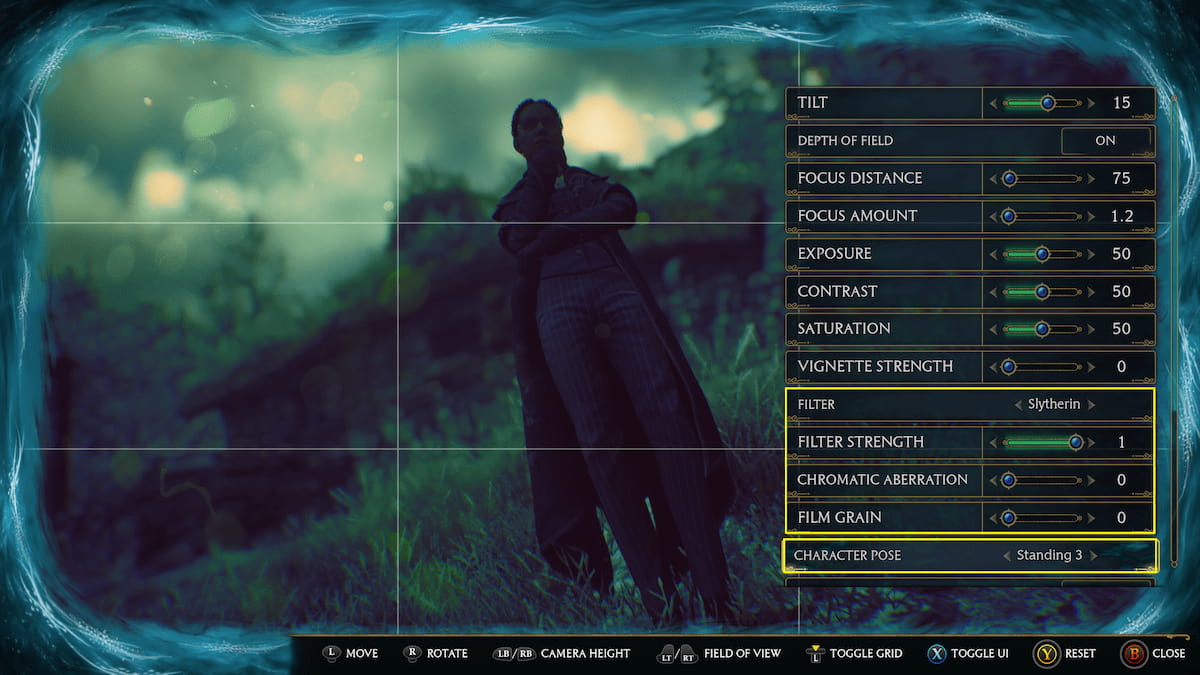
Character poses are definitely one of the best parts of Photo Mode. While your character may be looking good in their current action, if not, you can change their stance to make the photo even more dramatic. Make your character lounge among the grass and flowers, lunge forward amid a battle, or ponder quietly.
How to Capture a Photo
Lastly, we get to the very final step of the process, which is actually capturing the image. While it may seem like the most self-explanatory step, you may still be wondering the best way to go about it. First, you’ll want to ensure you Toggle UI off (along with the Grid back off). This will hide all the options on your screen and give you a clear view of your photo without any other menus in the way.
Now that your image is ready, you can take it. There’s no actual capture button in the Photo Mode; instead, you’ll press the screenshot button on your platform, such as the PrtSc button on your keyboard or the capture button on your Xbox controller. Then, it will save it directly to your console or PC.
Ta-da! You have the perfect image to look back on and reminisce on your magical adventure. If you want to restart and take a different type of image, hold the Reset button. This will clear out all the filters, frames, and other settings and give you a fresh start so you can add more to your collection!
Want more helpful tips like this? Check out GameSkinny’s Hogwarts Legacy guides hub.


Published: Jun 6, 2024 6:04 PM UTC