A Catalyzing Caper begins as soon as you gain access to the Temple of the Flames in Palia after completing Plumehound Pilgrimage. The next step after following Tau to the ruins’ location is to make your way through the temple to, once again, find him. This is how to complete A Catalyzing Caper in Palia.
How to Complete A Catalyzing Caper in Palia
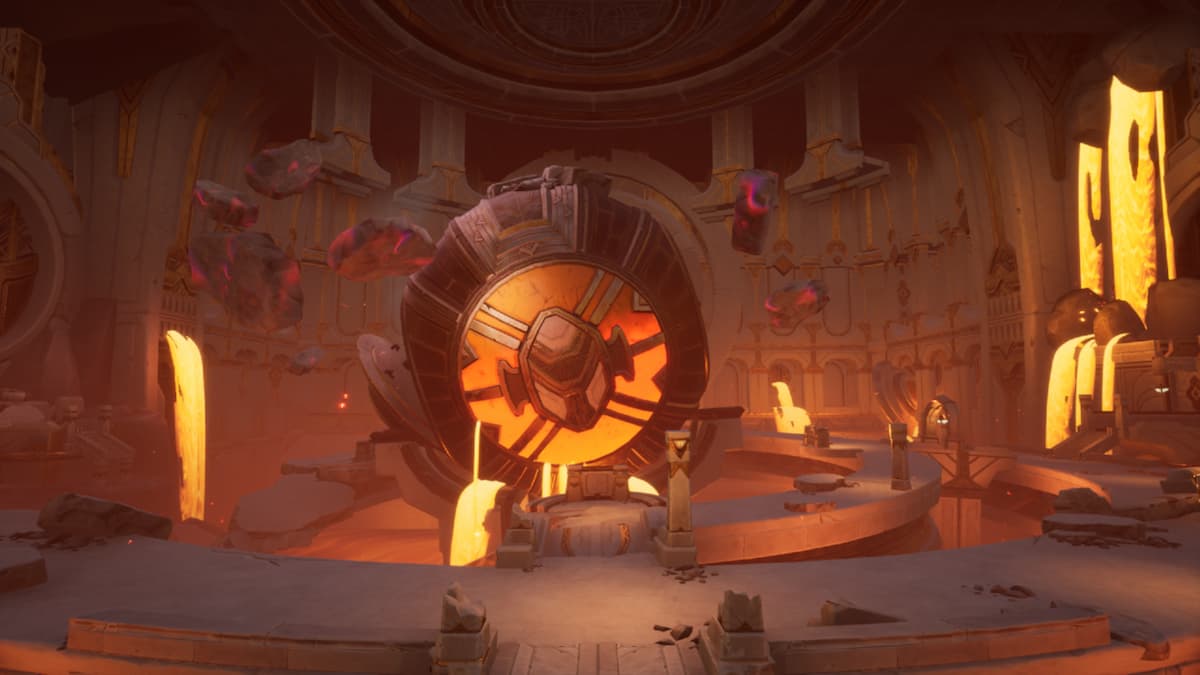
With a charged ancient battery in hand and the hunting duo accompanying you, make your way to the Temple of the Flames in the Flooded Fortress ruins. You’re greeted with a fire-lit area and an ancient tablet.
The ruins, an ancient human Flow Generator or refinery, were changed on the king’s orders from a simple factory to something more puzzling. Hassian and Sifuu wait inside, but Tau is nowhere to be found. He has bounded off ahead and is now separated by a locked Flame door.
- Bridge Puzzle
- Mysterious Chamber
- Navigate the Maze
- Kitsuu’s Revival Puzzle
- Sliding Kitsuu Puzzle Solution
Bridge Puzzle
The door is across a bridge, lit by six hanging braziers. The words on the door read:
“Firing a shot shall light the way, you simply need the order engraved. Above the gaze of your burning eye, the code to entry you shall find.”
If you read the ancient tablet, you’ll know that the king had an eye placed above the door to watch for intruders. Looking up to where the eye is, you’ll notice there’s a symbol on each row holding the braziers.
Shoot an arrow at the brazier with the symbol that matches the one shown. A fire will light in the brazier when you’ve chosen correctly. Once all three are lit, the door will unlock.

Mysterious Chamber
The next room is filled with flowing magma, as well as what appears to be blank murals around the center. Following the path, take the first staircase to the right. If you head all the way to the left, you’ll find a treasure chest. Ultimately, you want to enter the mysterious chamber to continue solving the ruins.
There, Hassian waits next to a Phoenix statue. The riddle on it reads:
“A tale like a maze, now hidden away, waits to be brought into the light of flame.”
Sifuu is also in the room, staring at a mural. It depicts a Galdur, not too dissimilar from Einar in design, and a Kitsuu. She recalls a story she used to tell Hassian but can’t quite remember how it goes. She also gives you an unlit torch, just what any well-prepped monster hunter would bring on an adventure.
You want to light the torch using the brazier off to the left of the mural. Once lit, use the flame to light the sconce to the left of the mural. This reveals a hidden room, filled with a maze, behind the mural.
Navigate the Maze
Navigating the first maze of the Catalyzing Caper quet in Palia isn’t extremely difficult. The hardest part is having to find another flame to light the torch. Each time you use it, it burns out. The paths on either side of the maze will take you farther into, as well as let you quickly return to the beginning.
You’ll want to note that you there are multiple climbable areas in the maze. These appear like grates, similar to the metalwork you can climb to reach some treasure chests in Bahari Bay. There’s another ancient tablet in the maze that may interest those who love Palia lore.
To reach the first flame:
- Go down the right metal path
- Follow it until you reach a fork
- Continue forward to another metal path, this one leading right
- Light the torch
To reach the next mural from the flame:
- Turn around, then take the path to the left
- Climb the metal trellises until you reach the top
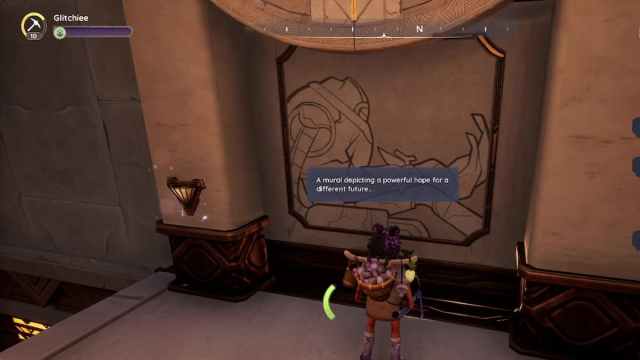
This mural depicts the Galdur getting struck by a Kitsuu’s horns, with something shattering on the Galdur’s body. Light the sconce, and a new room with another maze will appear.
Unlike the previous room, where there was an entry area before the maze started, you’ll instantly be in it here. Heading to the right will bring you to a treasure chest. Taking the path to the left leaves you with a dead end and the way forward to your right. The dead end has a room that contains an ancient tablet, but it’s blocked by a rock that can be broken with the Fine Pickaxe.
Upon leaving the room, head straight down the metal path, then to the right. Take your first left, then left again to reach the burning brazier. If you continue down the path where the brazier is, you’ll find a small climb spot with a chest behind it.
Return to the center of the maze, then head to the right until you find a climbing trellis. Head upwards to reach the sconce and the mural. This one depicts the broken Galdur and Kitsuu snuggling.
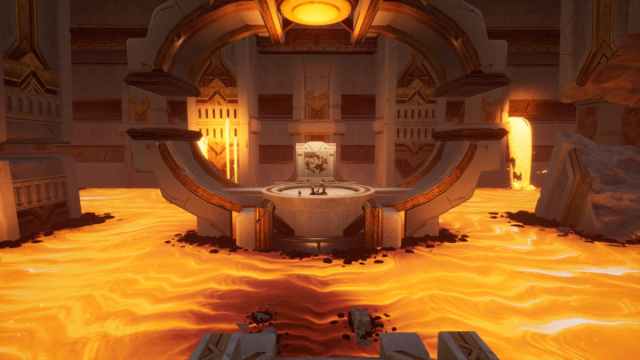
Room three doesn’t have a maze but rather an obstacle course above a pond of magma. Just like water if you land in it, you’ll respawn at your most recent location. A treasure chest is on a ramp to your right, while the way forward is to glide to the righthand ramp.
To get to the left ramp, you can either jump to it or climb across using the metal grate. Repeat the process, then jump across the columns. On the other side, you’ll need to climb up one floor to find the brazier and climb again to reach the mural, which depicts a happy ending. Unlike the previous rooms, you want to light the bowl in the center of the room.
Return to where Sifuu and Hassian wait where the Phoenix statue is. I just glided down all the rooms until I reached them. You need to speak with Hassian to learn that something happened in the room before. Those stones now contain the murals of the story, Kitsuu’s Revival, with each one associated with a symbol. Hassian stands in front of a locked door, unable to go further.
Kitsuu’s Revival Puzzle
To solve this puzzle, you need to shoot the symbols in the correct order of the story. The targets are to the left and right of the locked door.
- Leftmost symbol
- Second symbol from the right
- Rightmost symbol
- Second symbol from the left
Head into the room next to find another Phoenix statue.
“Our trust can only be passed to those who return it. Take a leap into the unknown and earn it.”
On a platform across a chasm is Tau, along with a Kitsuu. It appears that’s what has been causing Tau to leave Hassian. Launch yourself and glide over to the platform. Don’t worry, there’s an invisible floor to walk on when you fall short. By the time you make it over to Tau, the Kitsuu will have fled.
Sliding Kitsuu Puzzle Solution
Just like in the Temple of Waves, there’s a sliding puzzle you need to complete. This one is of a Kitsuu, and the final image can be seen where it was previously sitting. To solve it, you want to:
- Move the block second from the left to the right.
- Move the top leftmost block right.
- Move the second row’s left block up.
- Move the second from the left block in the second row left.
- Move the second from the left block in the first row down.
- Move the second from the right block in the first row left.
- Move the rightmost on the first block left.
That’s how to complete A Catalyzing Caper in Palia. There are still more mysteries to be solved. In the meantime, if you need help with any quests, how to get all the recipes, and more, check out our guide hub. There are still more mysteries to be solved. In the meantime, if you need help with any quests, how to get all the recipes, and more, check out our guide hub.


Published: Sep 21, 2023 2:31 PM UTC