WWE 2k17 is finally here, and as is custom, there are plenty of… well, customization tools. The character creation options have been massively expanded from the previous year’s iteration, giving creative players the ability to fashion their own works of art.
But even the most finely crafted portrait still needs a face, which is why the face photo capture system makes a return. The technology is pretty impressive, allowing players to overlay a real-world photo onto a character to create recreations of real-world people, but it can be finicky at times. That’s why we’ve compiled this handy list of tips for WWE 2k17‘s face capture system, so that you can create accurate in-ring versions of your favorite people with ease.
Getting started
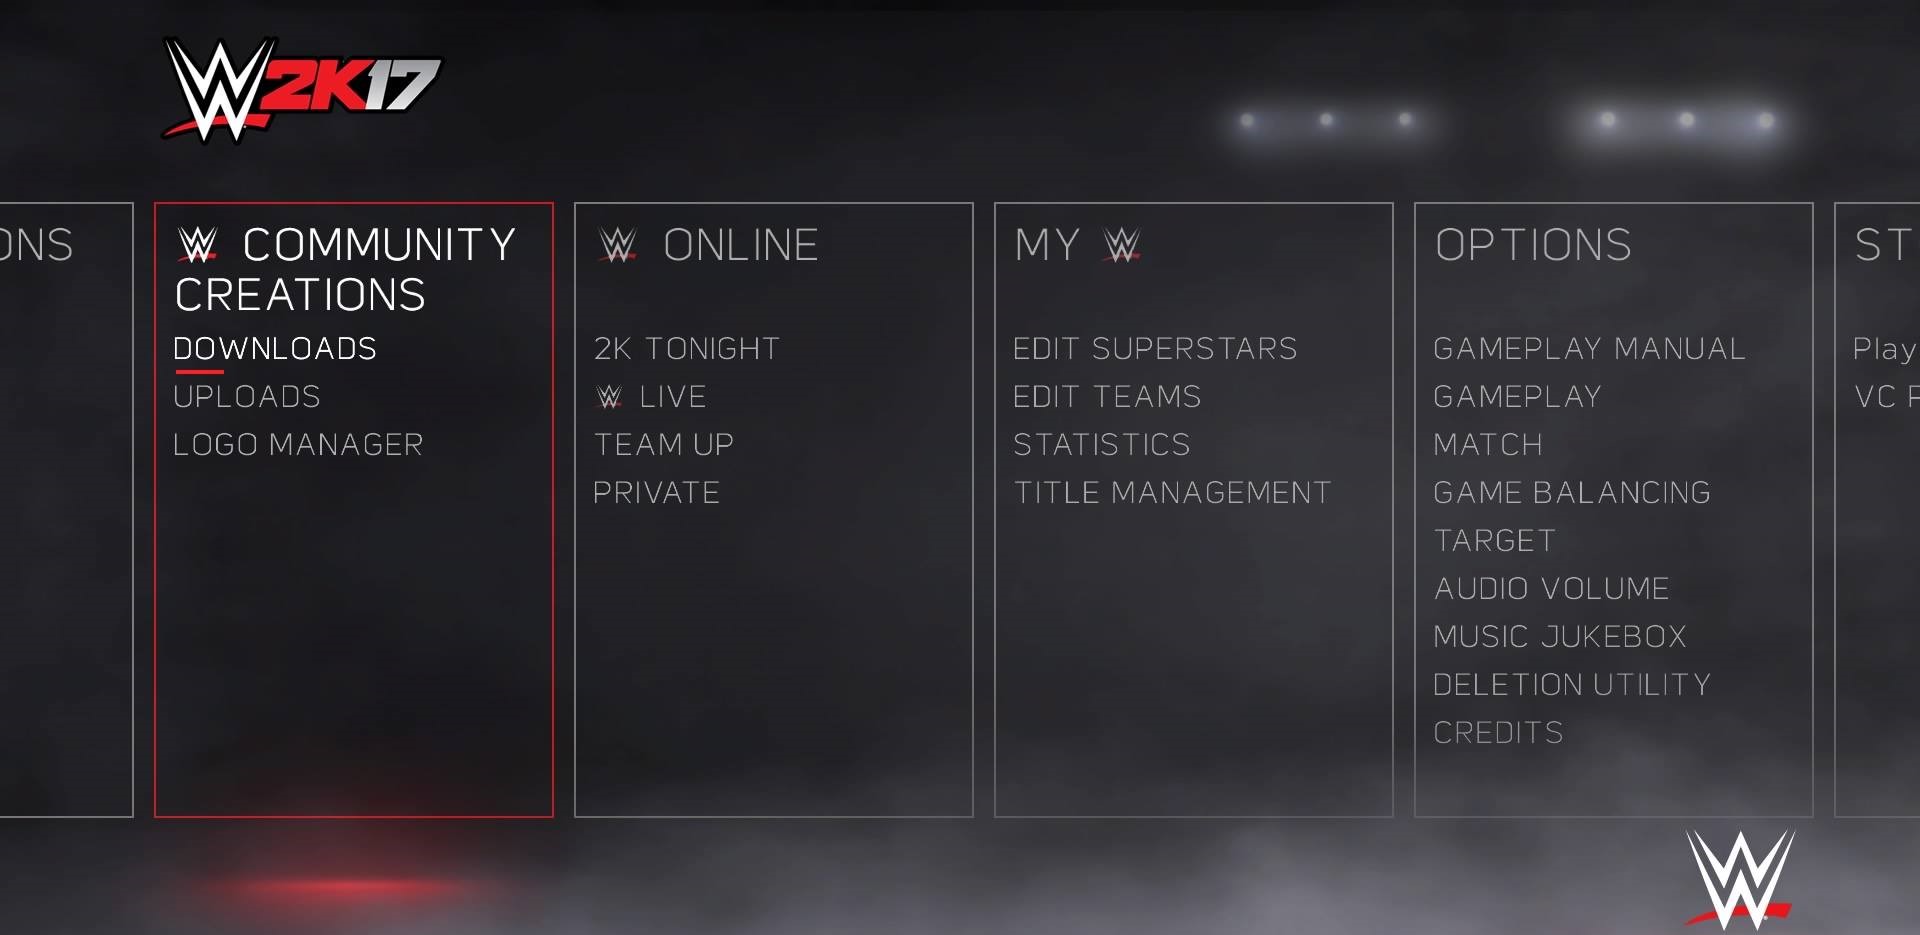
The first thing to note is that this year, there’s no mobile app for uploading face photos. It all happens online, through the WWE 2k17 logo uploader. Once you open up the page, it’ll ask for a code in order to connect it with your copy of WWE 2k17. Simply go to the logo manager in-game, request a code, and punch it into the site.
At that point, you can go hog wild uploading logos to use in game. One of the great things about the new logo uploader is that you can actually view and delete your images online as they are being uploaded, so you can check to see if everything went through all right.
Uploading images
If all you want to do is simply upload logos and images from the internet to paste on your wrestler’s t-shirt and around a custom arena, that’s pretty much all you need to know. Uploading those files should be pretty straightforward. Even downloaded face capture images should work pretty well without any extra effort on your part.
Issues will arise, however, when you want to use photos taken with a digital camera or from your phone. You’ll need to do a bit of extra legwork to make those photos play nice with WWE 2k17′s logo manager.
Photography Tips
If you’ve tried to upload a phone selfie to WWE 2k17‘s logo manager system, you’ve likely run into one of two issues: either your photo is warped or squished, or it’s rotated 90 degrees to the side. We’ll go over how to fix both of those problems here.
How to Fix a Rotated Photo
The root of this problem lies in embedded data hidden within photo files. A lot of these images have built in rotation data that tells computers, image editing software, and websites the way in which an image should be oriented. For some reason, the WWE 2k17 logo manager doesn’t play nice with this data, causing phone selfies to rotate when they’re uploaded. This can be fixed easily by holding your phone sideways when taking your selfie — either using the front-facing camera or having a friend take a picture of you using the rear-facing camera.
How to Fix a Squished or Warped Photo
Now that you’ve uploaded that photo, you’ve probably noticed that the image appears squished on the website. That’s because all WWE 2k17 face images are scaled to a 1:1 ratio. This means that wide or tall photos will be stretched, squished, and warped until they fit. But luckily this is an easy fix.
Simply open up the file in an image editor (most phones have built-in image editors as well, so now need to upload to your computer). Crop the photo to a 1:1 length-width ratio (so a square image). Make sure, however, that you leave ample space around your face so that you have room to maneuver it when you actually apply it to your character.
Downloading and Using Images
So you have a whole bunch of images in the WWE 2k17 server. Great! But how do you get them on your system and on your characters? The process is a lot simpler than it was last year, but if you’re used to WWE 2k16‘s system, you might be searching for your images for a bit. They’re not in uploads or downloads, they actually appear now in the Logo Manager tab, under the “incoming” heading. Download them from there, and you’ll be all good.
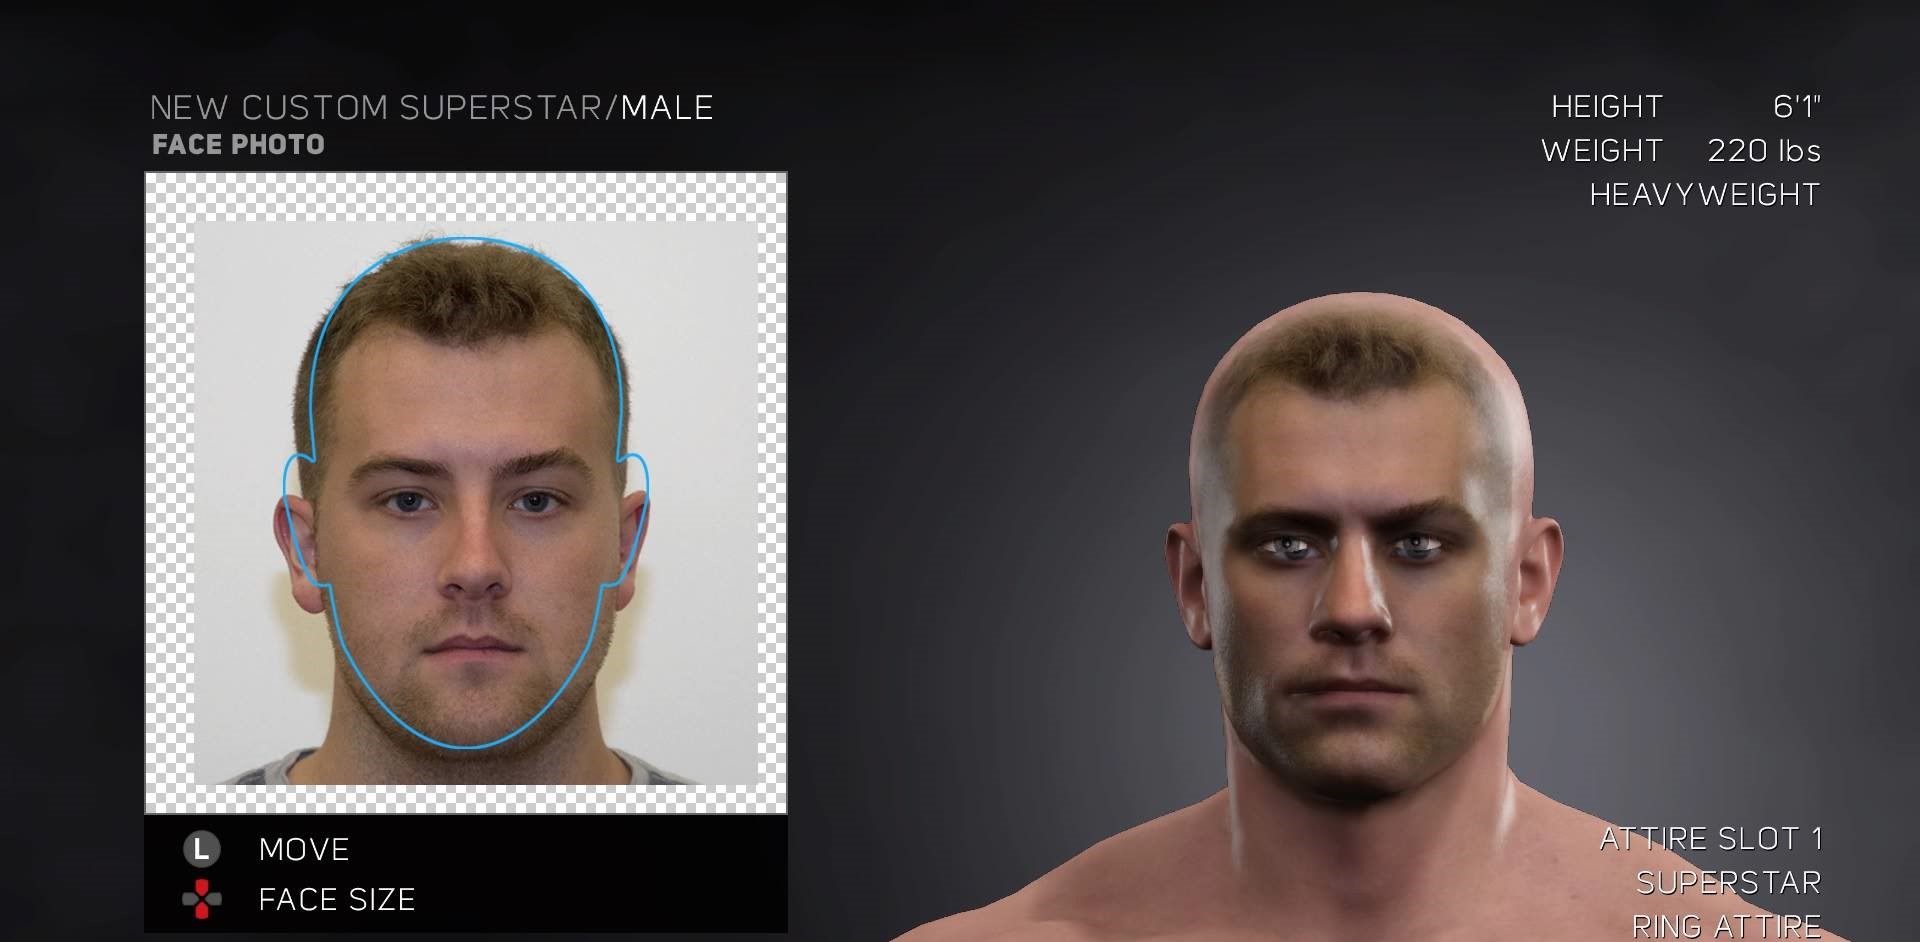
The next step is simply to open up the character creator and in the “face” menu, select the photo capture option. We recommend playing around with the sample faces in the game first, just to get to grips with how to overlay the photos on the face, and afterward, how to fine-tune the face shape and location of facial features.
Generally, you want to drill down in terms of specificity — for example, when you’re setting your face size, just make sure that your features are somewhat in the right place. You can fine-tune the size and position later, but if you try to do too much too early, you’ll end up with more of a Picasso face than a Rembrandt.
After that’s done, you’re all set! Follow the on-screen instructions, and you’ll be on your way.
How are you liking WWE 2k17 so far? Feel free to share your favorite screenshots or thoughts in the comments. In the meantime, we’ll be trying to recreate characters from Attack on Titan in the character creator.




Published: Oct 13, 2016 09:45 am