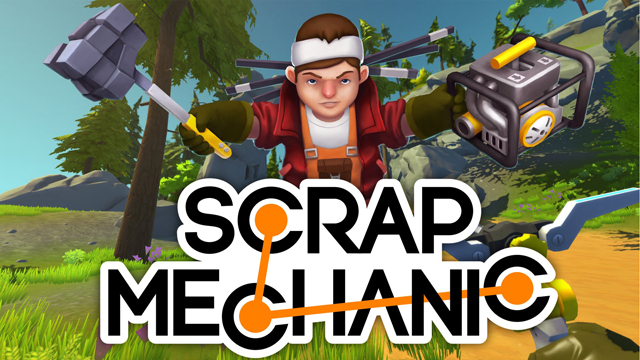
Scrap Mechanic is both a game and a creative platform for all those who enjoy designing and engineering. It offers such a wide variety of tools that you might find yourself a bit confused in the beginning, although there is a very handy in-game guide book that helps a lot. This guide, on the other hand, should make things even faster for you, so you can immediately start creating new and crazy mechanisms.
For now, Scrap Mechanic offers Creative mode only, but the developers promise to deliver Survival mode in the near future, so keep your eyes open.
The game uses many familiar mechanics from games like Minecraft and Hurtworld, but turns them into something of its own. So, if you are familiar with those games, it will be quite easy for you to get into Scrap Mechanic.
Inventory is your magic toolbox
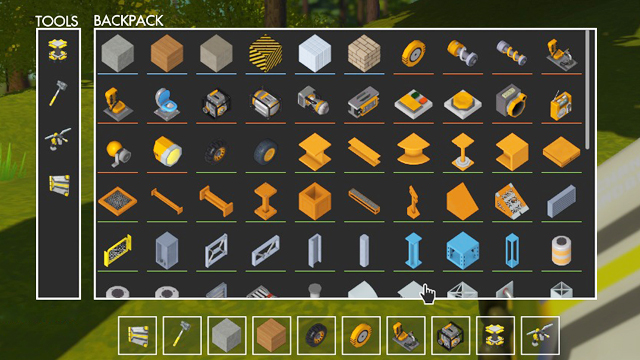
In the very beginning, you will be asked to create a map. After you create one, you can invite friends to join you or just play alone – it’s your choice.
You start your journey amidst the wilderness, and with a whole set of useful tools in your backpack. You can activate the inventory menu by pressing an “I” button. There you will see various parts, blocks, and tools that you can use for building all kinds of structures – both movable and immovable.
How to use parts and tools from your inventory:
- You need to drag parts and blocks from the backpack into the hotbar below.
- Use your left mouse button for creating and right mouse button for deleting certain blocks.
- If you’re using parts, you can rotate them in different directions by holding the “Q” button.
The most fun parts in Scrap Mechanic are called interactive parts, such as bearings, gas and electric engines, controllers, etc. You can find them all in your inventory as well, but they do need a bit more knowledge than the usual sets of tools.
You can also use the connect tool, if you wish to connect two or more parts, for example, like an engine with a bearing. For more combinations of parts, you can always check the in-game handbook available to you at any time in the game.
How to build a vehicle in Scrap Mechanic
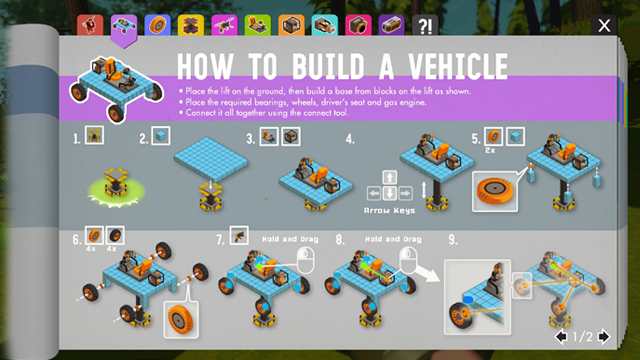
You can freely roam the world of Scrap Mechanic on your feet, but walking isn’t as fun as riding. So, why don’t you start by building a vehicle of your own?
The lift and the chassis
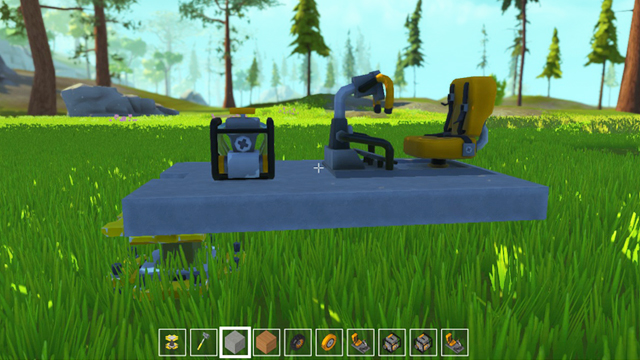
- First, you need to get acquainted with the Lift – one of your four main tools. You can set up the lift at any point on the ground and control its movements by pressing the up and down arrow keys.
- Then, you need to set up a platform, which will serve as the chassis for your car. It can be made of any types of blocks, but it should be big enough to accommodate a driver’s seat and an engine.
- Usually, you want to use gas engines for your vehicles and electric engines for your automated mechanisms.
The bearings and the wheels
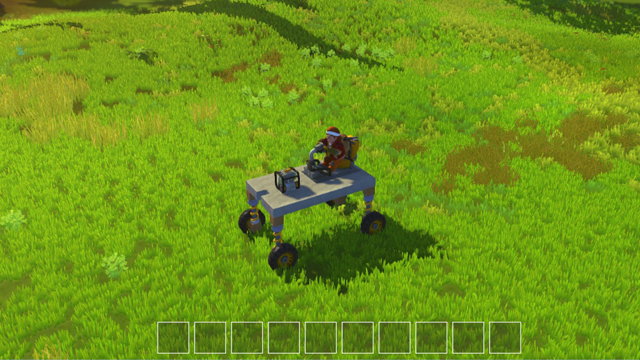
- Now you need to attach two bearings on the front corners of the bottom of the chassis.
- Attach one wooden block to each of the bearings, and then attach one suspension part to each block.
- Bearings on the front wheels are needed for steering, but your rear wheels don’t need it, so just put two blocks and two suspension parts without bearings on the rear side of the chassis.
- After that attach one block to each of the four suspension parts and attach another bearing to each of these four blocks.
- Now you can add wheels to the bearings on the outside.
The Connect tool
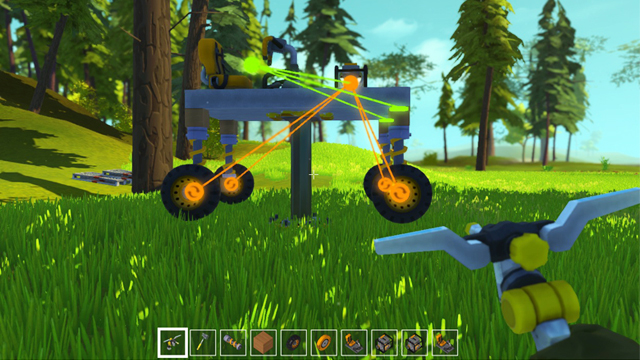
- To finish things off, you need the Connect tool. Connect two front bearings with your driver’s seat and connect the seat to the engine.
- Then, connect each of the four bearings on the wheels to your engine as well.
- Also, make sure that your bearings rotate in the same direction, otherwise, your car will not be able to move. You can change the rotation of the bearings by pressing the right mouse button while holding the connect tool.
How to build a base in Scrap Mechanic
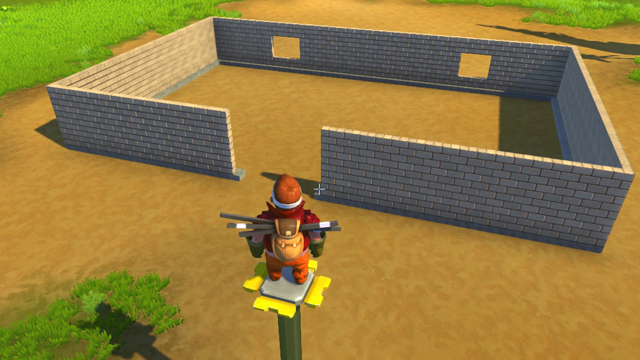
You can use your new car for traveling further and locating some nice spot for your shelter. It’s important to learn how to build your own base now, so later when the survival mode arrives you will know exactly what to do.
Foundation and walls
- Find a piece of flat land and start setting up the foundation by using concrete blocks. Then, equip some bricks and build up your walls.
- You can make holes in the walls for windows by selecting an area of the wall and pressing the right mouse button.
Automated gate
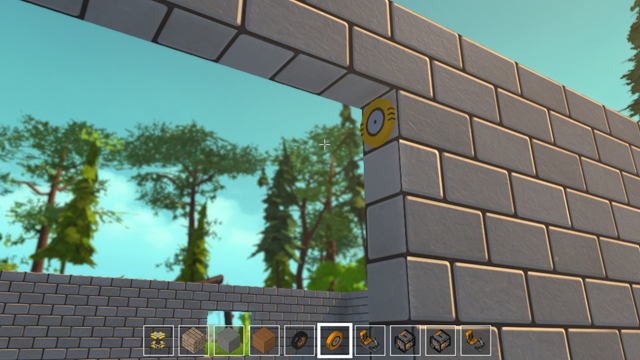
- Leave some space for the entrance gate. Attach a bearing to the upper part of the wall and set up the controller wherever you like.
- Now, choose the switch from your inventory and use the connect tool to bind the bearing with the controller and the controller with the switch.
- Activate the controller by pressing the “E” button. You will see a simple menu where you need to assign the rotation of the bearing.
- After all that, you can choose either wooden or metallic blocks and fill up the doorway space with them.
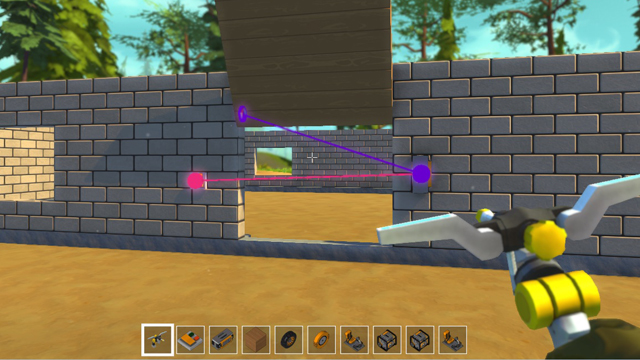
In this way, you can use the switch to open your gate, but don’t forget to install another switch inside the base, so you could do the same from the inside and not trap yourself there.
Conclusion
In these few simple steps, you will be able to build your first vehicle and base in Scrap Mechanic. These are very basic examples of what’s possible. The more you play and try things out, the more possibilities you will uncover in the process.
Share your crazy inventions from Scrap Mechanic in the comments section below!



Published: Mar 4, 2016 05:42 am