Get ready to develop some serious callouses on your feet in The Sinking City as your troubled detective searches for answers to a mysterious bout of madness plaguing Massachusetts.
Not only are there no quest markers with a big blip on the map telling you where to go to solve any given case, there aren’t even house numbers, so you have to find your own way in this game based on landmarks and street signs.
If you don’t want to spend hours re-treading the same sections, you’ll need to find the fast travel phone booths positioned in each district.
After leaving the port and starting the open world portion of the game, I strongly recommend traversing the city to unlock fast travel phone booths and visit the various archive locations around Oakmont before going to the Expedition Headquarters for the main quest.
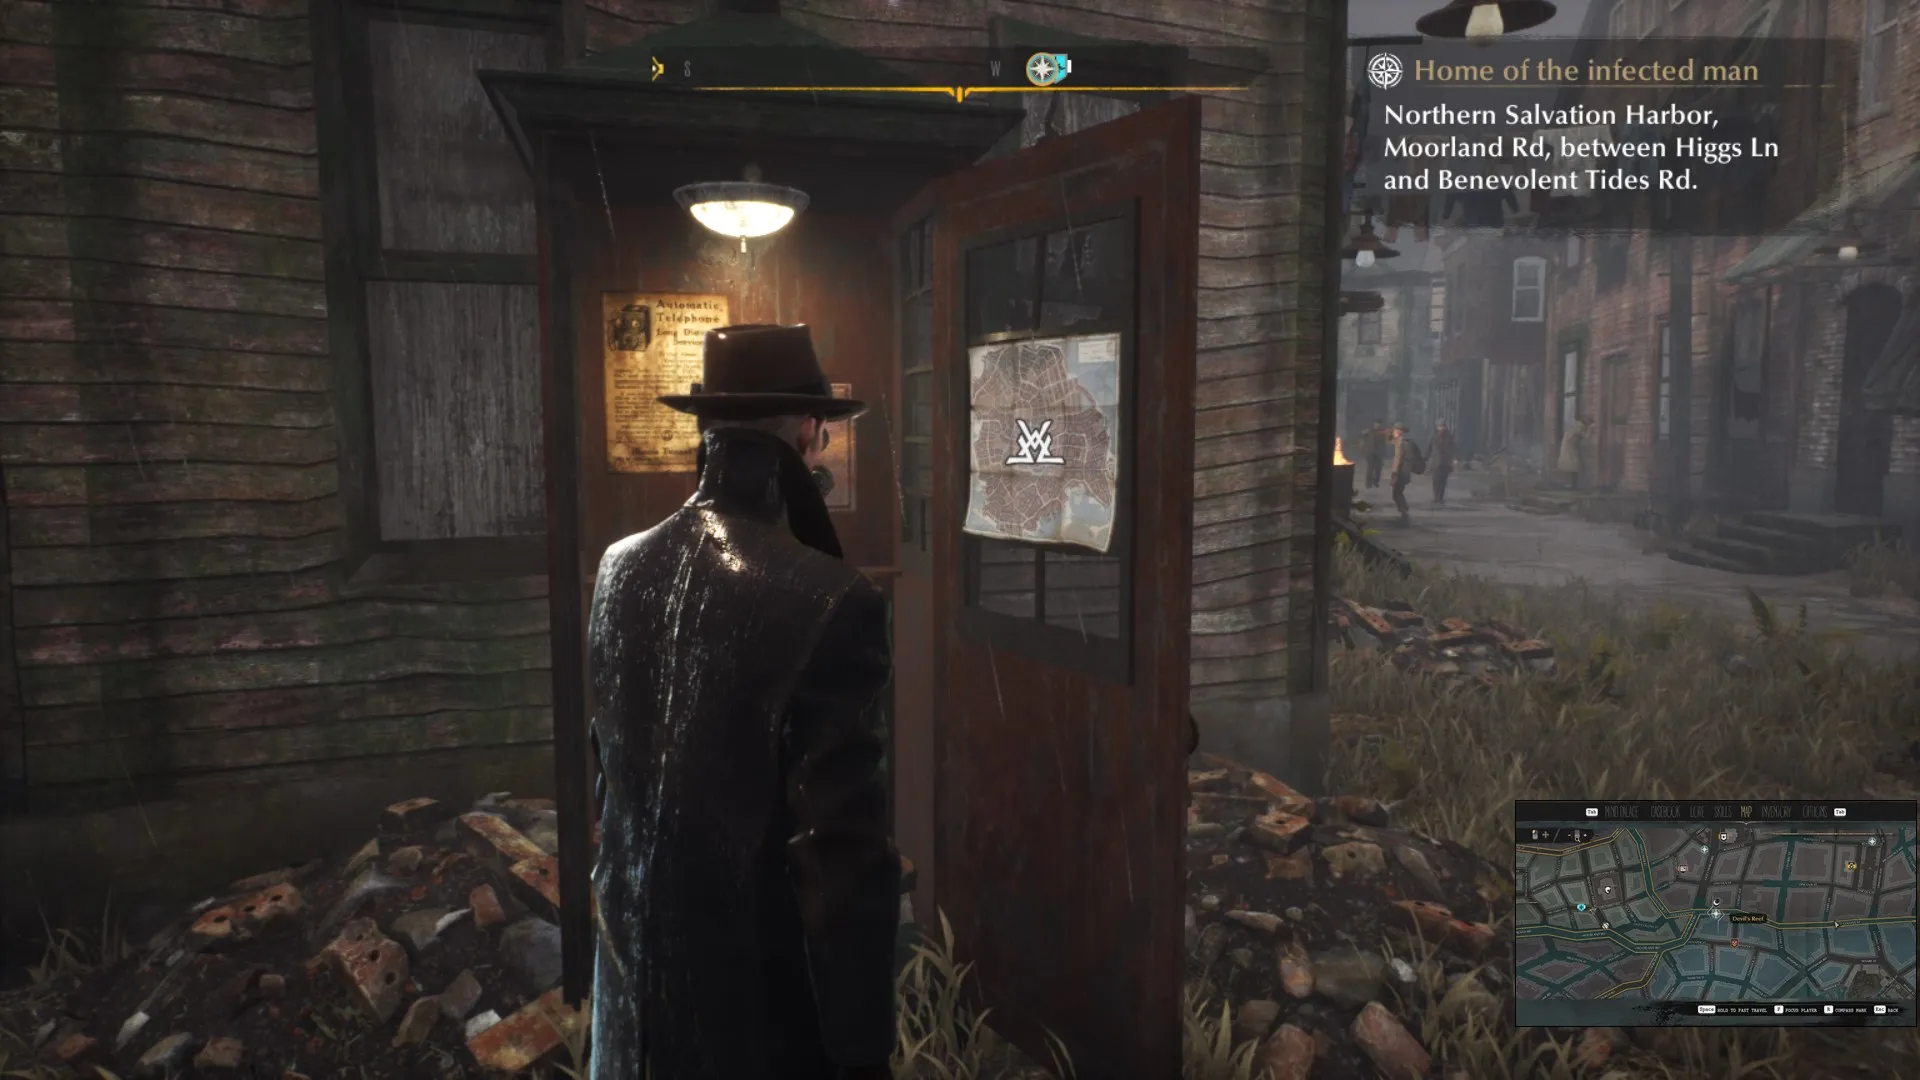 Phone booths are how you get around quickly
To put it mildly, Oakmont is big, confusing, and unforgiving to outsiders.
If you familiarize yourself with the layout, have several phone booths open to utilize for quick movement, and figure out which buildings let you research what type of quest info, you won’t be nearly as frustrated when trying to complete various quests later.
As a bonus, you get experience for finding new locations, so you can head into the side and main quests with a few extra skill points for holding extra crafting resources and staying sane longer.
Let’s dive into all the fast travel locations in The Sinking City!
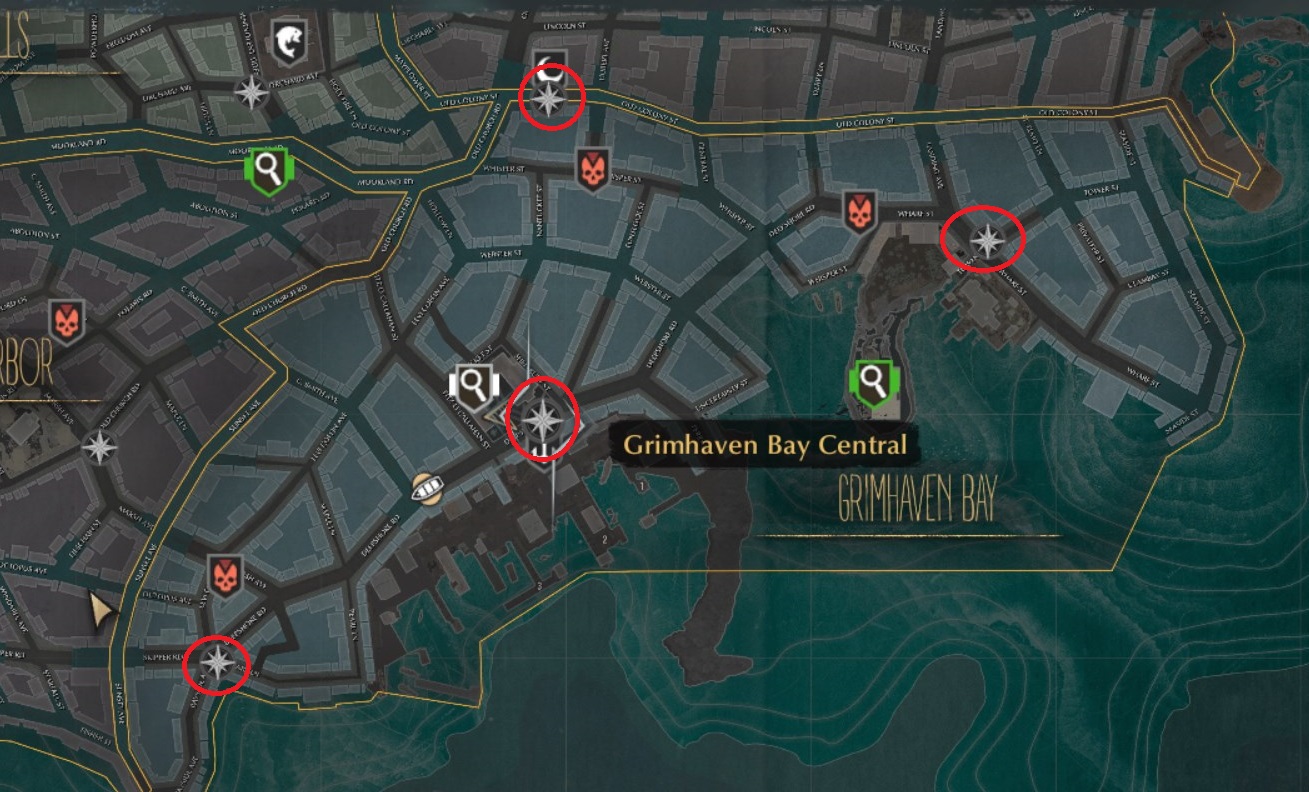
Grimhaven Bay Fast Travel Locations
- Grimhaven Bay Central: The middle of Deepshore Road, just north of the Oakmont City Port map point and south of Bounty Of The Sea side quest NPC.
- Grimhaven Bay East: On the corner of Tower Street and Wharf Street east of the infested area and northeast of the peninsula featuring Blackwood Manor.
- Grimhaven Bay South: Near the far south edge of the map, this one is at the intersection of Bayside Avenue, Pearl Lane, and Deepshore Road.
- Devil’s Reef: This one is actually on the border with Coverside and is found directly outside the entrance to the Devil’s Reef hotel on the tiny road that has flooded sections on both the east and west sides.
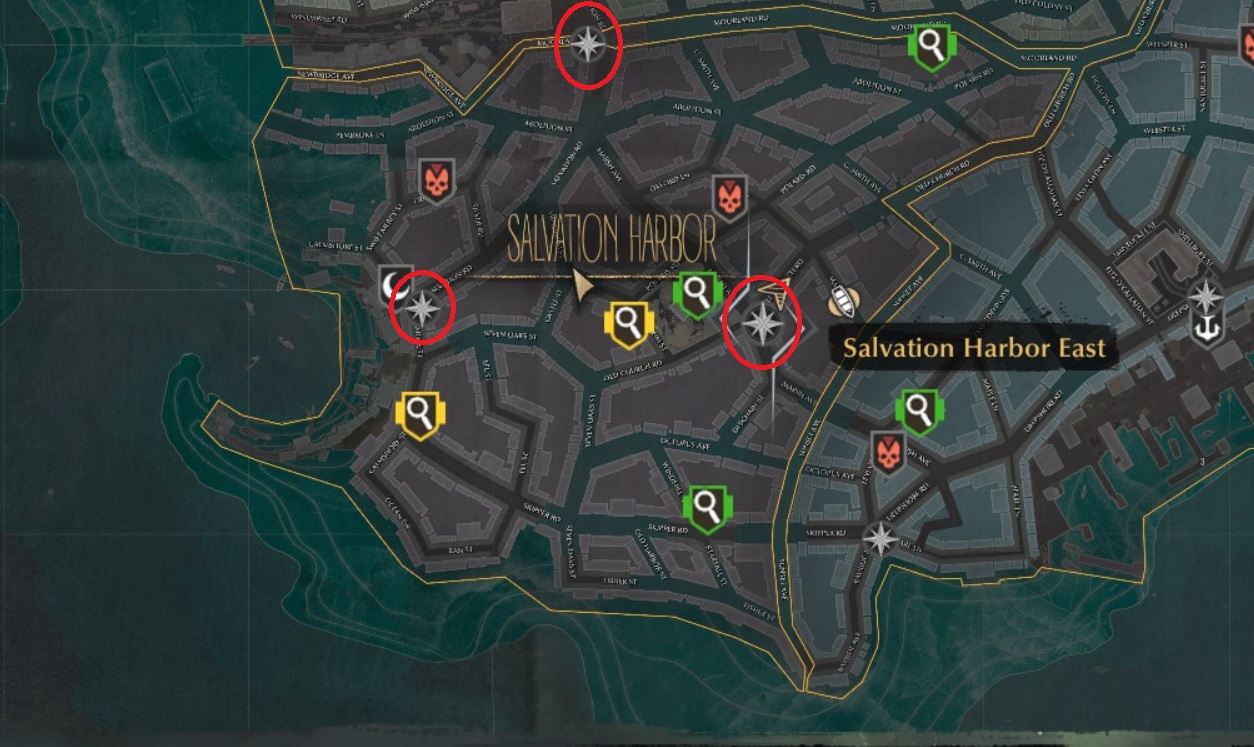
Salvation Harbor Fast Travel Locations
- Salvation Harbor East: At the intersection of Old Church Road and Marsh Ave about a block west of the border with Grimhaven Bay.s
- Salvation Harbor North: Although listed as being in Salvation Harbor, this is actually on the border with the Shells, found at the intersection of Moorland Road and Salvation Road (just west of the flooded part of Moorland Road).
- Salvation Harbor West: At the intersection of Calmshore Street and Salvation Road, east of the bay with the sunken ships and several blocks west of the Former Patient’s Shop.
Coverside Fast Travel Locations
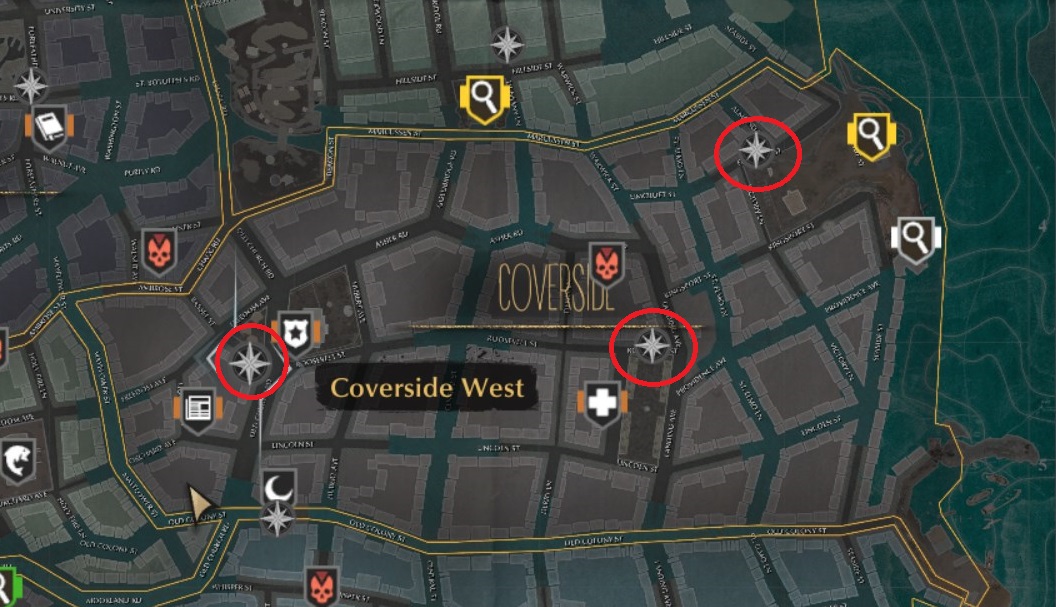
- Coverside West: At the intersection of Old Church Road, Roosevelt Street, and Basset Street just southwest of the Police Department and northeast of the Oakmont Chronicle.
- Coverside Central: On the corner of Roosevelt Street and Landing Avenue just slightly to the northeast of the Hospital of St. Mary.
- Coverside East: At the corner of Elmcroft Street and Almond Lane, just outside the large walled section leading to the Asylum.
The Shells Fast Travel Locations
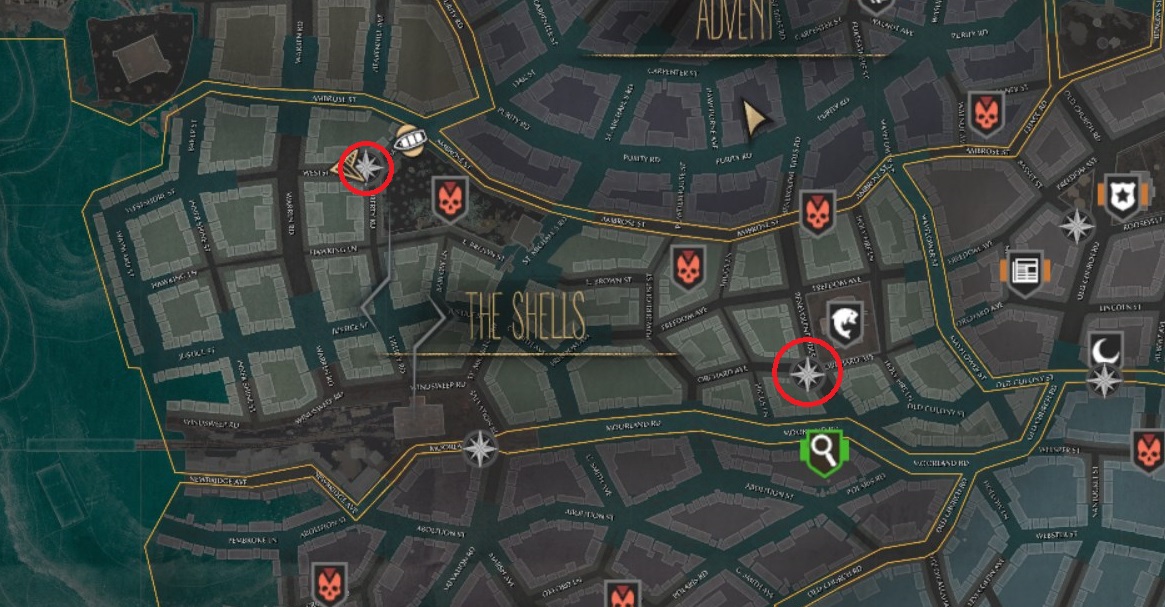
- The Shell East: Found at the intersection of Benevolent Tides Road and Orchard Ave on the southwest corner of the Fish Market and just north of the flooded Moorland Road border with Salvation Harbor.
- The Shells West: This one’s at the corner of the Westshore Street and Oak Street near the boat that leads to the flooded section of Ambrose Street.
Oldgrove Fast Travel Locations
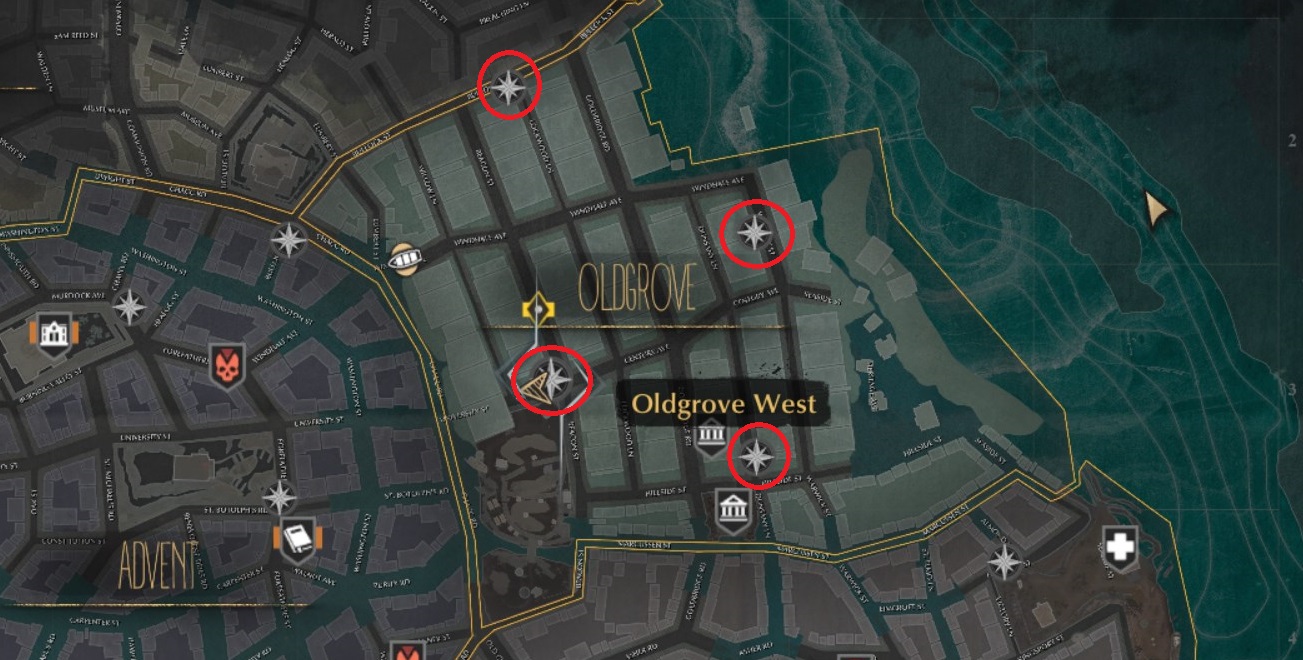
- Oldgrove South: Slightly north of the intersection between Dunsany Lane and Hillside Street about half a block north of Throgmorton Manor.
- Oldgrove East: At the center of the far north end of Warwick Street.
- Oldgrove West: Found at the corner of Century Ave and Beacon Street.
- Oldgrove North: On the district boundary with Reed Heights at the intersection of Bullock Street and Lockwood Lane.
Advent Fast Travel Locations
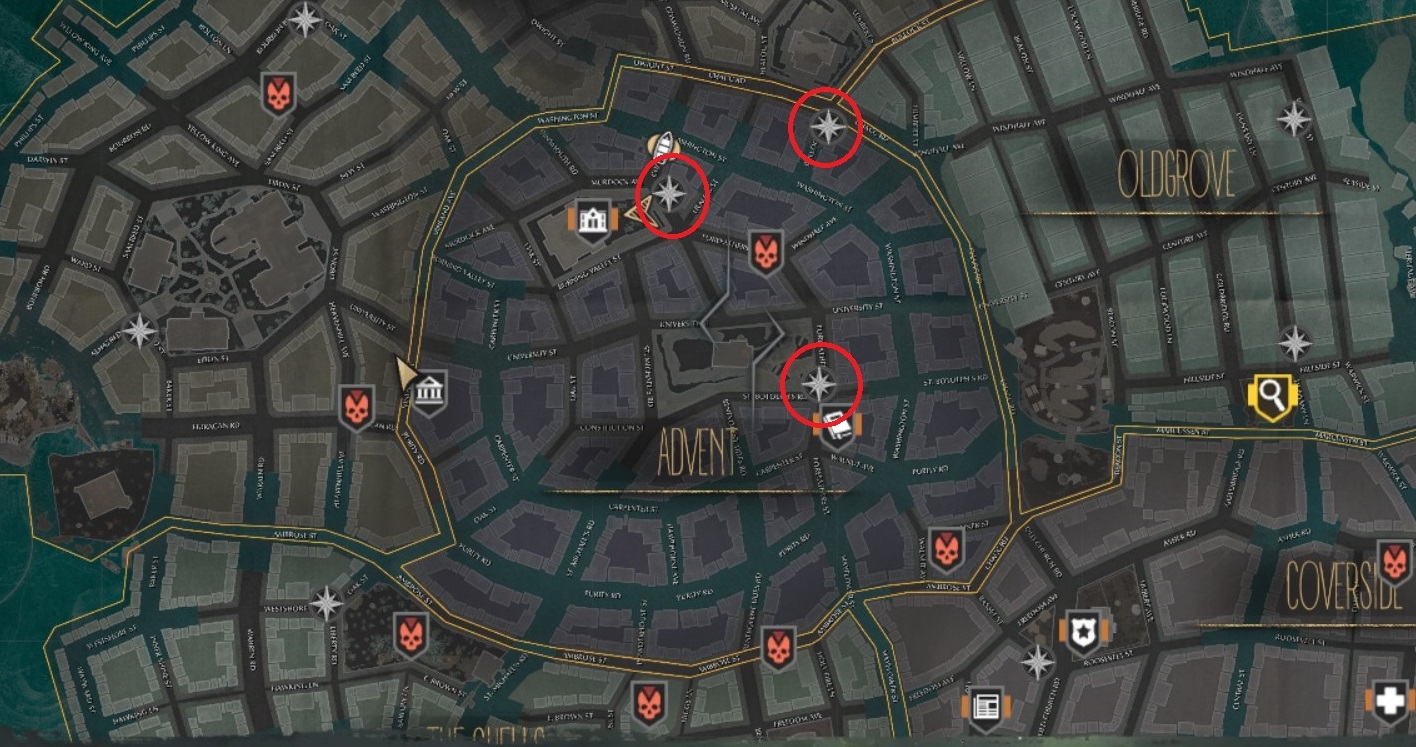
- Advent Central: Found at the corner of Forefather’s Street and St. Boltoph’s Road, just north of the Oakmont University Library.
- Advent West: Directly across the city from Oakmont City Hall between Healog Street and Chapel Street.
- Advent North: At the border with Reed Heights, this phone booth is on the corner of Bullock Street and Chacc Road.
Reed Heights Fast Travel Locations
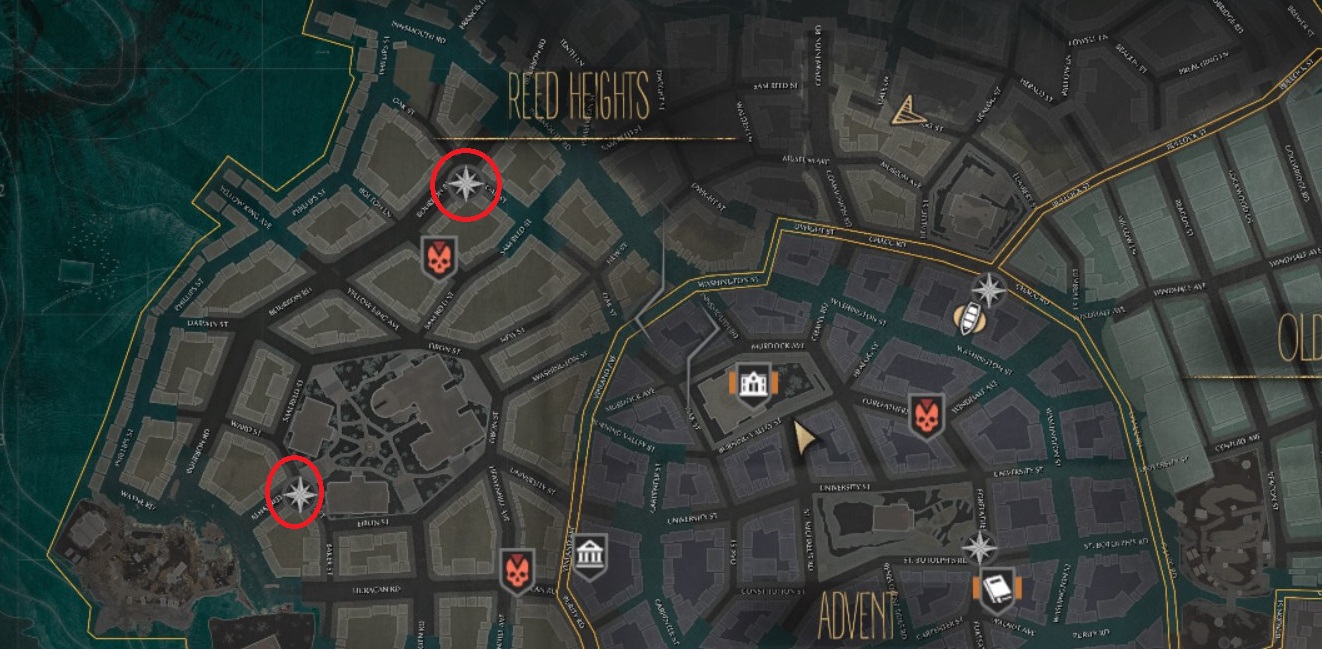
- Reed Heights South: Positioned at the intersection of Ward Street and Alhazred Street, at the southwest edge of the large collection of buildings and walkways clearly visible on the map.
- Reed Heights West: At the corner of Bourbon Road and Oak Street, just to the west of the flooded portion of Oak Street and east of the infested area.
Have you found any other fast travel points we missed in our trek across the sunken city of Oakmont? Let us know below and we’ll get them added, and be sure to pop off a comment if you need help finding any of the quest locations!



Published: Jun 6, 2019 04:14 pm