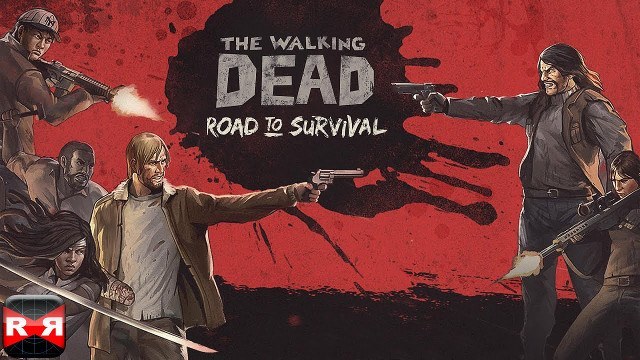
These days, it appears there is no shortage of mobile-based games for fans of The Walking Dead. A while back I posted a guide for The Walking Dead: No Man’s Land — a combination base management / ARPG based on the television show. This guide, on the other hand, will cover The Walking Dead: Road to Survival — a base management / turn-based combat game based on the comic books.
In this guide, we’ll cover the basics of town building and combat survival. As with No Man’s Land, you’ll need to pay close attention to both town building and in-combat survival. However, in this game, there is more emphasis on character collecting and leveling, and less on strategic combat.
This guide will be divided into two main sections: Town Management and Survival. Town management will cover everything you’ll need to know about managing your town, buildings, and supplies. (For details on character management see our character guide.) Survival will cover what you need to know to survive in combat, whether it be the story mode, raids, or other modes.
Town Management
Those of you familiar with The Walking Dead universe will recognize this place immediately. That’s right, you’re in Woodbury. The game actually starts a bit before The Governor takes control of the place and you’ll be responsible for building it.
Aside from being where you manage resources, the town is also your primary hub for all activities. It’s where you’ll check your mail, contact your friends and your faction (guild), manage your inventory, and more. To progress through the game’s story or be able to compete with other players in combat you will need to manage the town properly. This means generating resources and upgrading buildings.
Resources
There are four primary resources in Road to Survival. These include Food, Materials, Survivors, and Coins. All four are necessary to manage your town properly. While all four are obtainable as rewards for combat, your primary source of food and lumber will be from the town itself.
- Food – Required in conjunction with survivors to train and acquire new characters as well as leveling and upgrading existing characters, this resource is also used in the creation of combat items in the workshop. Food is acquired via combat rewards and farm plots in the town.
- Materials – Used to build and upgrade town buildings and structures, these are acquired via combat rewards and material posts.
- Survivors – Used to obtain new characters via the training ground. Five survivors are required for every new character obtained this way. (Note that some characters are obtained via special events or the game’s shop.)
- Coins – Used to train, level, and upgrade characters. Also used in building and upgrading town buildings. Can be used to speed up building and upgrades. Coins can be acquired as a combat reward. Or, if you’ve got cash to blow, it can be bought via the gold store.
- World Energy – Indicated by little gas can icons under your XP bar on the top left, and this is used to initiate activities on the map — story and Roadmap.
- Radios – These open up select areas of the Roadmap for a limited time.
Inventory
While not part of the primary town resources, your inventory can be accessed from the game’s menu and is where you can keep track of weapons, gear and more. Check here for newly acquired weapons and to make sure you’res stocked up on items that can help you in battle. There are five inventory areas in total, which are:
- Weapons – All newly acquired weapons will appear here. You can equip, sell or buy new ones from this menu.
- Gear – Unlike weapons, gear can not be equipped. Instead, it’s used in the process of leveling and upgrading characters.
- Battle Items – These are items that will benefit you in battle.
- Ingredients – These are used in crafting battle items in the workshop.
- General – World Energy refills and radios are the only things you’ll find here, with a shiny button encouraging you to spend money on more.
Structures
Structures encompass all the buildings and plots you’ll need to construct and upgrade within town. Every town starts out with a Town Hall. All other buildings must be constructed using resources. Different structures become available and are upgradable under different circumstances, so you’ll need to keep track of where your buildings are at and what’s available in to build at a given time to keep things moving smoothly.
You’ll want to pay attention to the structures in your camp since you’ll have to keep them upgraded in order to create, level, and upgrade characters or upgrade craft battle items.
- Town Hall – The town’s main and only pre-existing structure, the Town Hall regulates what kind of structures can be built, how high they can be leveled, and how many of each can be had at a given time. Different structures will unlock as the Town Hall is leveled up, as will the ability to have more pre-existing structures and higher levels for them.
- Farm – Farms generate food needed to create and maintain the characters in your roster. The amount of food produced by a Farm will go up as you increase the Farm’s level. Each Farm will generate a max of 9,600 food per hour when completely leveled. Build these by tapping on empty plots.
- Material Post – Also built on open plots, Material Posts generate the materials needed to build and maintain town structures. Like the Farm, the amount of materials generated by the Material Post will increase as it is leveled up. Each Material Post will generate 12,900 materials at max level.
- Training Ground – The Training Ground is the third structure you will be able to build on empty plots. It’s used to transform survivors rescued during battle into characters for your roster. Characters with different types of specializations can be created here, such as Weapons, Medical or Strategic. New types become available to research and train as the Training Ground is leveled up.
- Workshop – It is here that you will craft items for use in battles, such as poison, tear gas, or items to replenish HP. Build Workshops by tapping on dilapidated houses. As you increase a Workshop’s level, new items will become available to research and craft.
- House – These provide places for survivors to stay until you transform them into usable characters. Housing space is limited but can be increased by either building more houses or upgrading existing ones. Build these by tapping on dilapidated houses.
- Food Storage – These are used to hold food. Similar to the House, space is limited but can be increased by either building more or upgrading existing ones. Food Storage is also built by tapping on dilapidated houses.
- Material Storage – Material Storage functions exactly like Food Storage — only it’s where you keep the materials necessary for building and repairing structures.
Research
As mentioned above when the Training Ground or Workshop is leveled up, new character types and items become available to create. However, before creating new characters or combat items, you must research them. Researching basically consists of spending some resources and waiting.
Researching new character types will cost you food while items will cost you materials.
Survival
The survival aspects of The Road to Survival take place in three main modes, The World, The Roadmap, and Raids.
- The World – The main storyline of the game, The World is broken up into chapters based on the story-line of the comic books. Each chapter takes place in a different area, the prison, the woods, a store, etc., and are broken up into six missions each. Completing each mission with at least one survivor still standing will earn you rewards such as materials, weapons, gear, and more.
- The Roadmap – The Roadmap contains a series of missions available for a limited time that provide special rewards when completed. This will often be higher level weapons and gear, bonus XP, or special characters. Some missions on the Roadmap require radios to unlock. You will either have to earn these as mission reward drops or buy them from the store.
- Raids – Raids are The Road to Survival‘s form of PvP. Access these via the Raids button on the left side of the screen. From here you can select who you would like to raid and initiate an attack. Winning a raid will earn you — and your Faction a variety of rewards. When other players attack you, you will receive a notification of the attack as well as whether you won or lost. At that time you will also be able to retaliate if you want. (Raids can be avoided if you’re willing to spend money on Ceasefire shields. These will block potential raids for a certain amount of time.)
Combat
Combat in The Road to Survival is turn-based, with each mission broken up into waves. There’s no movement required on your part. Instead, you will face enemies coming at you from each side of the screen — walkers or human. Walkers will slowly move toward you during each turn, while humans will just attack and return to their starting point. Because of this, walkers are typically easier to deal with. But there are some things you can do to help you survive each encounter.
Read the story text
The game will pretty much tell you if you’re going to be fighting walkers or people during each round via the story dialog. So, even if you might be the type to skip flavor text. Don’t.
Check your enemy traits and challenges
Prior to entering each mission, you’ll be given a chance to swap out members of your team. On this same screen, you’ll see information on what Traits your enemies will have and what additional challenges you’ll face.
Traits are explained in more detail in the character guide, but we’ll summarize here. There are four traits that characters and enemies can have. Each trait is stronger than one and weaker than another. These are in order: Tough > Alert > Strong > Fast > Tough. Keep in mind that not all walkers will have a trait but all humans do — including those you’ll meet when raiding other people’s towns.
When in combat, take your time and check each of your enemies for traits. Reserve the appropriate characters to attack them — unless they can’t reach them yet. I always attack enemies with traits first and those without I’ll go after with the rest of my team. Luckily, you won’t have to remember which trait does what while in battle because red arrow pointing up will appear next to characters with a competitive trait when you select an enemy.
Challenges are elements specific to the environment or the enemies in the mission that will make things harder on you. These include things like chokepoints, dividers, self-healing enemies and more.
- Area Damage – Enemies will damage multiple characters at once. In order to deal with this, keep items that will help restore HP quickly on hand… and keep a lot of it. You can make items to restore HP in the Workshop.
- Buff – Enemies will increase the power of themselves and their teammates. To combat this you can bring along stronger weapons like grenades — craftable in the Workshop. Also make sure to bring along characters with traits stronger than those listed on the mission details.
- Chokepoints – While these can hold enemies back and only let a few through at a time, their main purpose is to prevent attacks from melee characters. When an enemy is behind these the only way to attack them is either by shooting them or throwing a grenade or similar weapon at them. Keep your melee characters focused on the enemies that they can actually attack.
- Control – Enemies have various stuns and other attacks that can prevent you from attacking.
- Dividers – Dividers function like Chokepoints, only they split enemies into smaller groups instead of funneling them into the same area. Use the same tactics with dealing with dividers, only be aware that you will have enemies coming at you from more places.
- Focused Damage – This means you’ll be dealing with enemies that are effectively one-shot wonders when they get near a character with lower health. Take along higher level characters and a ton of HP restore items for these battles. Also, try to eliminate these stronger enemies before they actually reach your group.
- Healing – Enemies can heal themselves and teammates. You’ll want to do your best to eliminate these enemies quickly, before they have a chance to pop off any heals. When in doubt, use grenades.
- Large Mob – The power of the mob. They may not be powerful on their own, but you’re going to have to plow through a lot of enemies before you get to the end. Make sure you have enough healing and attack items to help you survive while clearing the mob as quickly as possible.
- Powerful Enemies – Basically, this just means you’ll be fighting enemies that are more powerful than average. Build your team out of higher level characters, make sure they have the highest level weapon you can equip and bring along plenty of healing and combat items.
Be aware of what skills your team has.
This is always the hardest part for me, because the information is not readily available on the screen. Rather it’s something you will need to note and keep track of on your own.
Adrenaline Rush
Most characters have a skill called Adrenaline Rush that will pop after they’ve taken or landed a certain amount of hits. Each character’s is different and you’re going to need to know what they are to use them at the right times.
Some characters have a healing AR while others have buffs or high powered attacks. Obviously firing off a healing AR doesn’t do you much good if everyone is healthy.
Leadership Skills
In addition to AR, some characters have leadership skills that will grant the team bonuses, buffs or abilities when those characters are made the leader of the group. These are quite useful as missions become more difficult.
Miscellaneous Tips
While most everything you need to know is contained in this guide, we do have a few additional tips that will make your life in the apocalypse a bit easier.
- Have a plan: When handling resources, keep in mind what you really need. If something doesn’t need upgraded right away, hold on to those resources for what does. Just because something can be upgraded or built doesn’t mean it needs to be.
- Choose wisely: The Road to Survival will offer story-based option dialog at the beginning and end of missions. In some cases it doesn’t amount to much and the game will push you back the other way. However, there are cases where the choice will determine whether or not someone joins or leaves your group. Weigh those options carefully.
- Remember that you can build more than one of everything: Aside from the Town Hall, you can build multiple versions of each building and structure. This is beneficial in several ways. First, it allows you to generate and store more materials even if you are unable to level up exiting structures right away. Second, it gives you the opportunity to craft multiple things at the same time.
- Be prepared for raids – Raids are a big aspect of the game and the developers encourage it. There are tournaments and challenges that offer big rewards to players who participate. This means your town WILL be invaded, and if you’re defeated you will lose resources. Make sure you’re leveling your characters properly so they can defend the place while you’re gone. Also, don’t be afraid to retaliate and get your revenge.
- Participate – The Walking Dead: Road to Survival has all kinds of events, dailies, and other things that you can participate in in order to earn rewards. These offer everything from materials and leveling bonuses to special characters. If you don’t participate, you miss out.
There you have it, the basics of surviving in The Walking Dead: Road to Survival. For information on characters, be sure to check out the RTS Character guide. And, if you’d like to check out that other The Walking Dead game, we have a guide for that as well.


Published: Jan 5, 2016 04:48 am