You land on an icy planet, but freezing to death is the least of your concerns in this mission. Indeed, deadly, seemingly impossible turrets lie in wait. Here’s how to complete the Distress Signal rumor in Warhammer 40K: Rogue Trader.
How to Complete Distress Signal in Warhammer 40,000: Rogue Trader
You can complete Distress Signal in Warhammer 40K: Rogue Trader by destroying all the automated turrets in the area. This particular point of interest is located in the Cradle of Khepri star system. There, you’ll find an unnamed ice world that happens to have this mini-dungeon, as well as +5 Promethium.
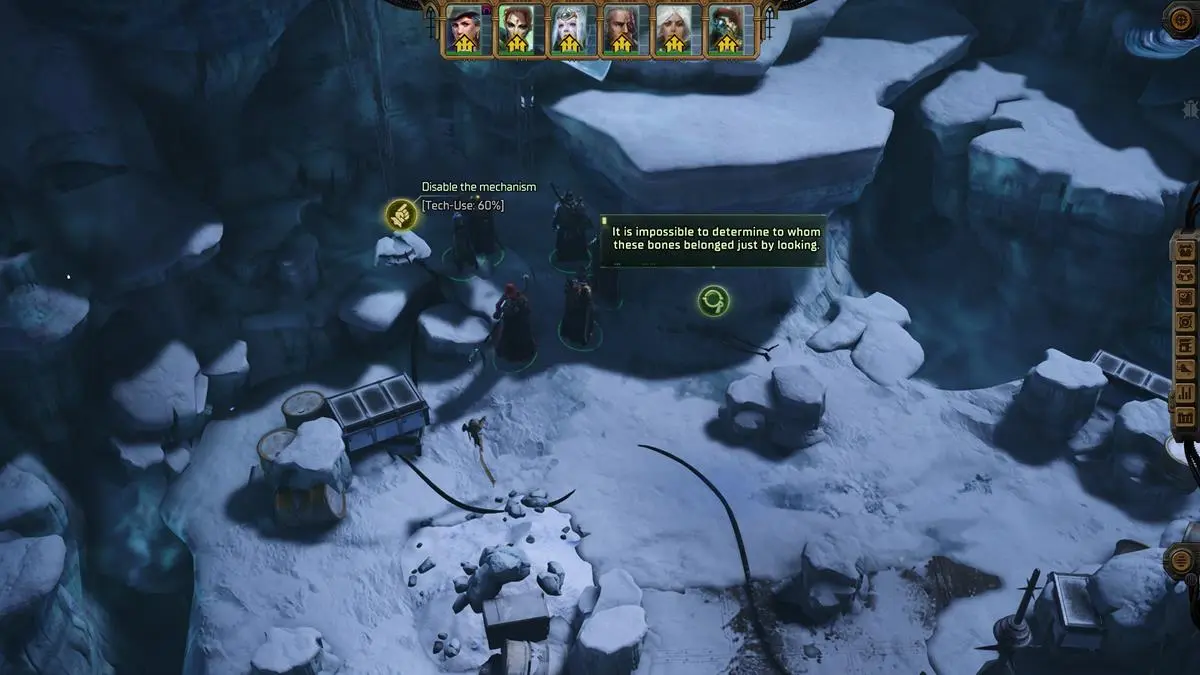
Once you reach the main area, you’ll notice a relay tower in the middle. I advise you not to interact with this just yet. That’s because this will cause half a dozen automated turrets to spawn. They’ll likely take out your characters, too, leading to an abrupt end for the Distress Signal side quest.
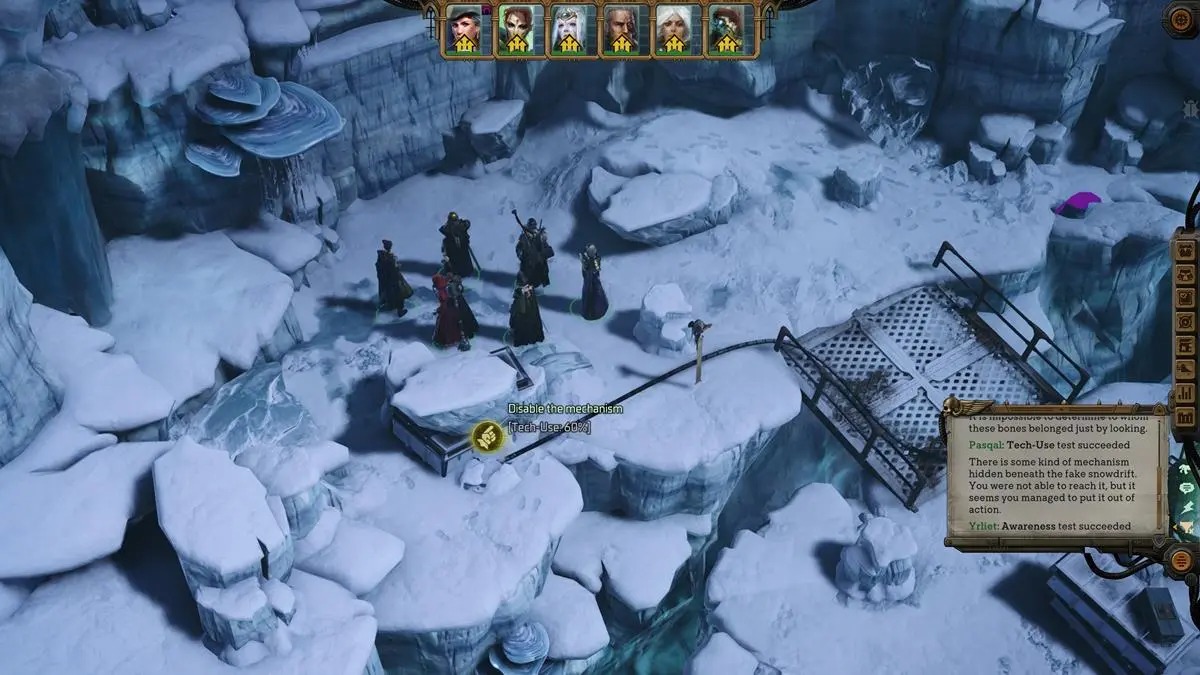
Check your surroundings to discover skill checks that require Lore (Xenos) and Tech-Use. In my playthrough, I had Yrliet handle Lore (Xenos) since she had the highest skill among all my companions. Pasqal, meanwhile, was the one disabling mechanisms via Tech-Use. Doing so also disabled up to three turrets in the surrounding area.
It’s also a good idea to keep a backup save before attempting any of the skill checks. There’s a chance that Pasqal’s Tech-Use activation might fail.
How to Complete the Turret Encounter
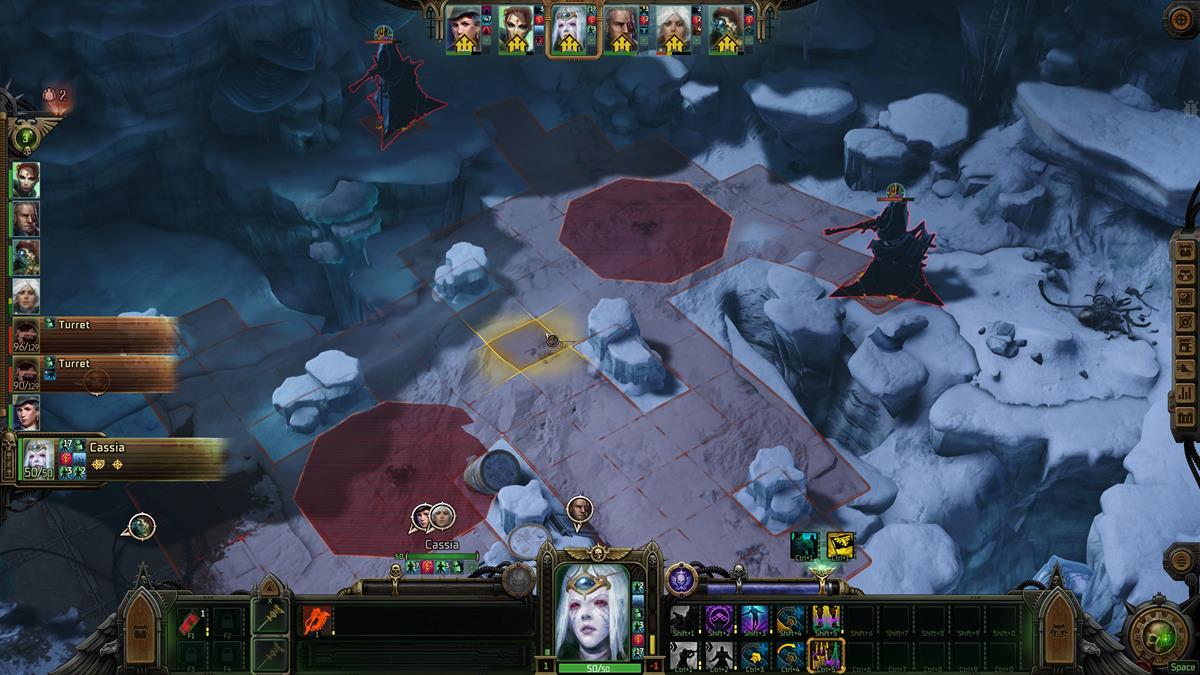
When you’re ready, interact with the relay tower to spawn any automated turrets that you couldn’t disable earlier. They have long range and can hit you with devastating projectiles. In my case, I had Cassia use Point of Curiosity to bunch at least two of them together. I then had Yrliet and Sister Argenta shoot them down.
It’s possible that, like me, you may experience an issue with the relay towers here. In my case, the tower only had one interaction button, but after completing the encounter, there were options for Tech-Use and Demolitions, including an Iconoclast action. It was also possible to use the Iconoclast action to destroy the relay tower completely. I can’t say for certain if this was meant to avoid the whole fight entirely or if it was just a bug.
Following the encounter, you should be able to loot rewards such as:
- Fortress World Origin Heavy Xenomesh (heavy armor): Can be equipped by Fortress World origin characters; +60% armor, +4 deflection, and 0.5 dodge penalty; +2 deflection against non-human enemies; +5 wounds/HP.
- Shuriken Pistol (one-handed ranged weapon): Aeldari Proficiency and Drukhari Proficiency only; 6-10 damage and 15% armor penetration; 7 rate-of-fire, 6 range, and 18 max ammo.
That’s how to complete Distress Signal in Warhammer 40K: Rogue Trader. While you’re roaming around the galaxy, you might want to know how to tackle other rumors, such as the Drifting Voidship Puzzle and the Unending War Ancient Bunker. For other tips and tactics, you can check out our WH40K: RT guides hub.




Published: Dec 7, 2023 10:27 pm