The devs at Blizzard really like to test WoW players sometimes — especially with elaborate mysteries and puzzles that are supposed to take a while to solve. But it never goes like that, does it? Somehow, players always crack these puzzles open much faster than the developers probably intended.
This is definitely the case in a recent update to World of Warcraft. With the release of patch 7.3, Blizzard added a new horse-style mount called the Lucid Nightmare that was supposed to be difficult for players to acquire. But a dedicated team of super sleuths has already figured out how to get it.
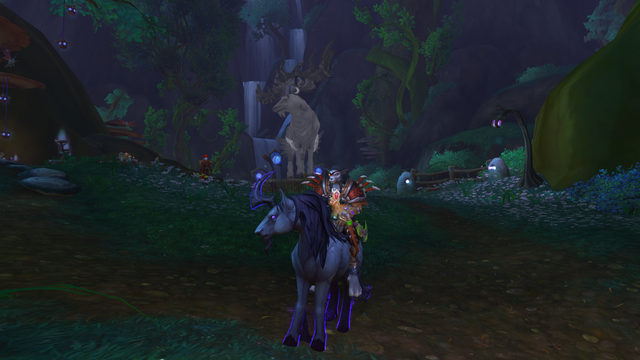
Want to get your hands on the Lucid Nightmare mount as well? You’re going to need a bit of perseverance to get it, since it’s neither easy nor quick to do. You’ll have to find clues and solve puzzles to unravel this mystery and get your mount. But follow this WoW guide, and you too will be twirling (yes, it twirls) around Dalaran sooner than you think!
Warning: You need to follow this guide exactly as it is written. The clues have to be read and followed in an exact order for this to work.
Acquiring the Lucid Nightmare Mount in WoW
Step 1: Solve the First Note’s Riddle
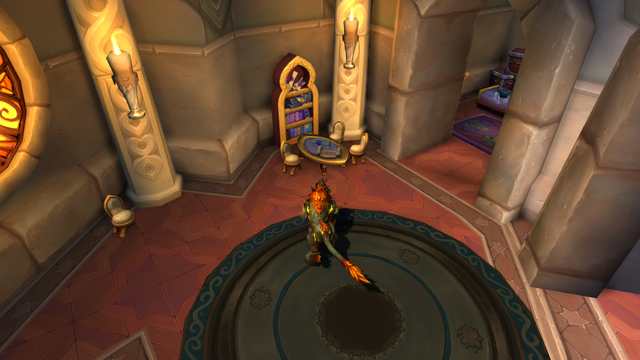
The first note is found at the top level of the Curiosities & Moore shop in Dalaran. As you can see from the image above, there is a scroll on one of the tables on the first floor. The scroll reads:
It begins in the 2104059.
With a most pleasing sign.
(These letters will not always rhyme.)
It really isn’t very straightforward, but 2104059 is an anagram for the release date of the Ulduar patch back when Wrath of the Lich King was released on April 15, 2009, aka 4/15/2009. So the first place you need to head to is the Ulduar raid, which is in Storm Peaks in Northrend.
Step 2: Travel to Ulduar
The easiest way to get to Storm Peaks, is to go to the bottom lot of portals in Dalaran and head for the portal to Wyrmrest Temple. The flight master at Wyrmrest will fly you straight to Ulduar if you have the flight path already, but you can also make your own way there if you don’t.
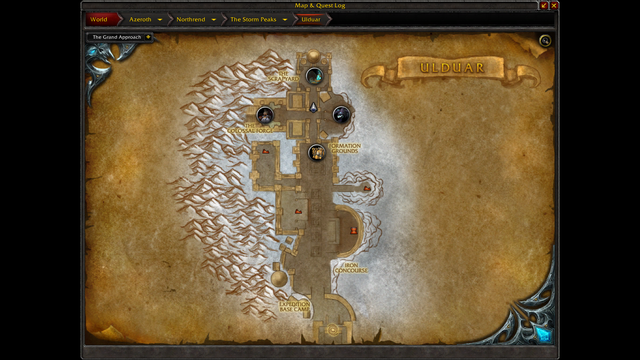
Step 3: Defeat XT-002 Deconstructor
Once you are in Ulduar, you need to get through to the 4th boss, XT-002 Deconstructor. I found that the easiest way to get there was to take a Salvaged Demolisher that can destroy all the towers and the Flame Leviathan boss. The vehicles take on an attack that’s relative to your attack power, so it doesn’t take any time at all to destroy anything. The only thing that takes time is actually getting there because the demolisher is so slow!
Once you have defeated XT-002, you need to head to the junk pile in the north-west corner of the room. There, on some rubbish, you will see a small rusty lever. Activate it.
Step 4: Solve the Light Puzzle
After you click the lever, a 20-by-20 grid of lights will appear on the floor of the room. Each of the lights can be turned on and off. To solve this puzzle, you need to turn the lights on in a particular arrangement. The green squares on this grid represent the lights that need to be switched on.
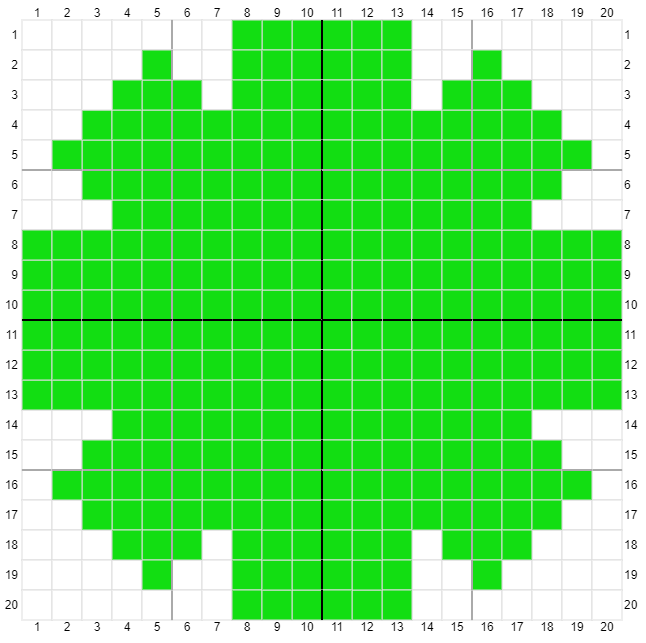 Image courtesy of Imgur
Step 5: Get the Next Scroll
After the pattern has been completed, a little red square of lights will show up with another scroll in the middle. It reads:
1000 years imprisoned.
Surely it wears on the mind.
This clue refers to the great C’Thun, the Old God of Madness and Chaos who took up residence in the Temple of Ahn’Qiraj, which is located in an original content area called Silithus.
Step 6: Travel to Ahn’Qiraj and Defeat the Twins
The quickest way to get where you need to go is, yet again, from the lower portal room in Dalaran and through the portal to the Caverns of Time in Tanaris.
Once you get to Ahn’Qiraj’s location, you want to take the raid entrance that is up at the top of the steps. This takes you into the Temple raid rather than the Ruins raid.
The Temple of Ahn’Qiraj is just in a big circle, so just follow it around. You don’t have to kill all the bosses but you WILL have to kill the Twin Emperors because that unlocks a door you need to get through.
Step 7: Play the Mini-Game
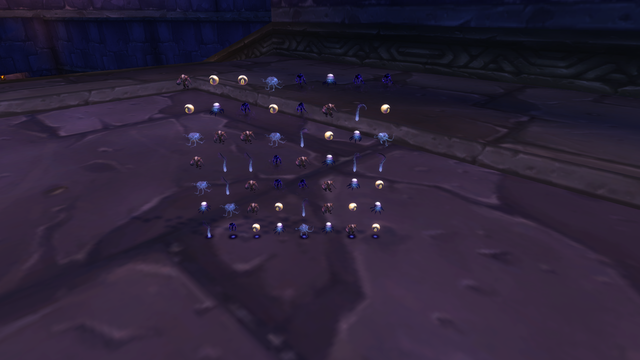
When you get to where C’Thun is, you can bypass him and go immediately to the little steps that are just past his room. At the top, you will find an altar with a Mind Larva on it. Activate the larva and you will have to play a little mini-game akin to Candy Crush.
Step 8: Get the Third Scroll
Keep playing this little gameuntil a scroll appears on the altar. The scroll reads:
Deeper than deep.
Awaits your seat.
You might think that this clue is referring to someplace deep underwater, but you’d be wrong. It is actually referring to a place in Deepholm, the underground area from the Cataclysm expansion.
Step 9: Travel to Deepholm and Explore the Fissure
The easiest way to get to Deepholm is to go to Stormwind or Orgrimmar and use the portal. Before you do though, you should take a Shadoweave Mask with you. This can be found on the auction house or made by a tailor using mageweave and shadow silk.
Once you have your mask and you’ve made it into Deepholm, head to the cave area below Therazane’s Throne. Do you remember where that big rock worm just goes round and round in circles? Yeah, there. It’s called the Crumbling Depths. Enter the cave and work your way around to the back of the cave system. There, next to a big rock formation, you will see a fissure on one of the rocks.
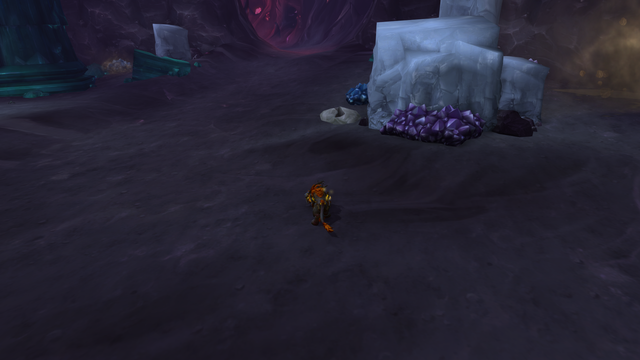
Upon clicking on the fissure, a warning will appear saying “WARNING: You are about to fall into a dark fissure. You may not be able to climb back out again. Are you very sure you want to do this?” Accept this and jump down.
Step 10: Get the Next Clue
In the cave below, you will see a small chair at the far end of the cave. On the back of the chair there is a little plaque that shows your next clue:
Supremacy?
Get…
Shirk…
…eke…”
Detectives have deduced that this is an anagram for “Racksum Greep is the key”. Racksum Greep is a goblin NPC that lives in Ratchet.
Step 11: Visit Racksum Greep for Your Next Clue
When you get to Rachet and make contact with Racksum Greep, you’ll see that he is wearing a Shadoweave Mask — but you that’s not why you’re here. Equip the mask that you have already acquired and a skull will appear on the chair. Interacting with the skull will reveal the next clue which is:
Where the shaded delegate may appear.
This is a reference to the Dark Iron Ambassador — a rare boss boss that spawns in the Gnomergan instance. So guess where you’re headed next?
Step 12: Go to the Gnomergan Instance
Once you’ve made it to the Gnomergan instance, you need to head towards a part of it called the Engineering Labs. This map shows you the way:
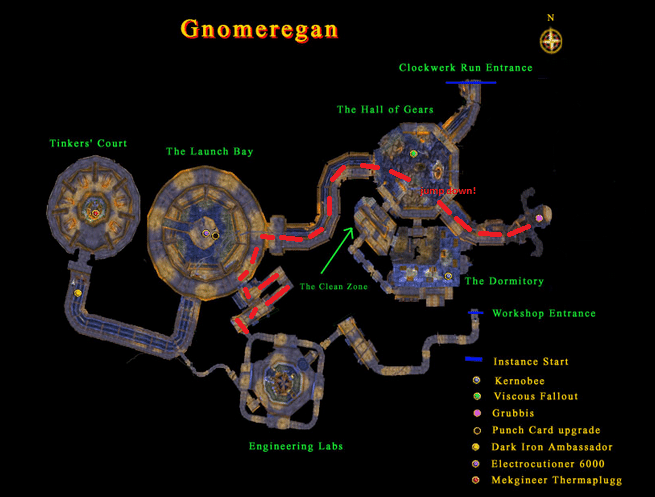 Image was found on imgur
When you reach the area shown on the image above, you will be faced with 10 levers. Now you have to arrange the levers in a specific way to get your next clue.
Step 13: Solve the Lever Puzzle for the Next Clue
Each lever in this group can be moved up or down. You need to work through all the levers so that they are set in the following sequence: 1222176597.
Once that is done, the next clue will appear.
Games and toys are left behind.
When you awaken screaming.
This has been interpreted to mean Val’Sharah, one of the new Legion areas.
Step 14: Go to Val’Sharah
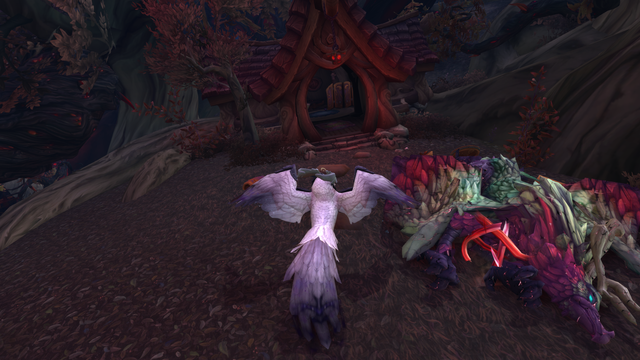
The location you need to go to is a little bit north of the Starsong Refuge flight path in a what looks like a cave. It isn’t the cave that’s shown on the minimap but a house on the ledge above it.
In the building, you will find a red Nightmare Tumor. Clicking on this will display the next puzzle.
Step 15: Solve the Line Puzzle for the Next Clue
This puzzle is a bit tricky, and will take a lot of trial and error to get right. But what you need to do is untangle a lot of lines. Anytime a line crosses another, they turn red. Untangling them turns them blue. There is no set way of doing it, as the puzzle changes. So you’ll need to find your own solution.
But no matter what arrangement your particular lines are in, you want things to start looking like the image below:
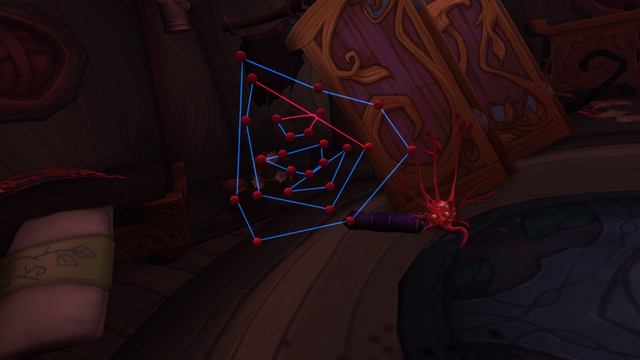
Completing the puzzle will reveal the next clue scroll:
What you seek is buried within.
This means that your next destination is the Tomb of Secrets.
Step 16: Go to the Tomb of Secrets and Eat the Sorcerer’s Ashes
Travel to Kun-Lai Summit to reach the Tomb of Secrets, a mogu tomb north of the One Keg flightpath. There is a portal to the Vale of Eternal Blossom in Dalaran, and you can fly to Kun-Lai from there.
Inside the tomb, you will see a statue with an urn at the base of it. Click on the urn to activate the next (and the most time-consuming) part of this hunt. The game will warn you that “you are about to consume the ashes of an evil sorcerer. There is no way to tell what will happen. Are you VERY sure you want to do this?” Of course you want to do this! Accept the warning!
Step 17: Solve the Endless Halls Puzzle
You will be teleported to an instanced area called the “Endless Halls”. The aim of this puzzle is to find matching colored orbs and runes by going through the rooms — but the only problem is that every room is exactly the same, with four doorways. Sometimes the doorways are blocked by rubble.
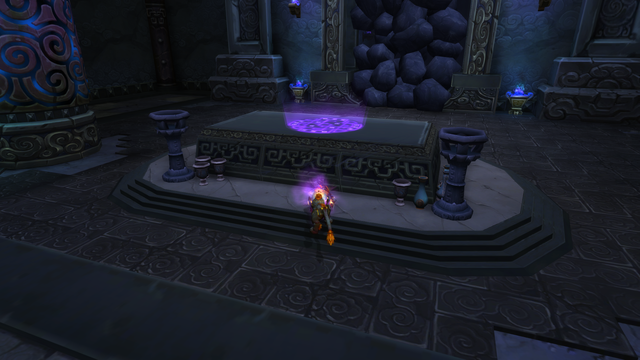
Every maze is different, so there is no specific route that we can recommend to you. The only way you are going to manage this is if you either draw a map of your own, or download a very handy add-on called Lucid Nightmare Helper.
This part of the journey is very long and extremely frustrating. In my own experience, it took well over an hour to complete. But if you want a little bit of extra help getting it down, a player known as Frogge has written this in-depth explanation of the Endless Halls.
Step 18: Get the Final Clue
Once you finally solve the puzzle and get to the next room, the final clue will be revealed:
The way is now open.
To the greatest secret never told.
A fitting end to your journey.
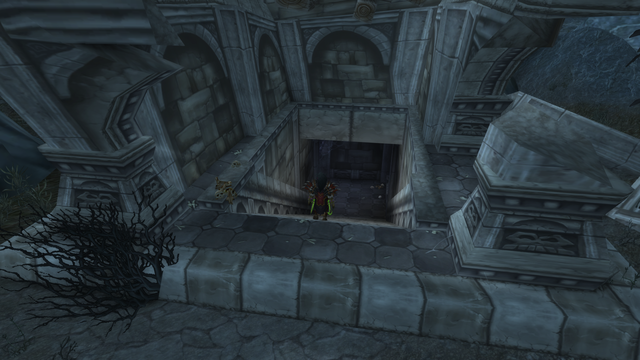
This bit is going to be really straight forward. This clue indicates that you need to head toward Deadwind Pass and find a place called the Forgotten Crypt.
Step 19: Search the Forgotten Crypt for the Final Chest
The Forgotten Crypt was going to be used as part of the game, but the designers eventually decided not to use it and left it unfinished. The whole crypt is empty of mobs — there aren’t even critters running around.
You need to find a room called the Pit of Criminals. When you first get in the Crypt, look for some water to swim under and then you will easily find the right room. A chest containing the mount is at the top of a pile of bones.
Congratulations! You now have the Lucid Nightmare mount! Now go and show it off somewhere!
—
We hope that this guide has helped you get your own mount. If you need some help with other aspects of the game, check out the rest of our WoW guides for more tips, tricks, and solutions:
- WoW 7.3 Patch Guide: How to Defeat the Legendary Battle Pets and Get the Felclaw Marsuul Pet
- How to Complete the Crystal Eyes Quest in World of Warcraft
- How to Fix WoW Legion App Not Connecting After Patch 7.2
- How to Obtain the Sun Darter Hatchling in WoW Legion



Published: Sep 6, 2017 12:27 pm