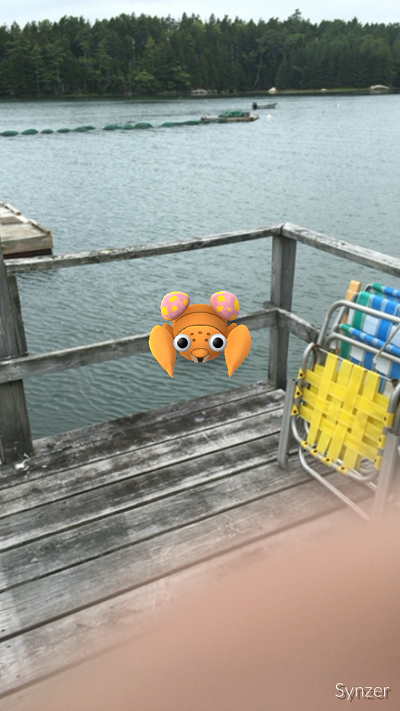
If you haven’t figured it out from the internet going crazy, Pokemon GO is officially out. It is a mobile app for Android and iOS, similar to Ingress, that allows you to walk around the real world and catch Pokemon. This has been the dream of every Pokemon fan since the beginning, and now it is becoming a reality.
Pokemon GO does not explain much, so there are many things you will not know understand until you figure it out yourself. This guide is for anyone that wants to understand everything currently in the app, and even those that have a basic understanding.
NOTE: At the time of writing, the servers are unstable or not working, so there will be additions, fixes, and clarifications when I can log back in. (If you’d like to try and work around it so that you can still play Pokemon GO when servers are down, we’ve got you covered.)
This guide will go over everything you need to get started in Pokemon GO including:
- Getting Started – What you need to know when you open the app for the first time.
- Trainer Profile – What is it and how you can improve it.
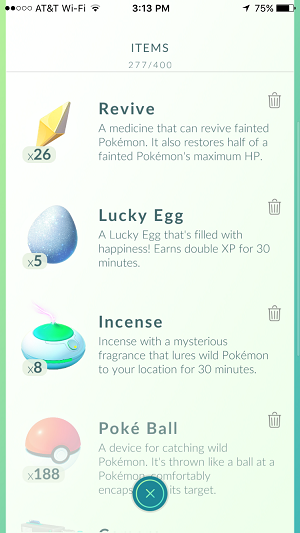
- Items – The different types of items you can find, or buy, and what they do.
- Map – What to look for on the GPS map.
- PokeStop Info – What they are and the things you can get from them.
- Gyms – When you can use them and what they are for.
Getting Started
Before you can start playing Pokemon GO, you must allow access to your location, since it needs to know where you are at all times, and make an account.
- You can use a Google account, or Pokemon Trainer Club account.
- Be sure it is one you can always access, because everything will be saved to that account.
- Once your account is created, you will create your character and select a username.
After all of that is out of the way, you will start a “tutorial” where you basically choose a starter. You can choose between Charmander, Squirtle, and Bulbasaur.
- Tap the Pokemon you want, then it will start the capture screen.
- You can choose AR mode to show the real life background, or leave it off to show a generic background.
Catching Pokemon
- When you are in the capture screen, tap and hold the Poke Ball.
- A circle will appear around the Pokemon, with a pulsating green circle on the inside.

- Flick the Poke Ball towards the Pokemon to try to catch it.
- You have a higher the chance when the green circle is largest.
- Pokemon have CP, or Combat Points, which determine the strength of the Pokemon.
- The same Pokemon can have higher CP, so keep that in mind when catching.
- Pokemon will have 2 moves (attacks), which are randomly chosen when you catch the Pokemon
Improving Pokemon
When you catch a Pokemon you get Stardust and Candy.
- Stardust is the same for everyone and is used when powering up a Pokemon.
- Candy is specific to each Pokemon’s evolutionary chain and is used with Stardust to power up your Pokemon, and by itself to evolve it.
- For example, Pidgey needs a certain number of candies to evolve into Pidgeotto, and that needs a certain amount to evolve into Pidgeot.
- You can catch either Pidgey or Pidgeotto to collect candies. Any of these candies can be used to evolve Pidgey or Pidgeotto.
Once you get enough candies for certain Pokemon, they can evolve. This increases their CP and sometimes which 2 moves they have access to.
Trainer Profile
Your trainer profile levels as you catch Pokemon, visit PokeStops, and more. When you level, you will get Poke Balls, Poke Coins, and other helpful items.
Also, you will be able to capture better/higher CP Pokemon as your trainer level increases.
Items
There are several items that can help you during your journey to catch ’em all.
- Poke Balls – These are used to catch Pokemon. You can get them in many ways and there are high quality ones that increase your chance to capture.
- Incense – Used to lure wild Pokemon to your location for 30 minutes.
- Lure Module – Used to lure wild Pokemon to a PokeStop for 30 minutes.
- Lucky Egg – Doubles your experience for 30 minutes.
- Potions – Heal your Pokemon when damaged from Gym battles. There are higher quality ones that heal more HP.
- Revive – Revives a fainted Pokemon.
- Egg Incubator – Place Pokemon eggs in these to start to hatching process.
- Razz Berry – Increases your chance to catch the Pokemon on your next throw.

Shop
You can spend Pokecoins to buy these helpful items and more, such as item and Pokemon storage upgrades.
You can also spend real money to get Pokecoins. The prices range from $1 -$100 in set packages.
Map
When you are not in a menu or trying to catch a Pokemon, you’ll see your avatar on the map. It is a real-time map that will show your location in the real world and uses GPS to constantly update your location.
As you walk around, you will notice PokeStops, Gyms, and Pokemon. You can also click the bottom-right of the screen to check which Pokemon are nearby.
PokeStop Info
Pokestops are landmarks, even small ones, that give multiple items.
- They will give you Poke Balls and a chance for eggs.
- Starting at level 5, you will also have a chance to get potions, revives, etc. for Gym battles.
- As you level up, more items become available, such as Razz Berries and Great Balls.
- They have unlimited uses, but you can only use it every 5 minutes.
Eggs
You can reach your eggs by going to your Pokemon from the menu, then swiping over to the Eggs tab.
- From the Eggs tab, select the Egg, then the incubator you want to use.
- You get 1 that has unlimited uses, but you can only hatch 1 egg at a time.
- You can buy others at the shop that have 3 uses each if you want to hatch multiple at the same time.
Gyms
You can access Gyms starting at Trainer Level 5. This is also when you can select a team to join.
There are 3 teams to choose from:
- Team Valor (Red)
- Team Mystic (Blue)
- Team Instinct (Yellow)
- You can place 1 Pokemon at the Gym if it is not already occupied by a rival
- The Pokemon you place at a gym cannot be powered up or evolved while there.
- You also can’t get it back until it is knocked out of the gym.
- If the Gym has a color, somebody else has a Pokemon set to that Gym.
- Each color corresponds the the team’s color listed above.
- If somebody of the same team is occupying the Gym, you can fight against it to train.
- You can also place 1 of your own Pokemon at the Gym if there is an open spot. More spots become available as the gym gains prestige.
- Training increases the Gym’s Prestige. When your Gym’s Prestige reaches 0, you lose control of the Gym.
- You gain experience from training and your Pokemon will not faint.
- If you fight a rival Gym, you will lower their Prestige
- If it reaches 0, you can take over the Gym for your team.
- If you lose all your HP at a rival Gym, you must use a Revive on that Pokemon before you may use it again.
- You can collect rewards every 21 hours for placing a Pokemon at a Gym
- You get 10 PokeCoins and 500 stardust for each Gym you occupy.
- You can only collect for a total of 10 Gyms at a time.
That’s all for my Pokemon GO Beginner Tips and Tricks. Again, There will be updates when the servers become more stable and I can log back in. If you’re having login issues or other bugs you need help troubleshooting, check out our fixes for common issues in Pokemon GO. And let me know if you have any questions or anything to add!


Published: Jul 7, 2016 01:32 pm